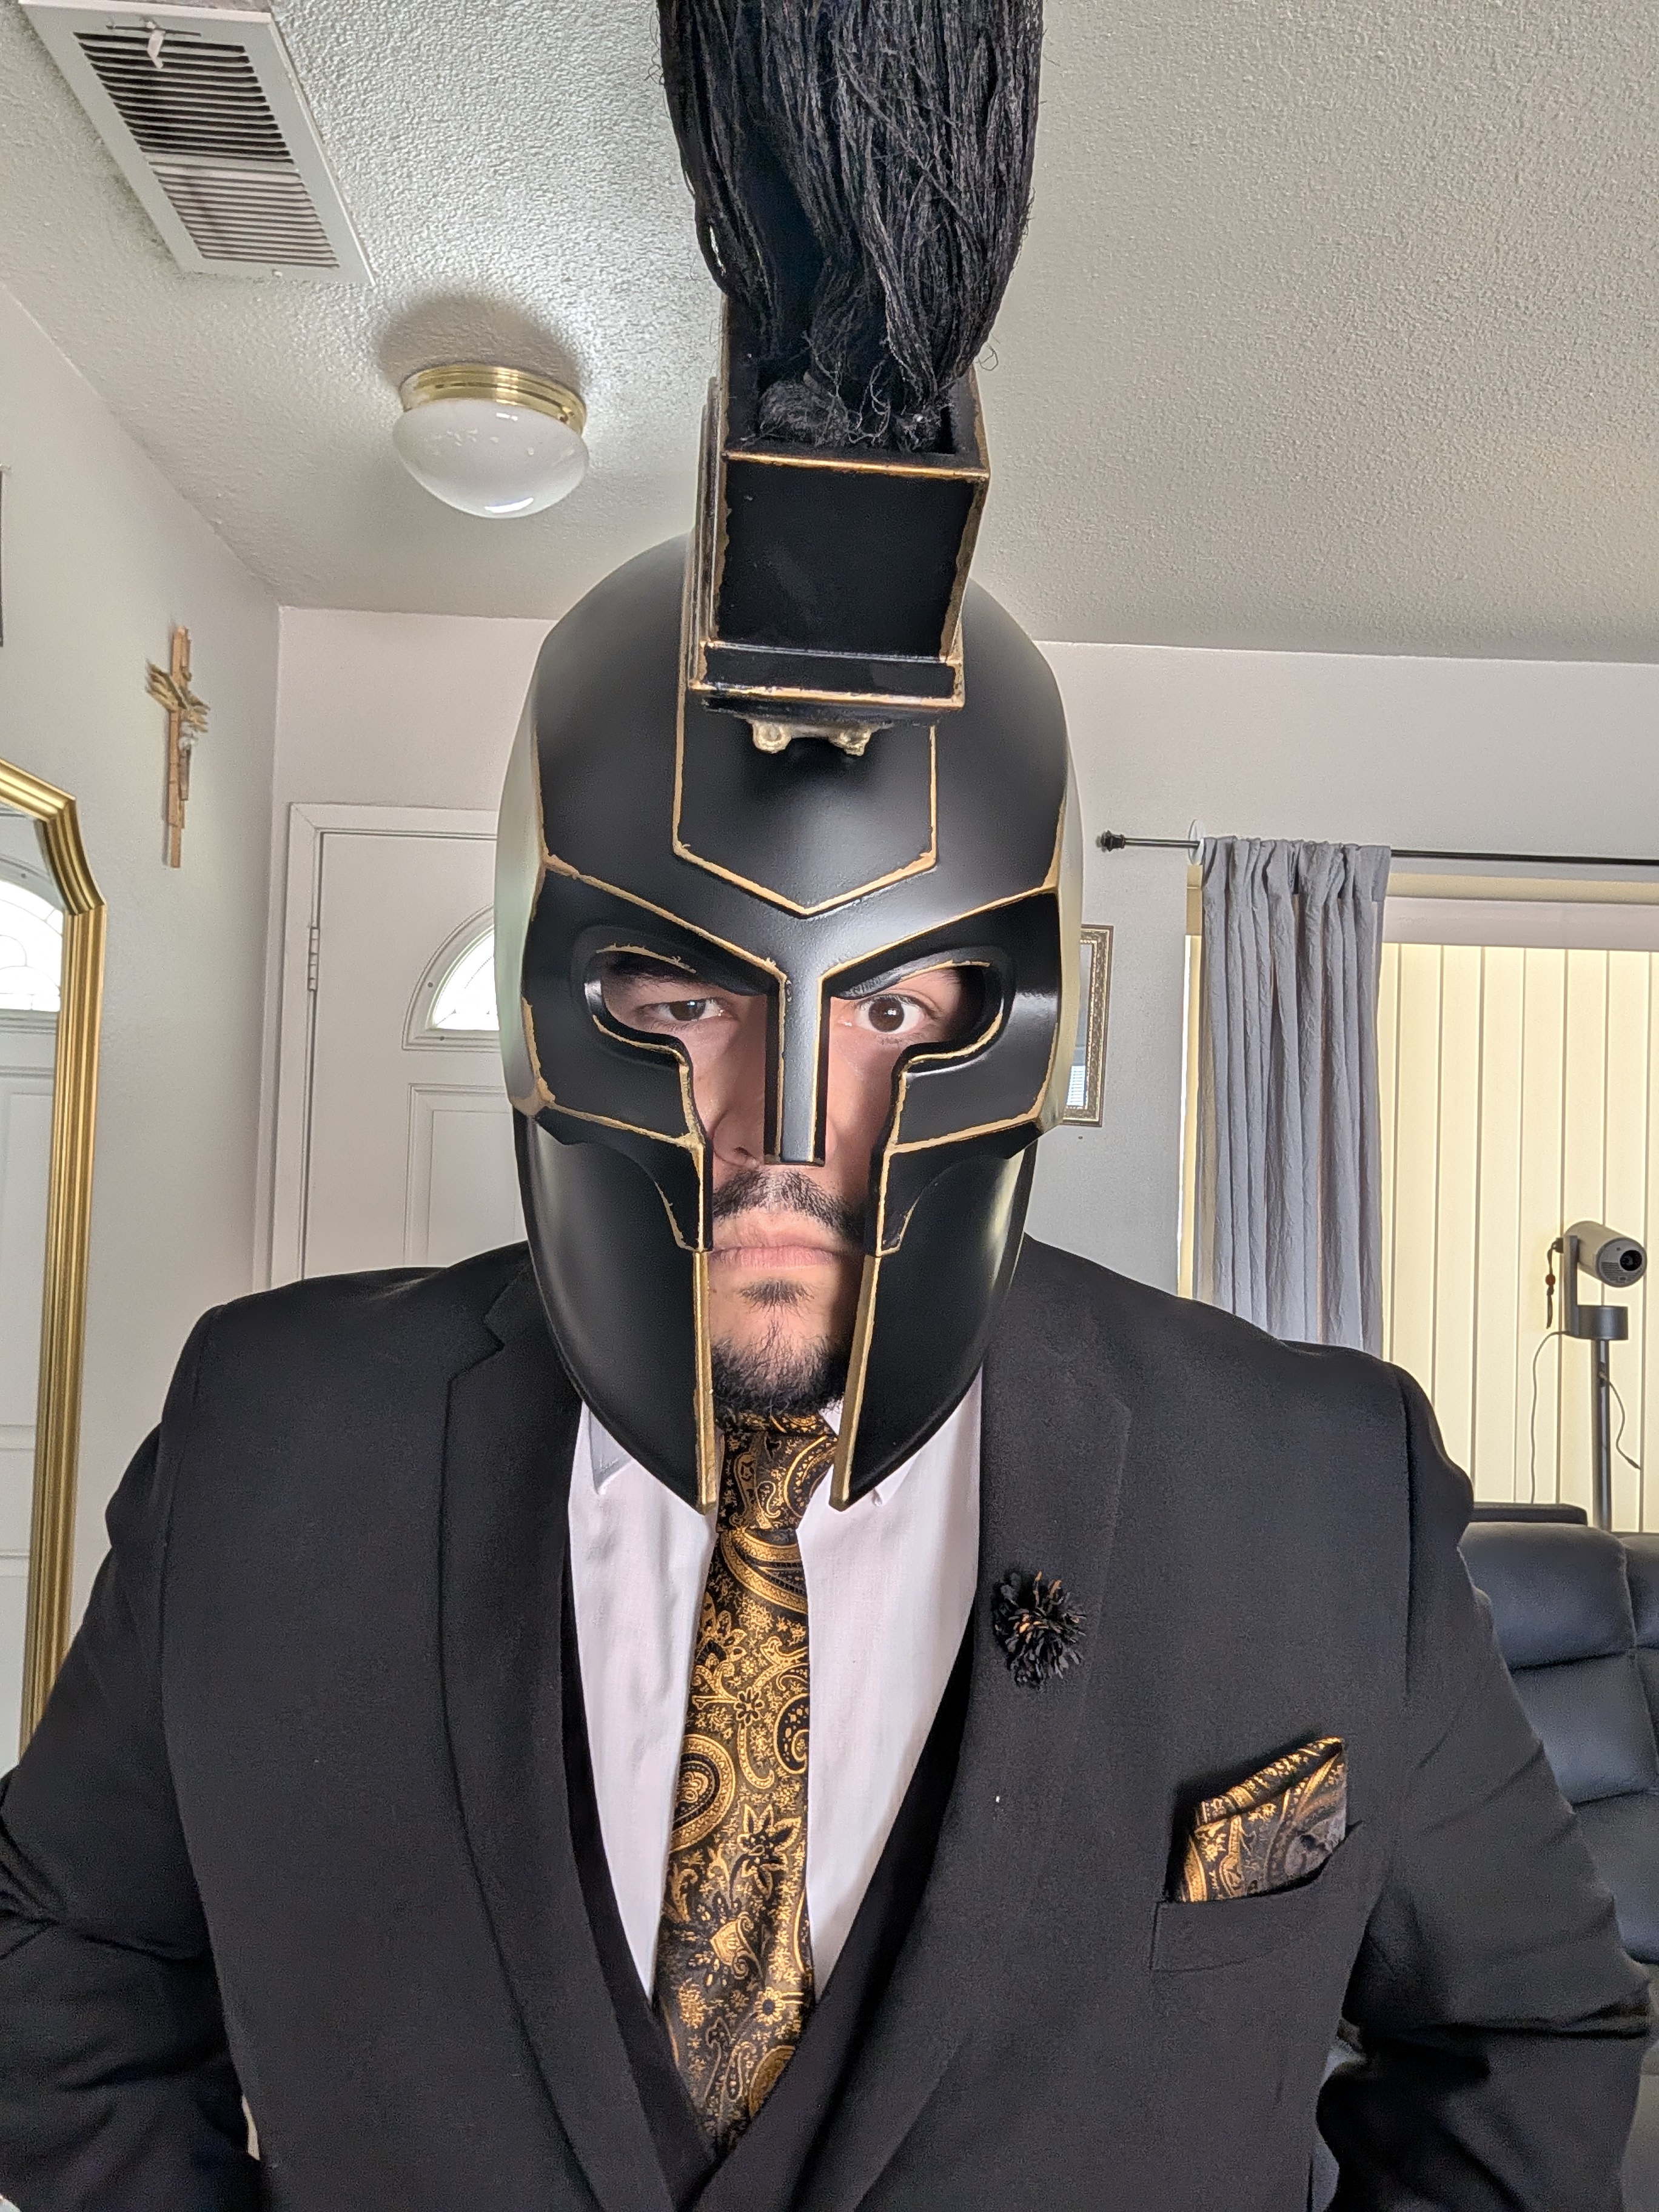
So this one's been living in my head rent-free for weeks and it's finally done, which means it's time to do the thing I always do: dump every photo I took, make a tiktok about it, ramble about the process, and try to explain why a grown man spent a month of his life gluing synthetic hair to a 3D print in his bathroom. Answer? Its for the Love of the Game.
Context for the uninitiated: On top of my DnD hobby, and my many years as a security expert, I am also a 3D printing hobbyist, have been for about 5 years now. I even run my own "Order-to-Print" 3D printing business over at helmsforge.com.
Let's get into it.
The Why (It's Really Just: I Wanted To)
I'm going to be honest with you the way I always am on this blog. There's no deep lore reason for this one. I saw Nolan's The Odyssey, King Agamemnon walked on screen in that helmet, and I felt that AURA FARMING emanating off of him. That sharp brow line, the angular cheek guards, the way the crest sweeps back like it's mid-battle even when it's standing still. Peak design. The costume designer cooked on this one folks. Upon leaving the theater, i was hooked, and had to print my own.
I actually got extra unhinged about the movie because my local theater had the actual Trojan Horse statue set up out front for the release, and I made the pilgrimage to go see it (I say local but really it was a 40min drive away) just to stand next to it like a tourist. No shame. Look at this thing:
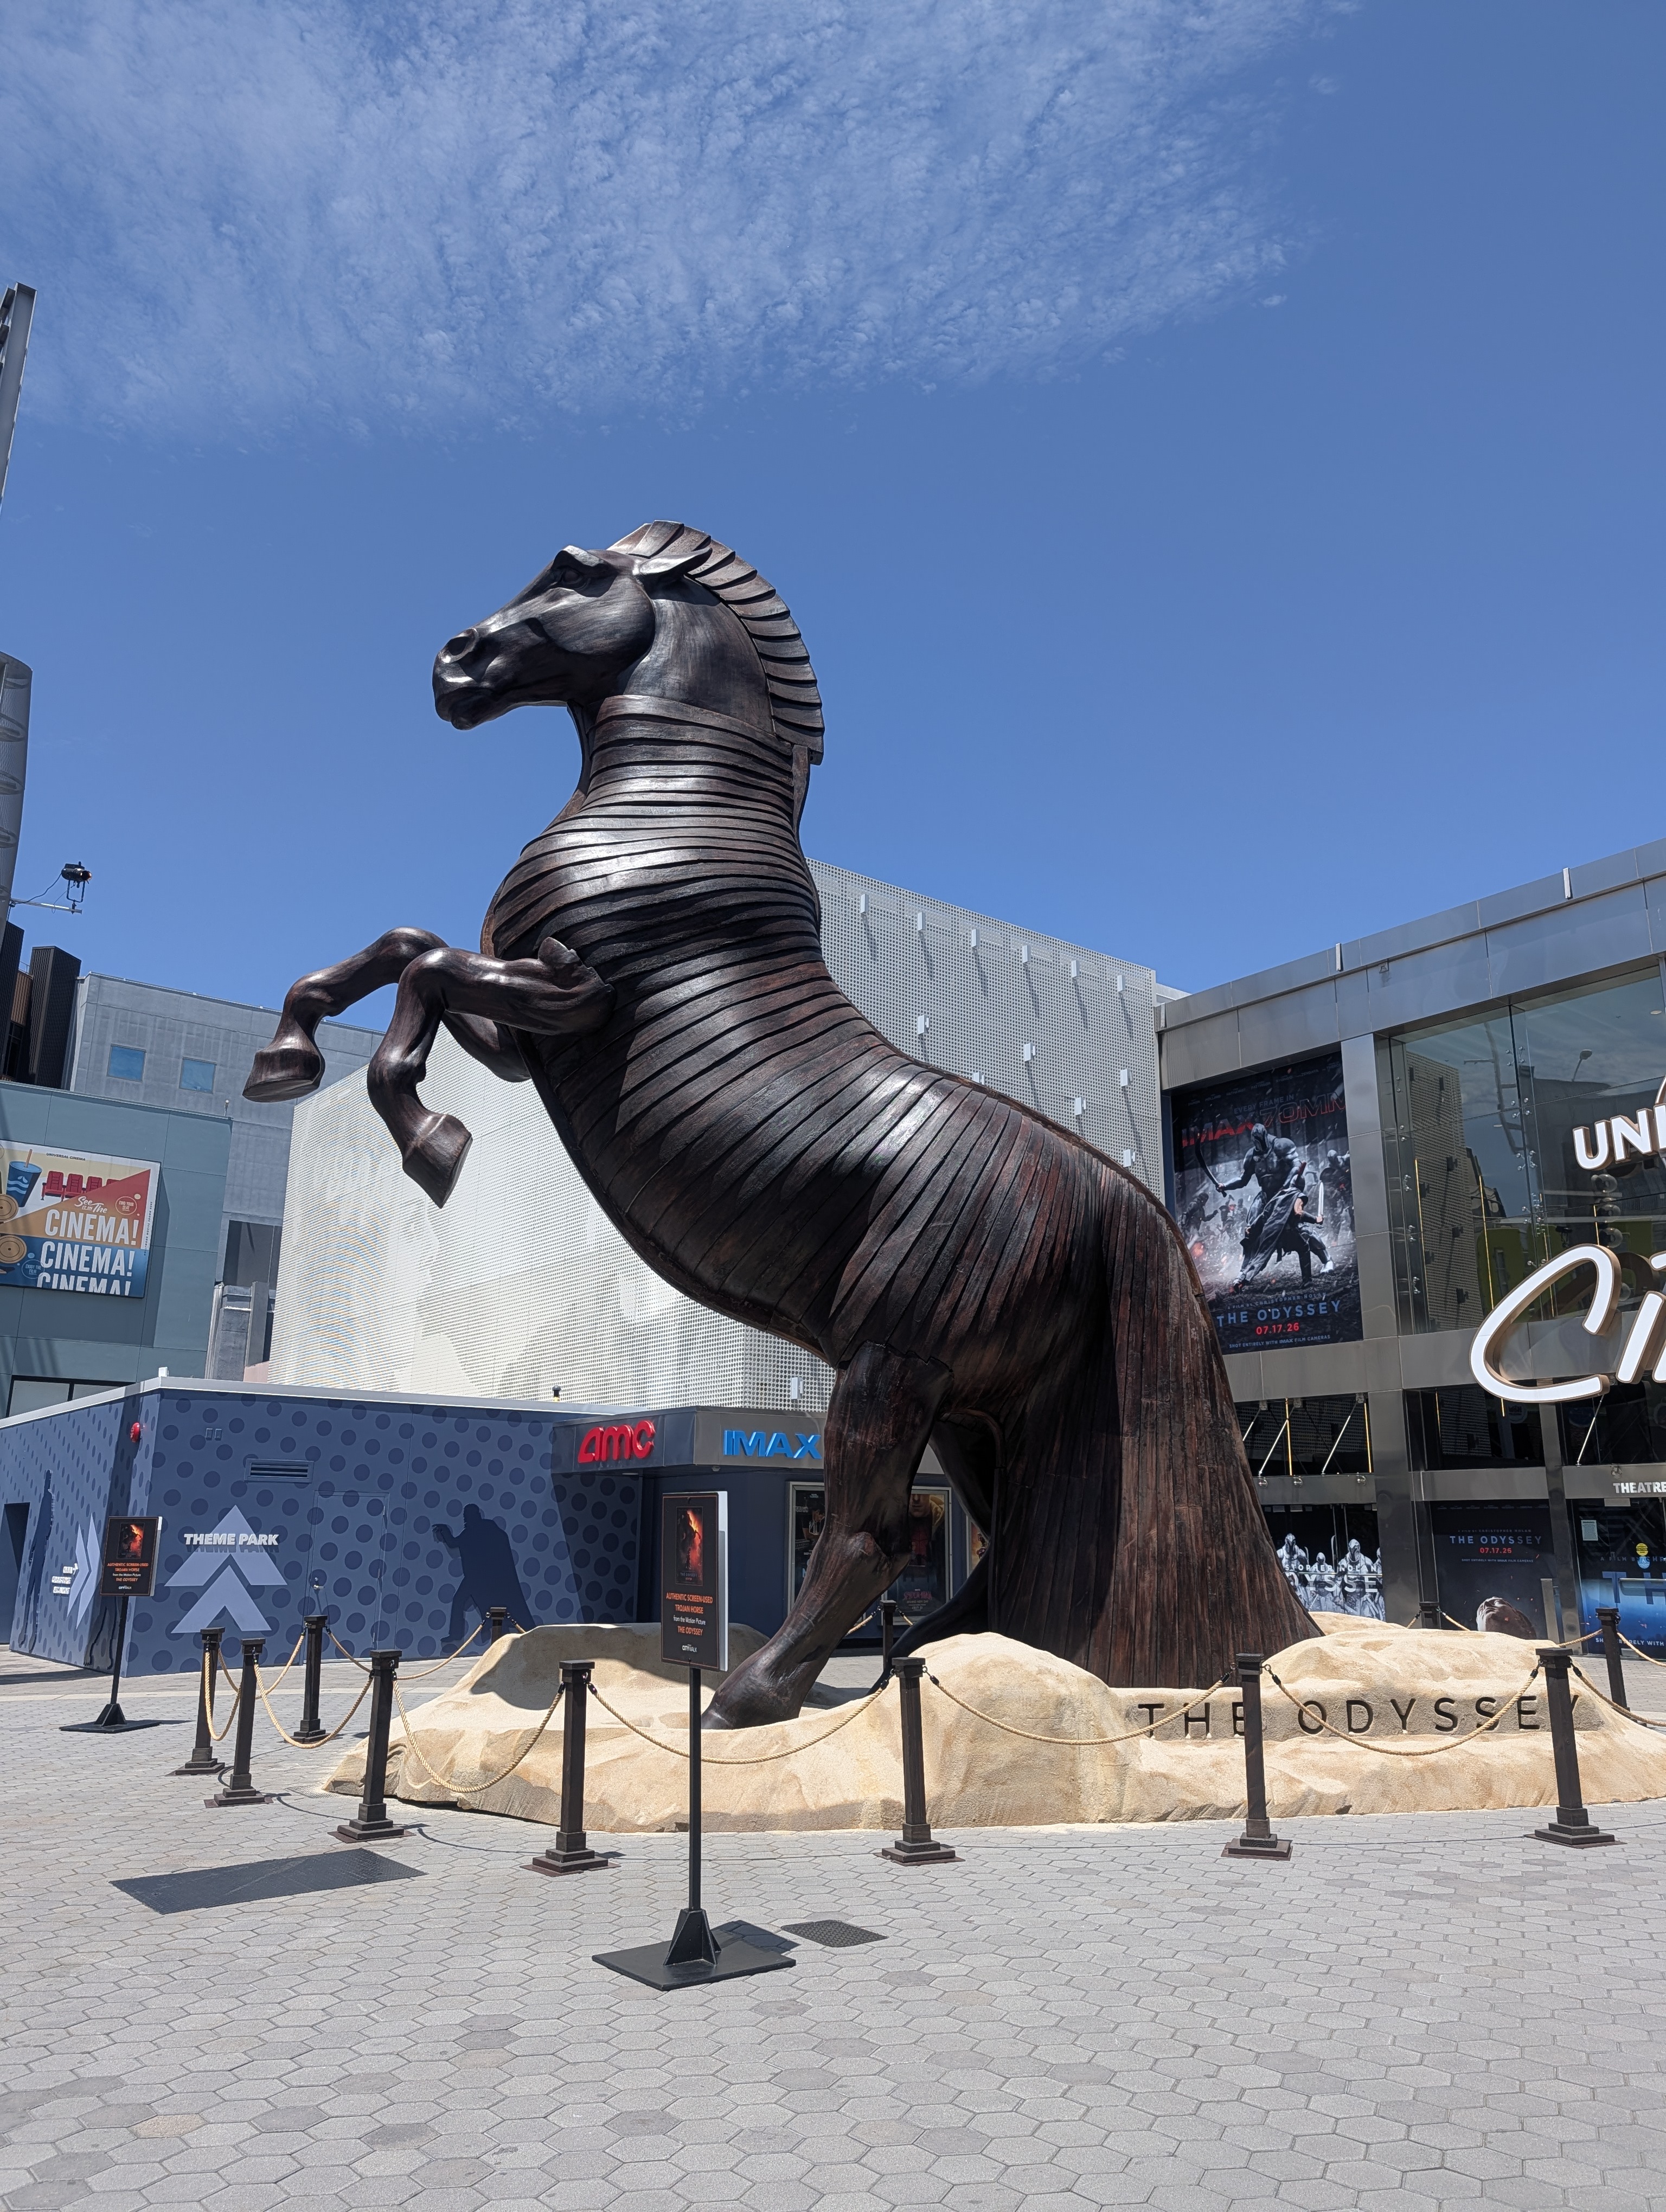
Not helmet-related, but this is basically the exact moment my brain fully committed to this project. 10/10 marketing, Universal.
So the "why" here is genuinely simple, and I don't want to dress it up as more than it is: I wanted to challenge myself. I wanted to see if I could take this design and get it as close to film-accurate as my hands, my printer, and my very patient bathroom sink would allow.
No commission, no con deadline, no one asking me to. Just me, my Bambu P2S, and an unreasonable amount of synthetic hair. This isn't my first rodeo with Galactic Armory's (the makers of the STL files I used) files either. I used their STLs for a Helldivers helmet build a while back and they were clean, well-scaled, and printed beautifully, so when I found out they'd already modeled Agamemnon's helmet I didn't even hesitate. Instant add to cart.
What Went Into This Thing
Here's the full gear list, for anyone following along at home:
| Category | Details |
|---|---|
| STL files | Galactic Armory's King Agamemnon helmet files |
| Printer | Bambu Lab P2S |
| Filament | Polymaker CosPLA (cosplay-specific PLA) |
| Seam fusion | Clear water-based resin + cornstarch mixture |
| Surface prep | Filler sandable primer; 200–300 grit for dry sanding; 800–1000 grit for wet sanding |
| Paint | Rust-Oleum for all cans: Farmhouse Black base coat, satin clear coat, Vintage Gold, Speedpaint 2.0 Hoplite Gold detail paint, final matte clear coat |
| Hair | ~3 packages of Kanekalon synthetic hair (X-pression braiding hair) |
| Hair styling | Got2b Glued Blasting Freeze Spray + Got2b gel |
| Hardware | Epoxy, zip ties, and black thread for the crest plugs; nitrile gloves; face mask; CA glue with activator; J-B Weld epoxy; 1/4" aluminum wire for the ponytail armature |
And because I know some of you love numbers as much as I love lore, here's the project breakdown:
- Total time: 4 weeks, start to finish
- Print time: ~4 days of the P2S just grinding away
- Build time: ~25 hours, spread across about 3 weeks of evenings and weekends
- Filament used: ~1.7 kg
- Hair used: ~3 packages of Kanekalon
- Hairspray used: ~2.4 bottles of Got2b Glued Blasting Freeze Spray (yes I counted, yes it's a lot, no I regret nothing)
The Build
Okay. Deep breath. Here's how this actually came together.
Printing and the First "Oh, This Is Really Happening" Moment
The P2S ate through the Galactic Armory files piece by piece over about four days, and pulling that very first cheek piece off the plate was the moment this stopped being "a thing I was thinking about" and became "a thing I was doing."
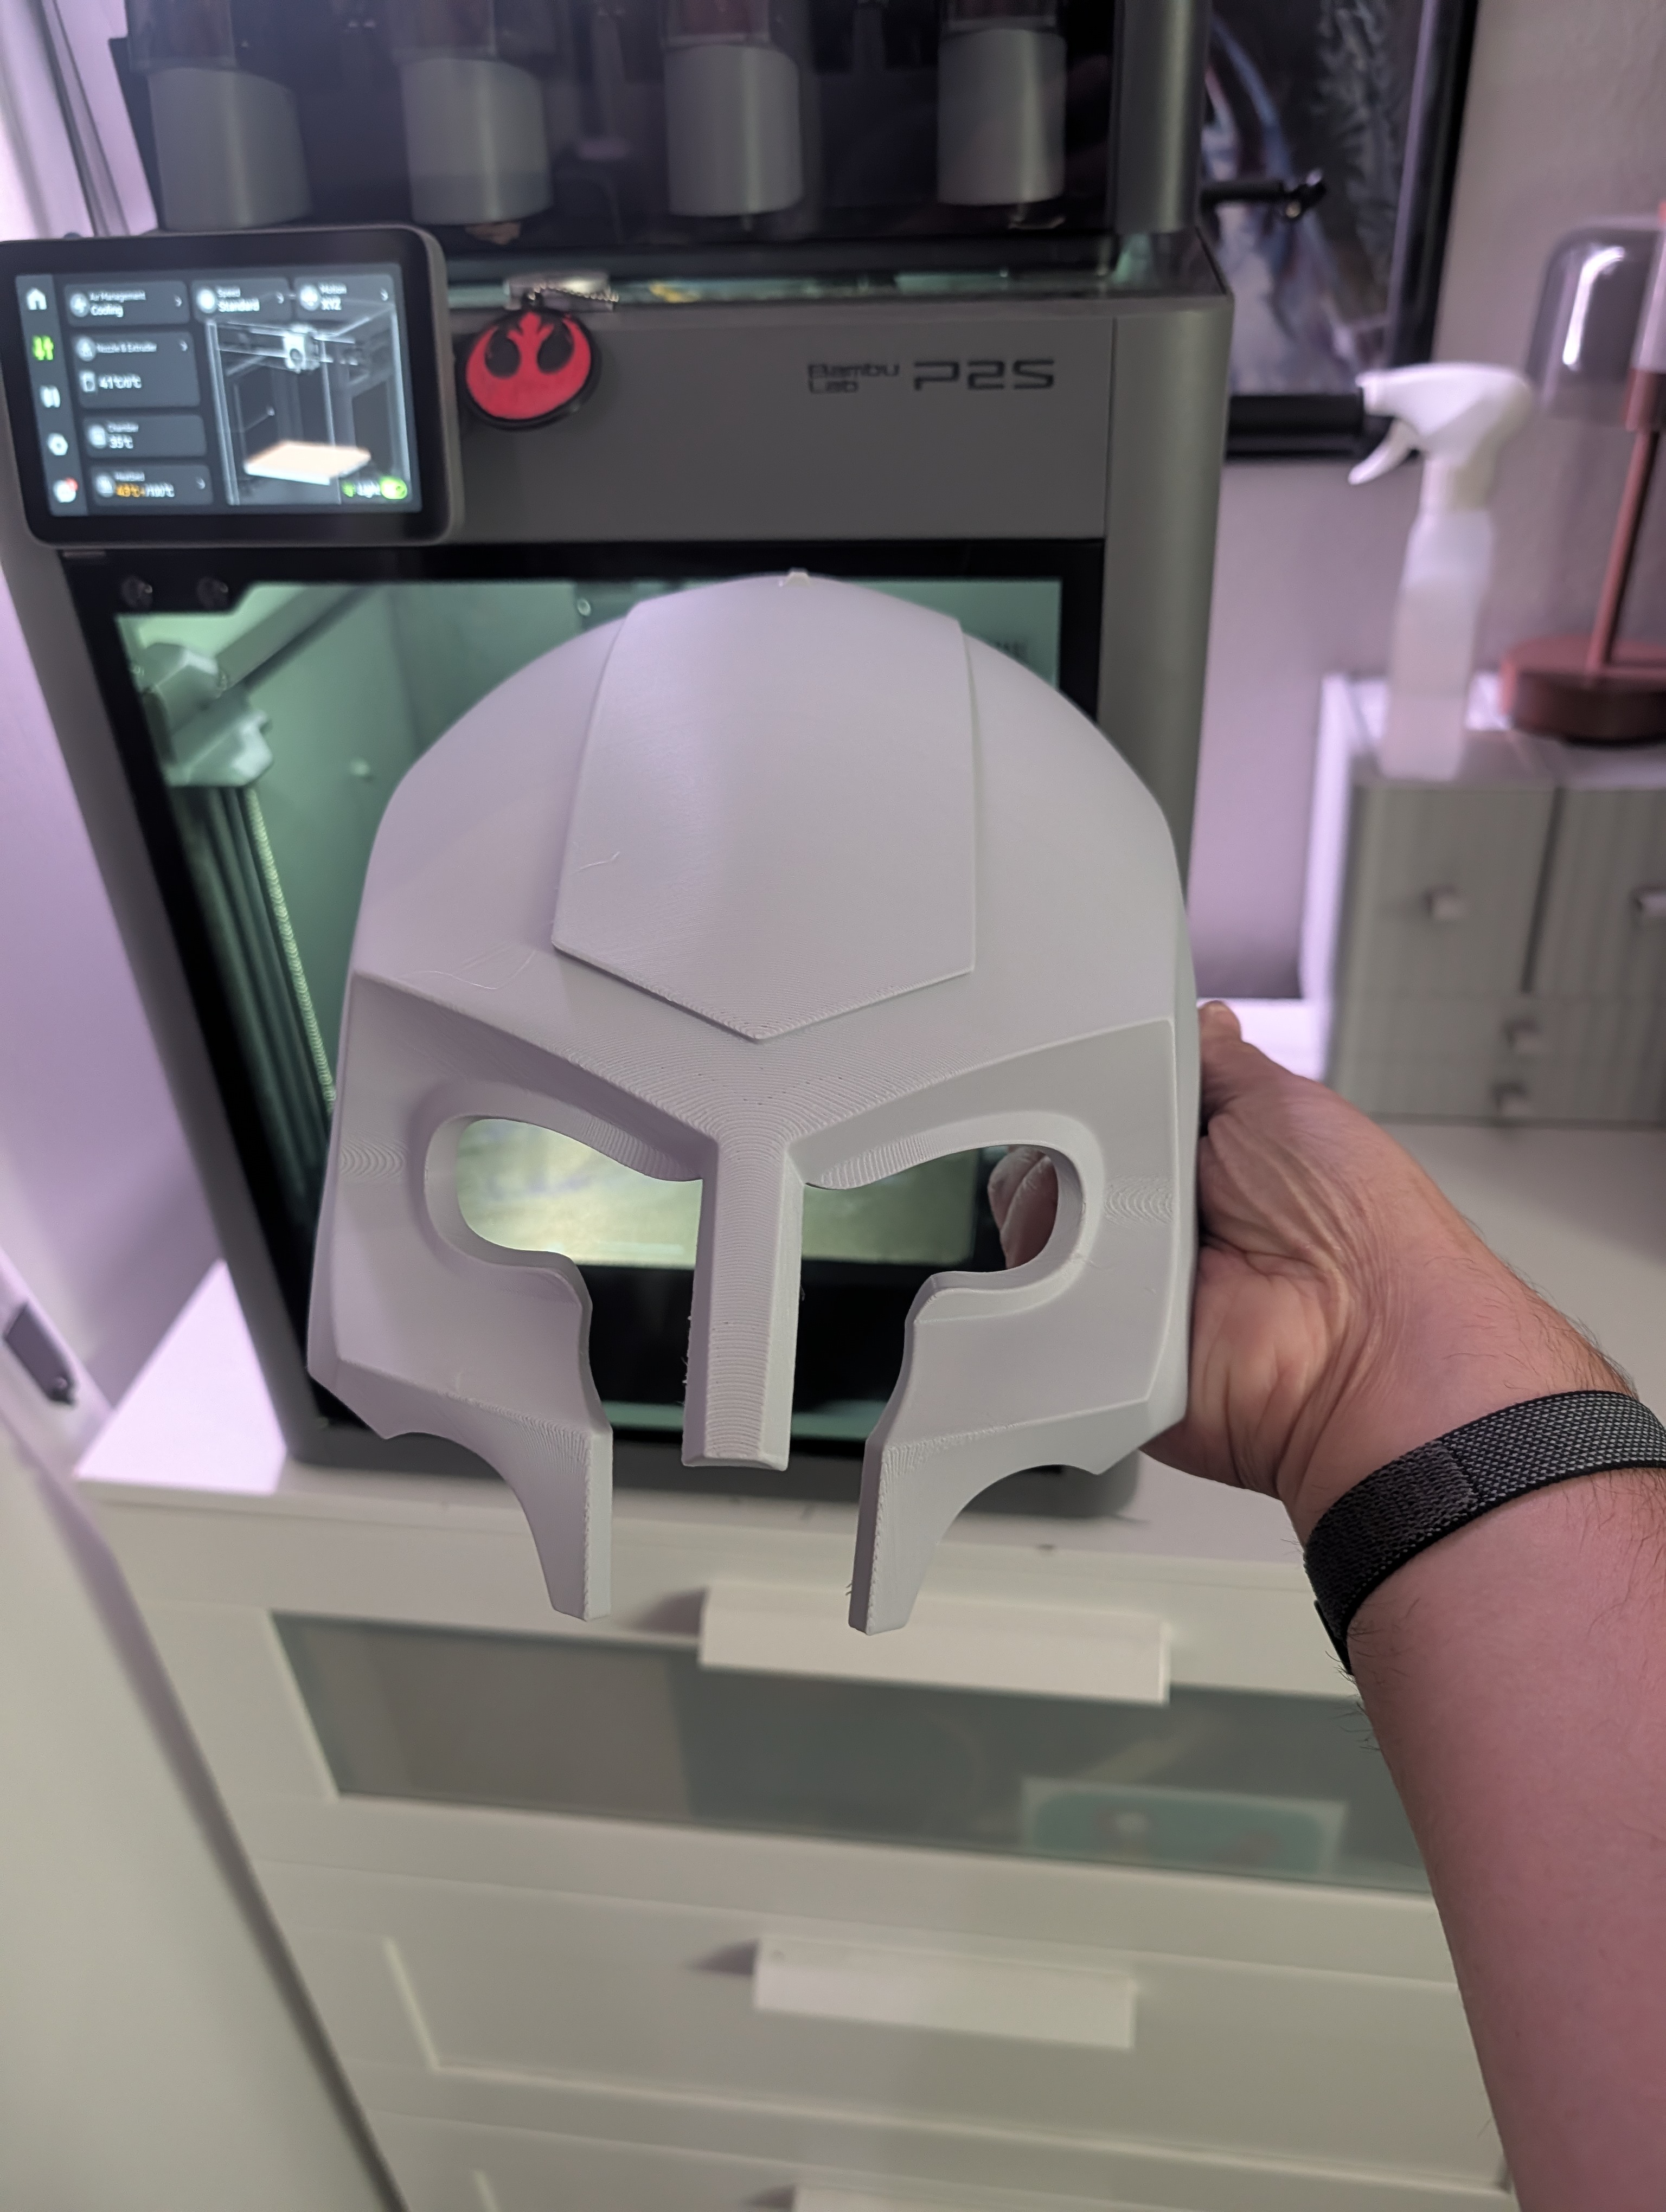
Fresh off the plate. Still warm. Still just a piece of a much bigger idea at this point.
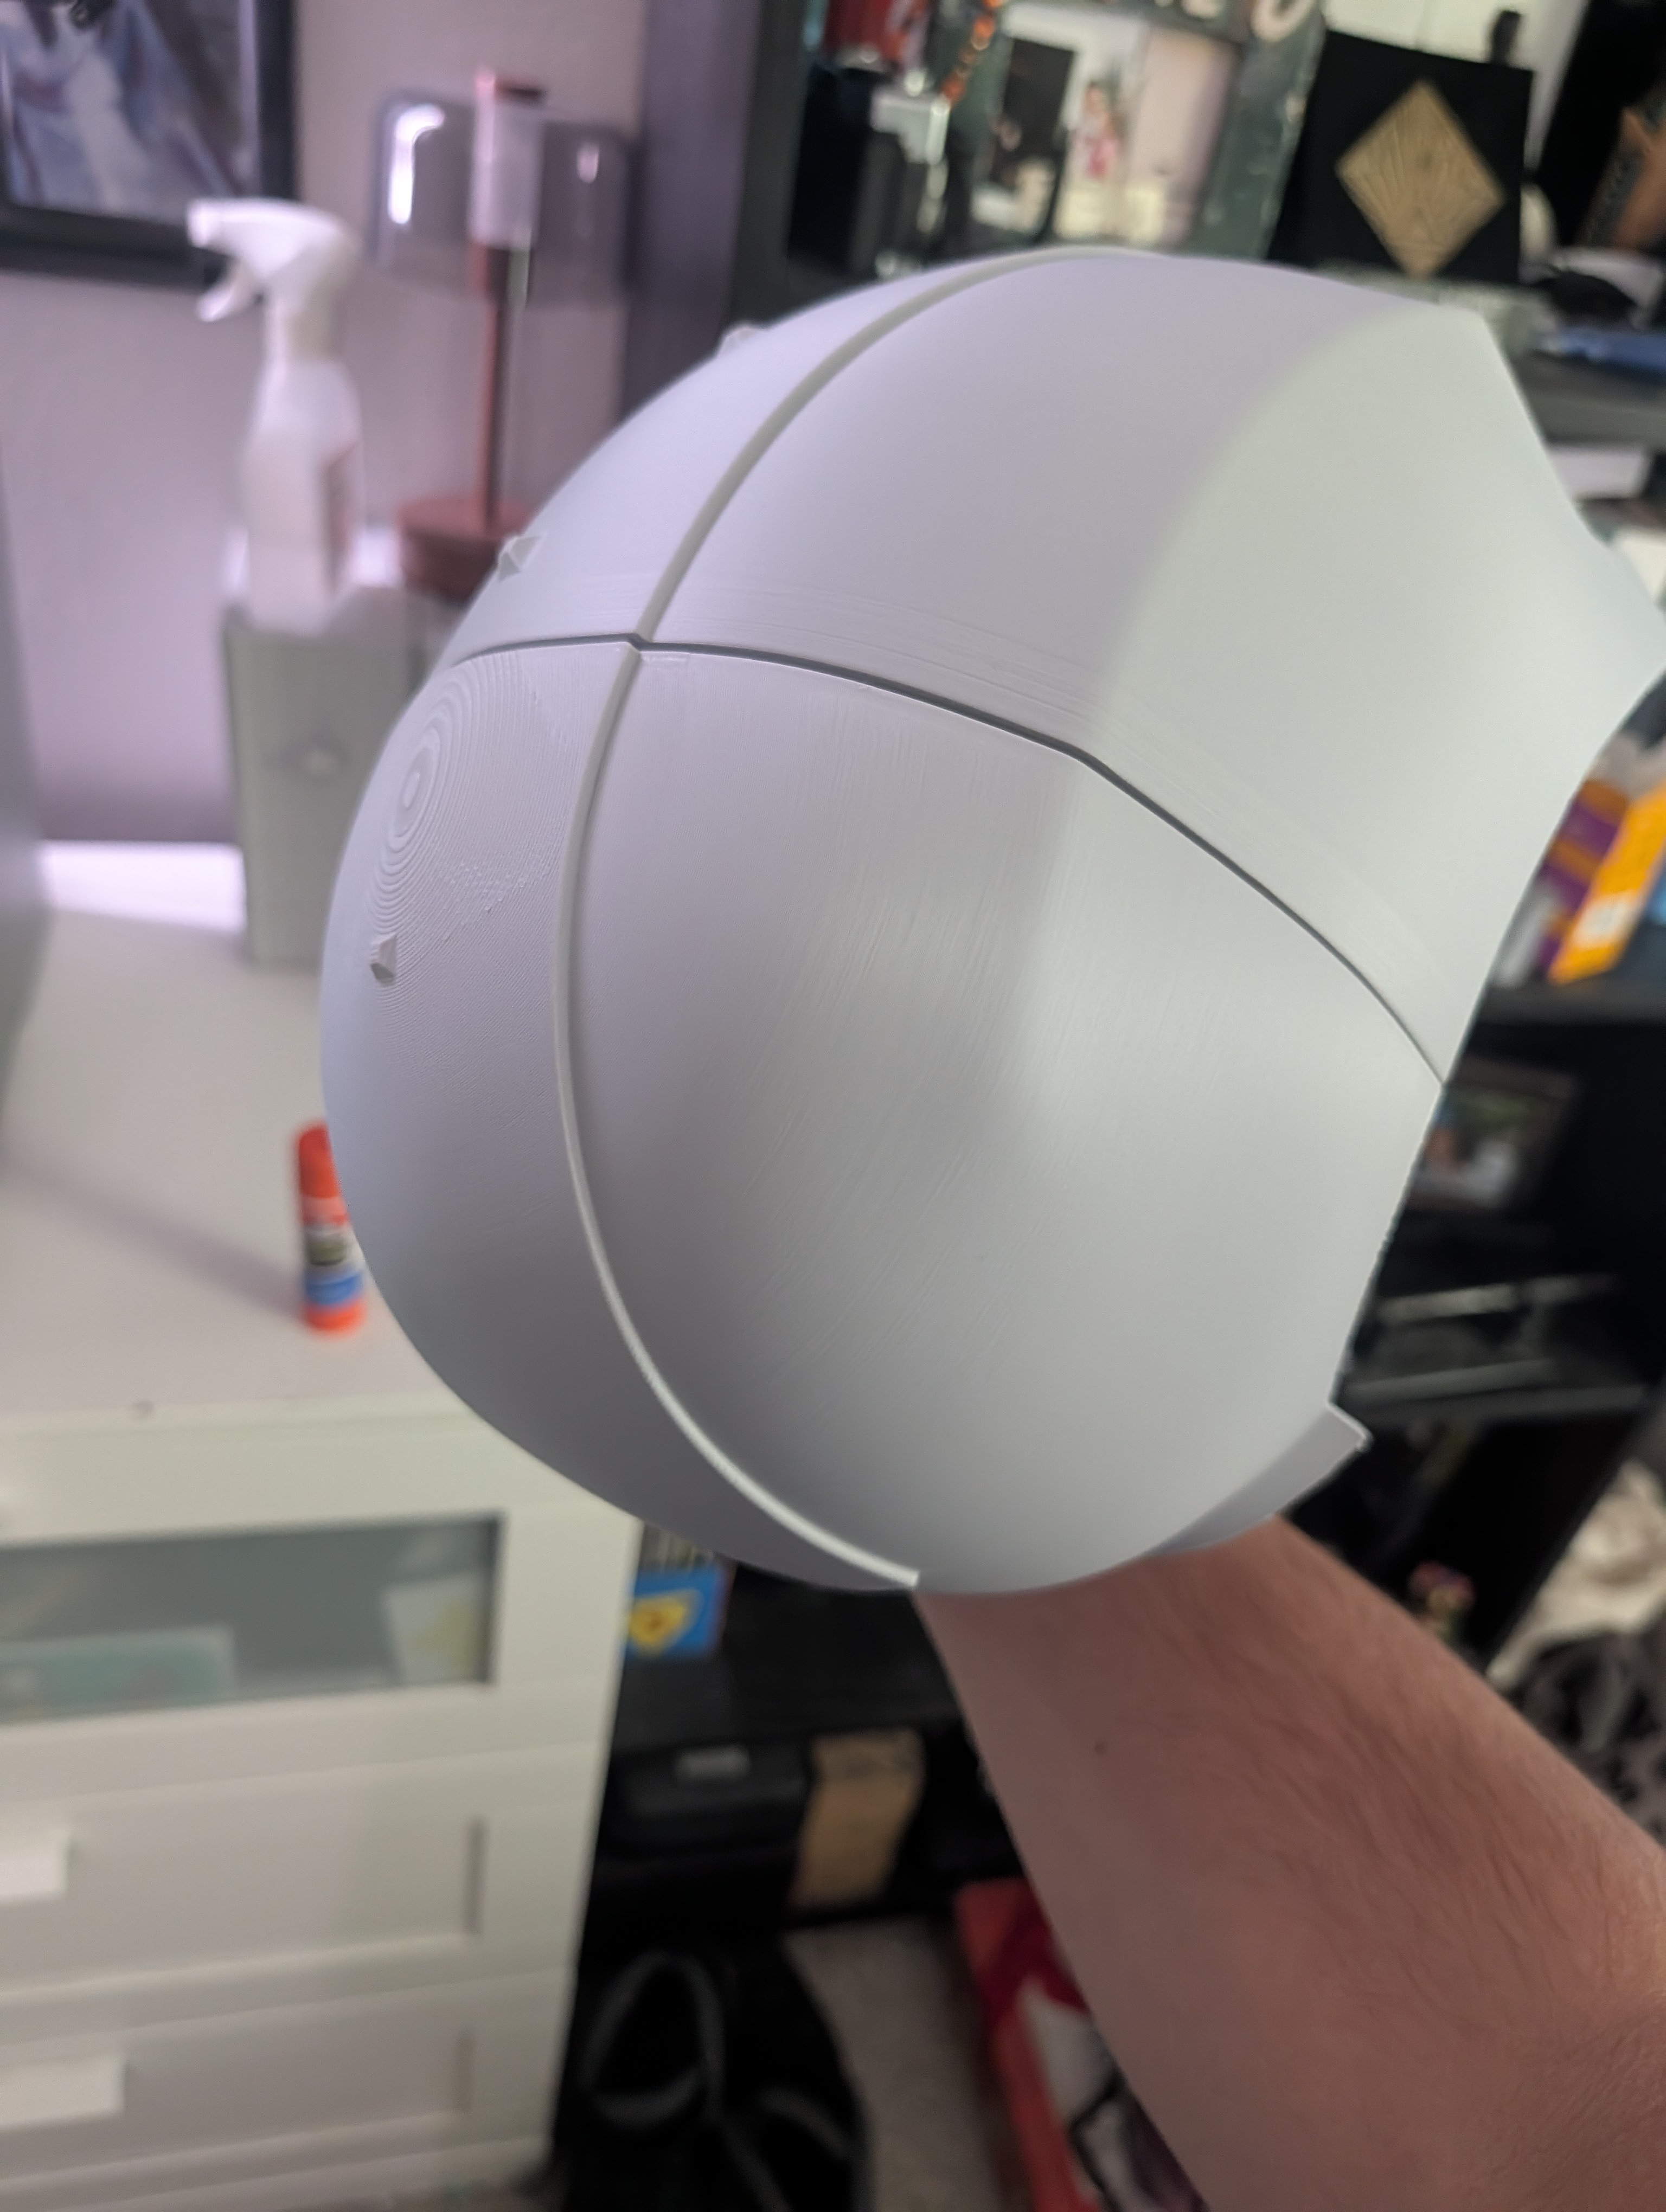
You can already see the panel lines and layer detail Galactic Armory baked into the model — this is why I keep coming back to their files.
Once every piece was off the plate, I dry-fit the whole shell together for the first time, and honestly this was one of my favorite moments of the whole build. It's the closest you get to seeing the "finished" silhouette before you've committed to a single drop of paint.
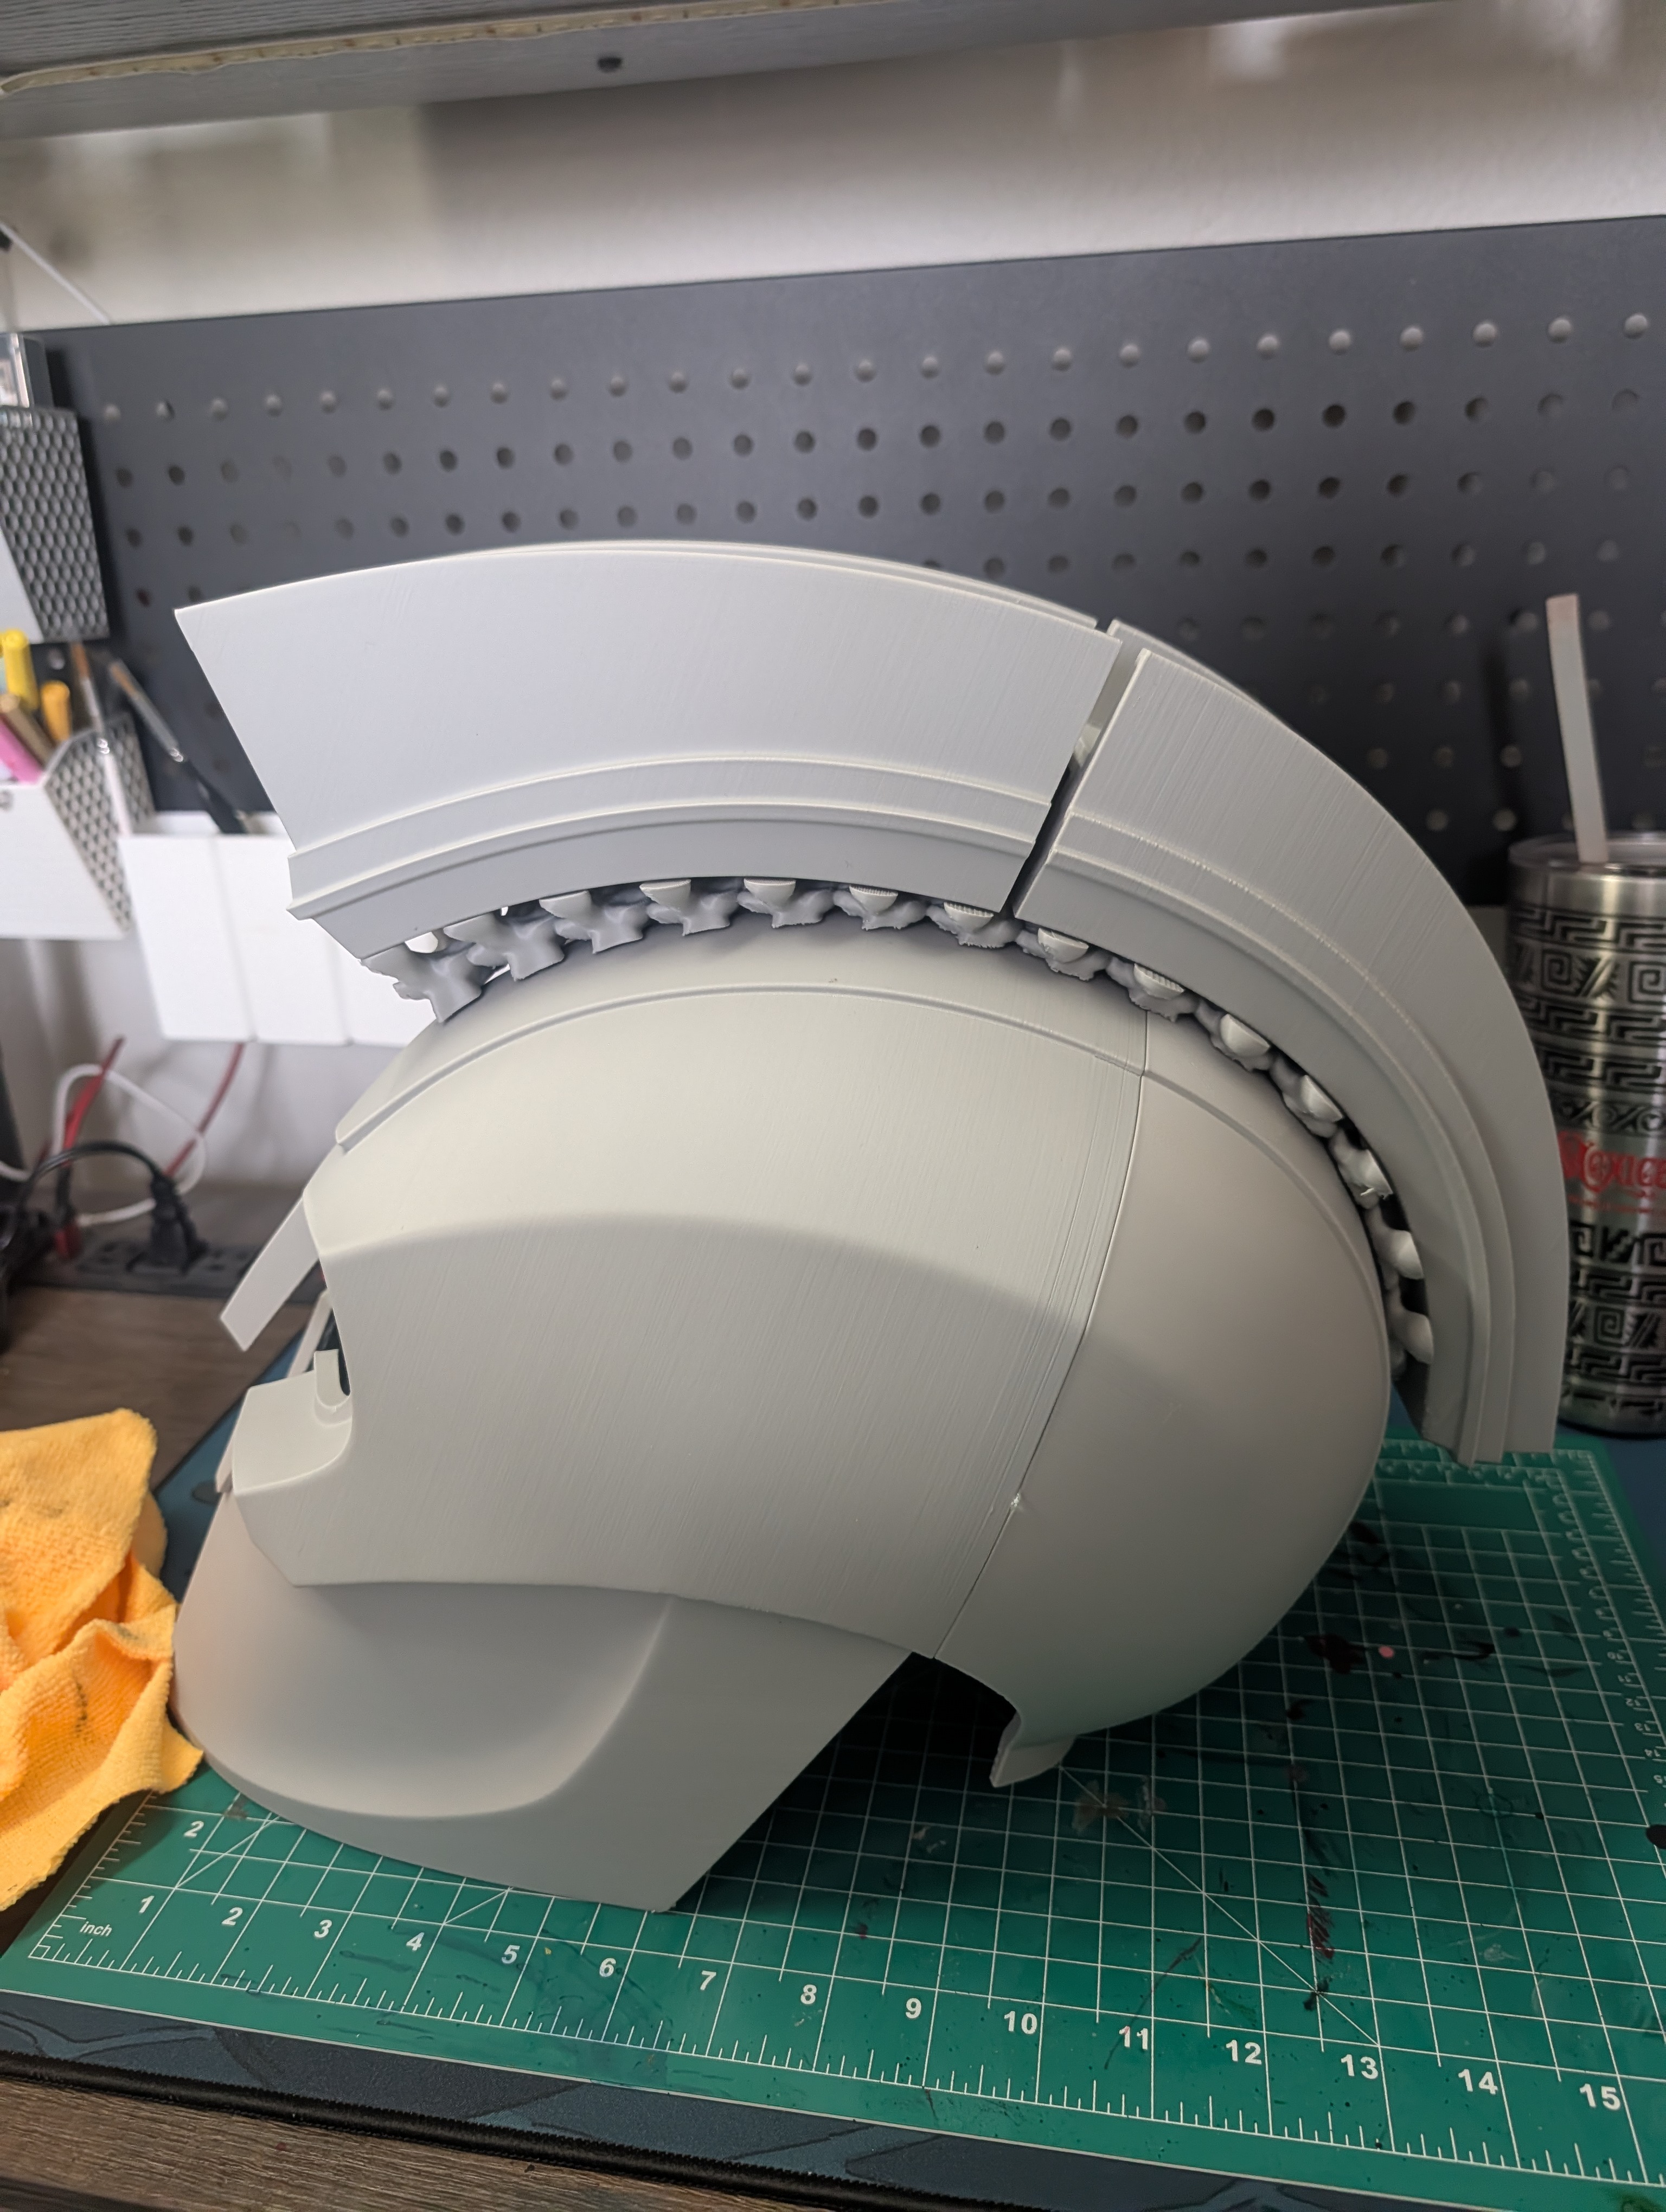
Full assembly, still stark white PLA, still very much "3D print" and not yet "movie prop." That transformation is the whole game from here.
If you want to see the actual print process in motion instead of just the end result, here's one of the timelapse clips straight off the printer:Please check out my tiktok about it here: https://www.tiktok.com/t/ZP8Wgkj3T/
Fusing the Seams (Turning "Several Pieces" Into "One Helmet")
This is the part nobody warns you about when you get into 3D printed cosplay: printing the pieces is maybe 20% of the actual work. The other 80% is convincing a bunch of individually printed panels that they are, in fact, one single object.
My method here was a mix of resin and cornstarch worked into the seam lines, then a full resin wash over the entire helmet and crest to knock down the print texture. CA Glue + Activator quick-setting spray did a lot of the structural work of actually locking the panels together before I got into the cosmetic pass.
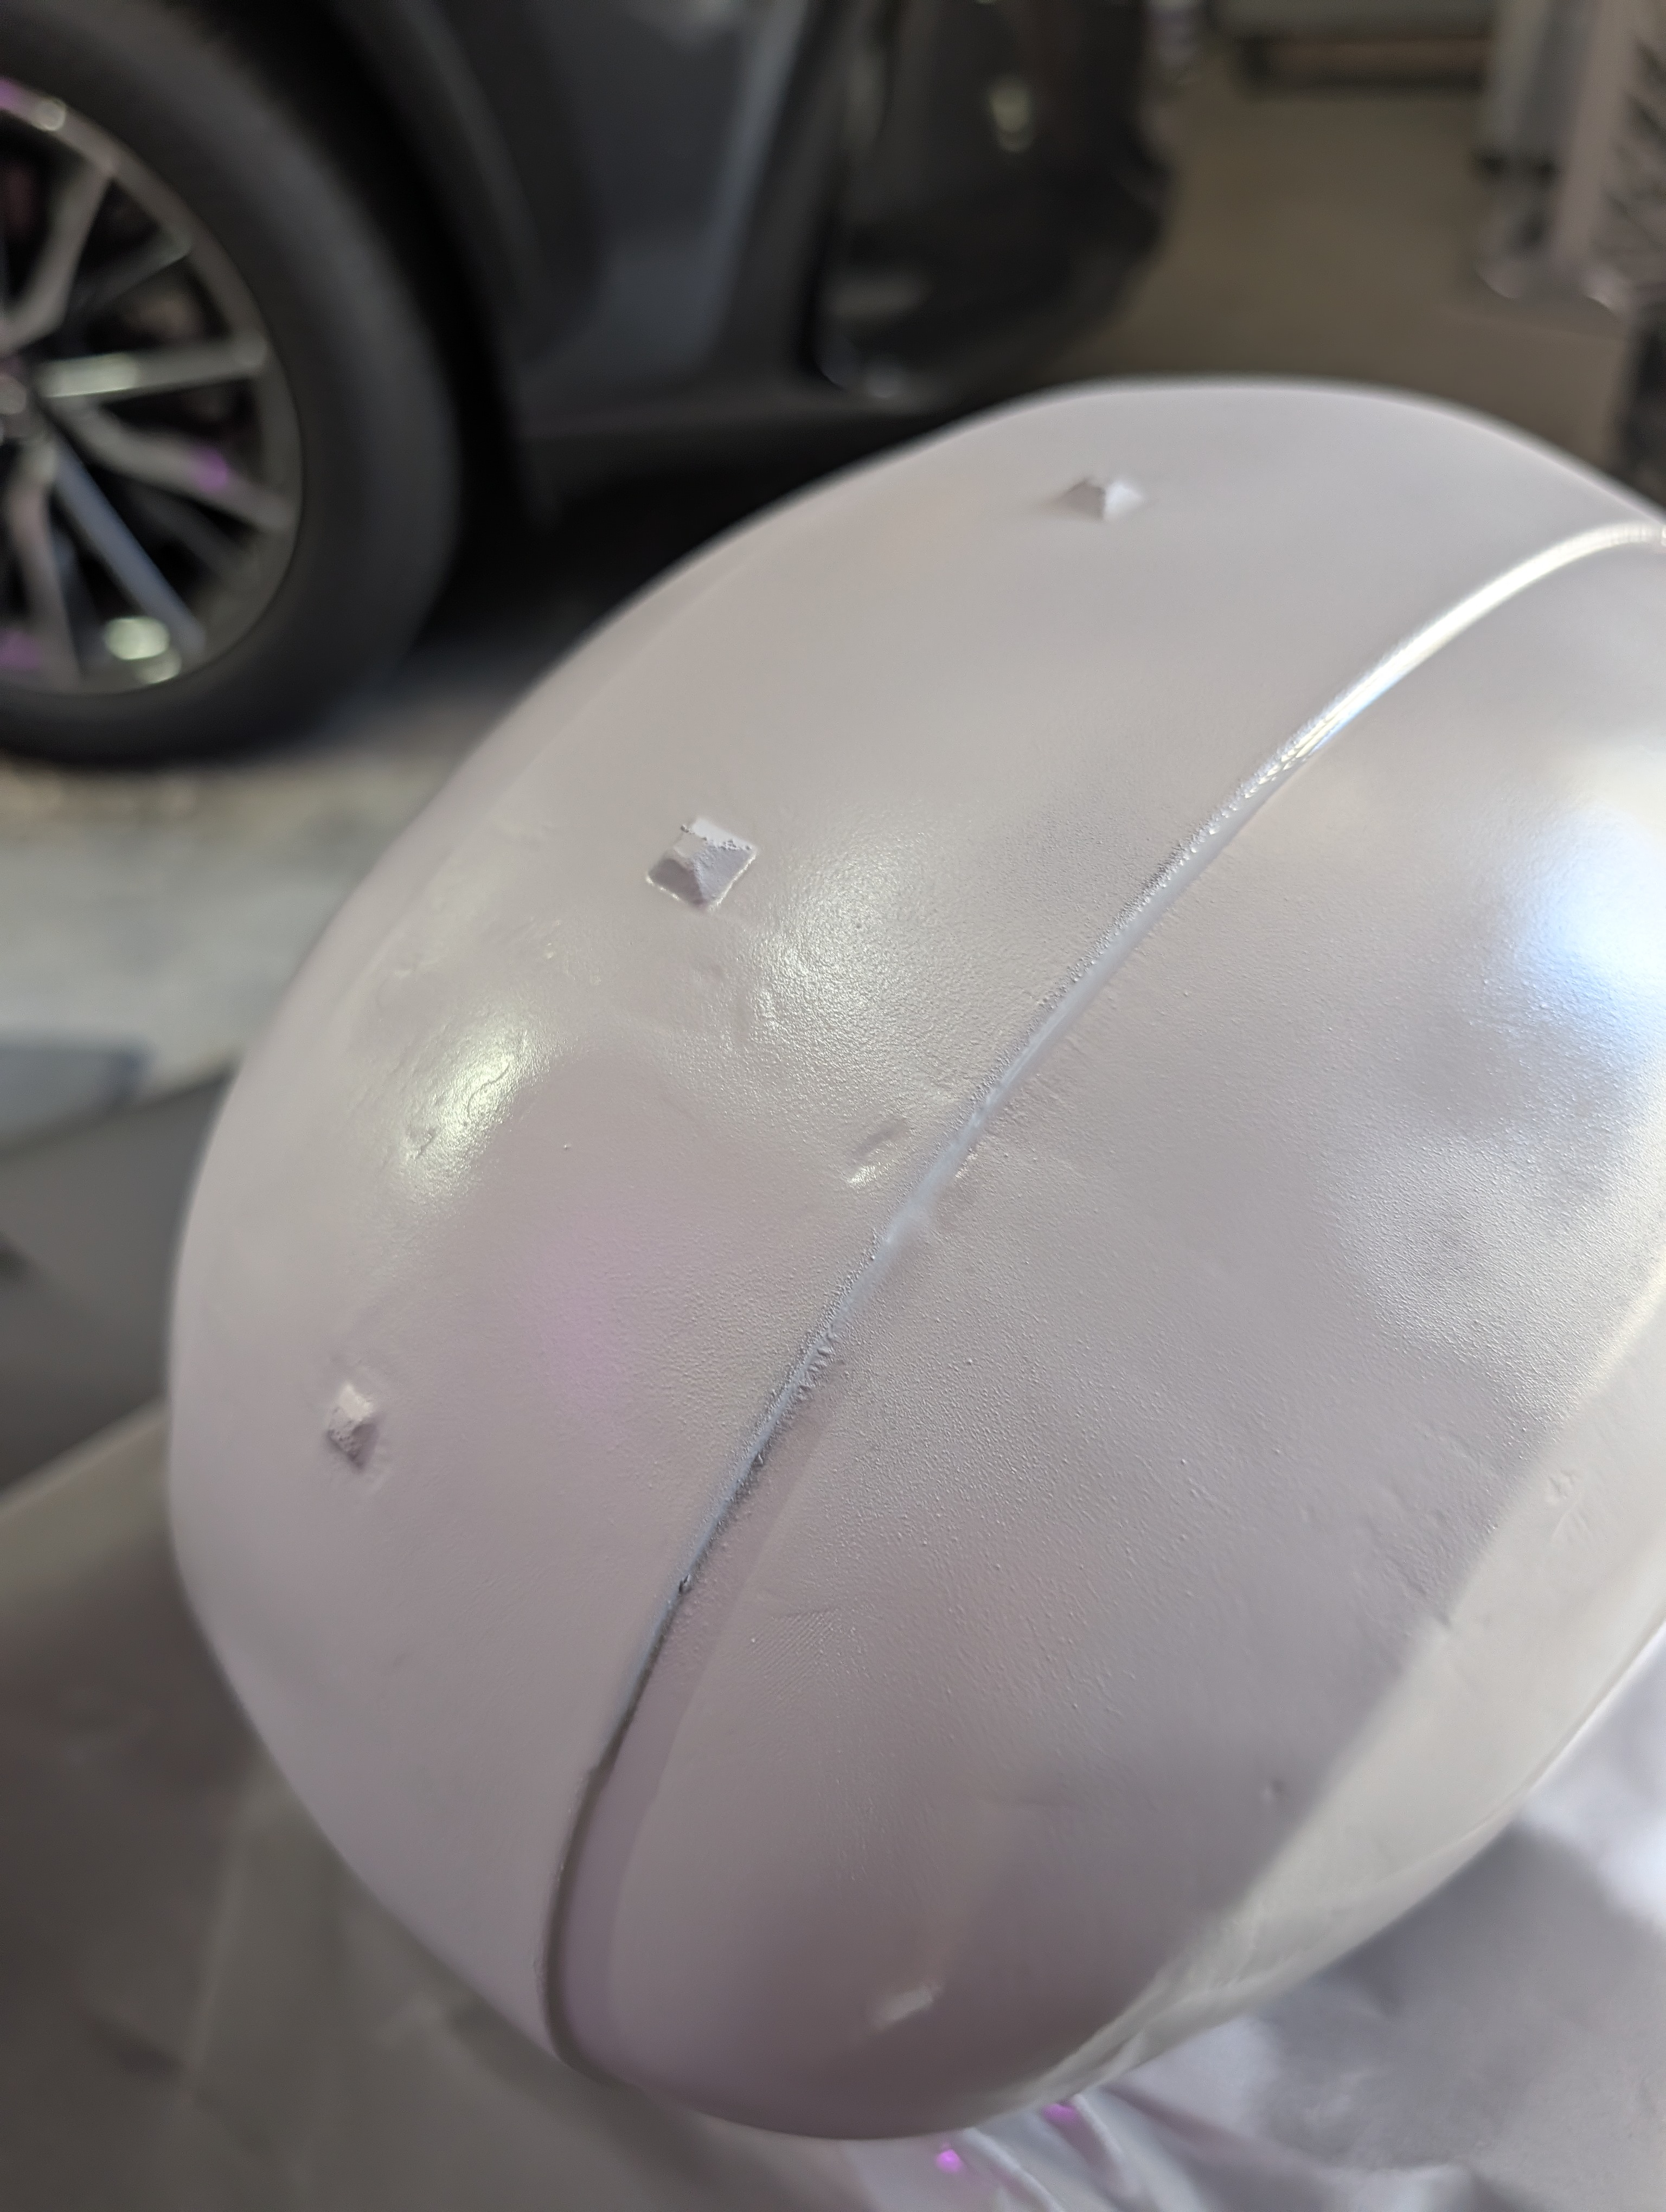
This is the least glamorous photo in this entire post and also one of the most important. Those little filled divots are where separate prints stop being separate prints.
The Primer-Sand-Repeat Spiral
I want to be transparent, this next stretch is where the "25 hours of build time" number really starts racking up, and it is not exciting to look at in photos. It's filler primer, sand, filler primer again, wet sand, and then doing that whole loop again about one and a half more times until the surface of the helmet no longer showed any layer lines from the printer. The resin wash is so good on eliminating those layer lines. This was the first time I wet-sanded anything and it was amazing. The smoothest surface I have ever achieved in a 3D print.
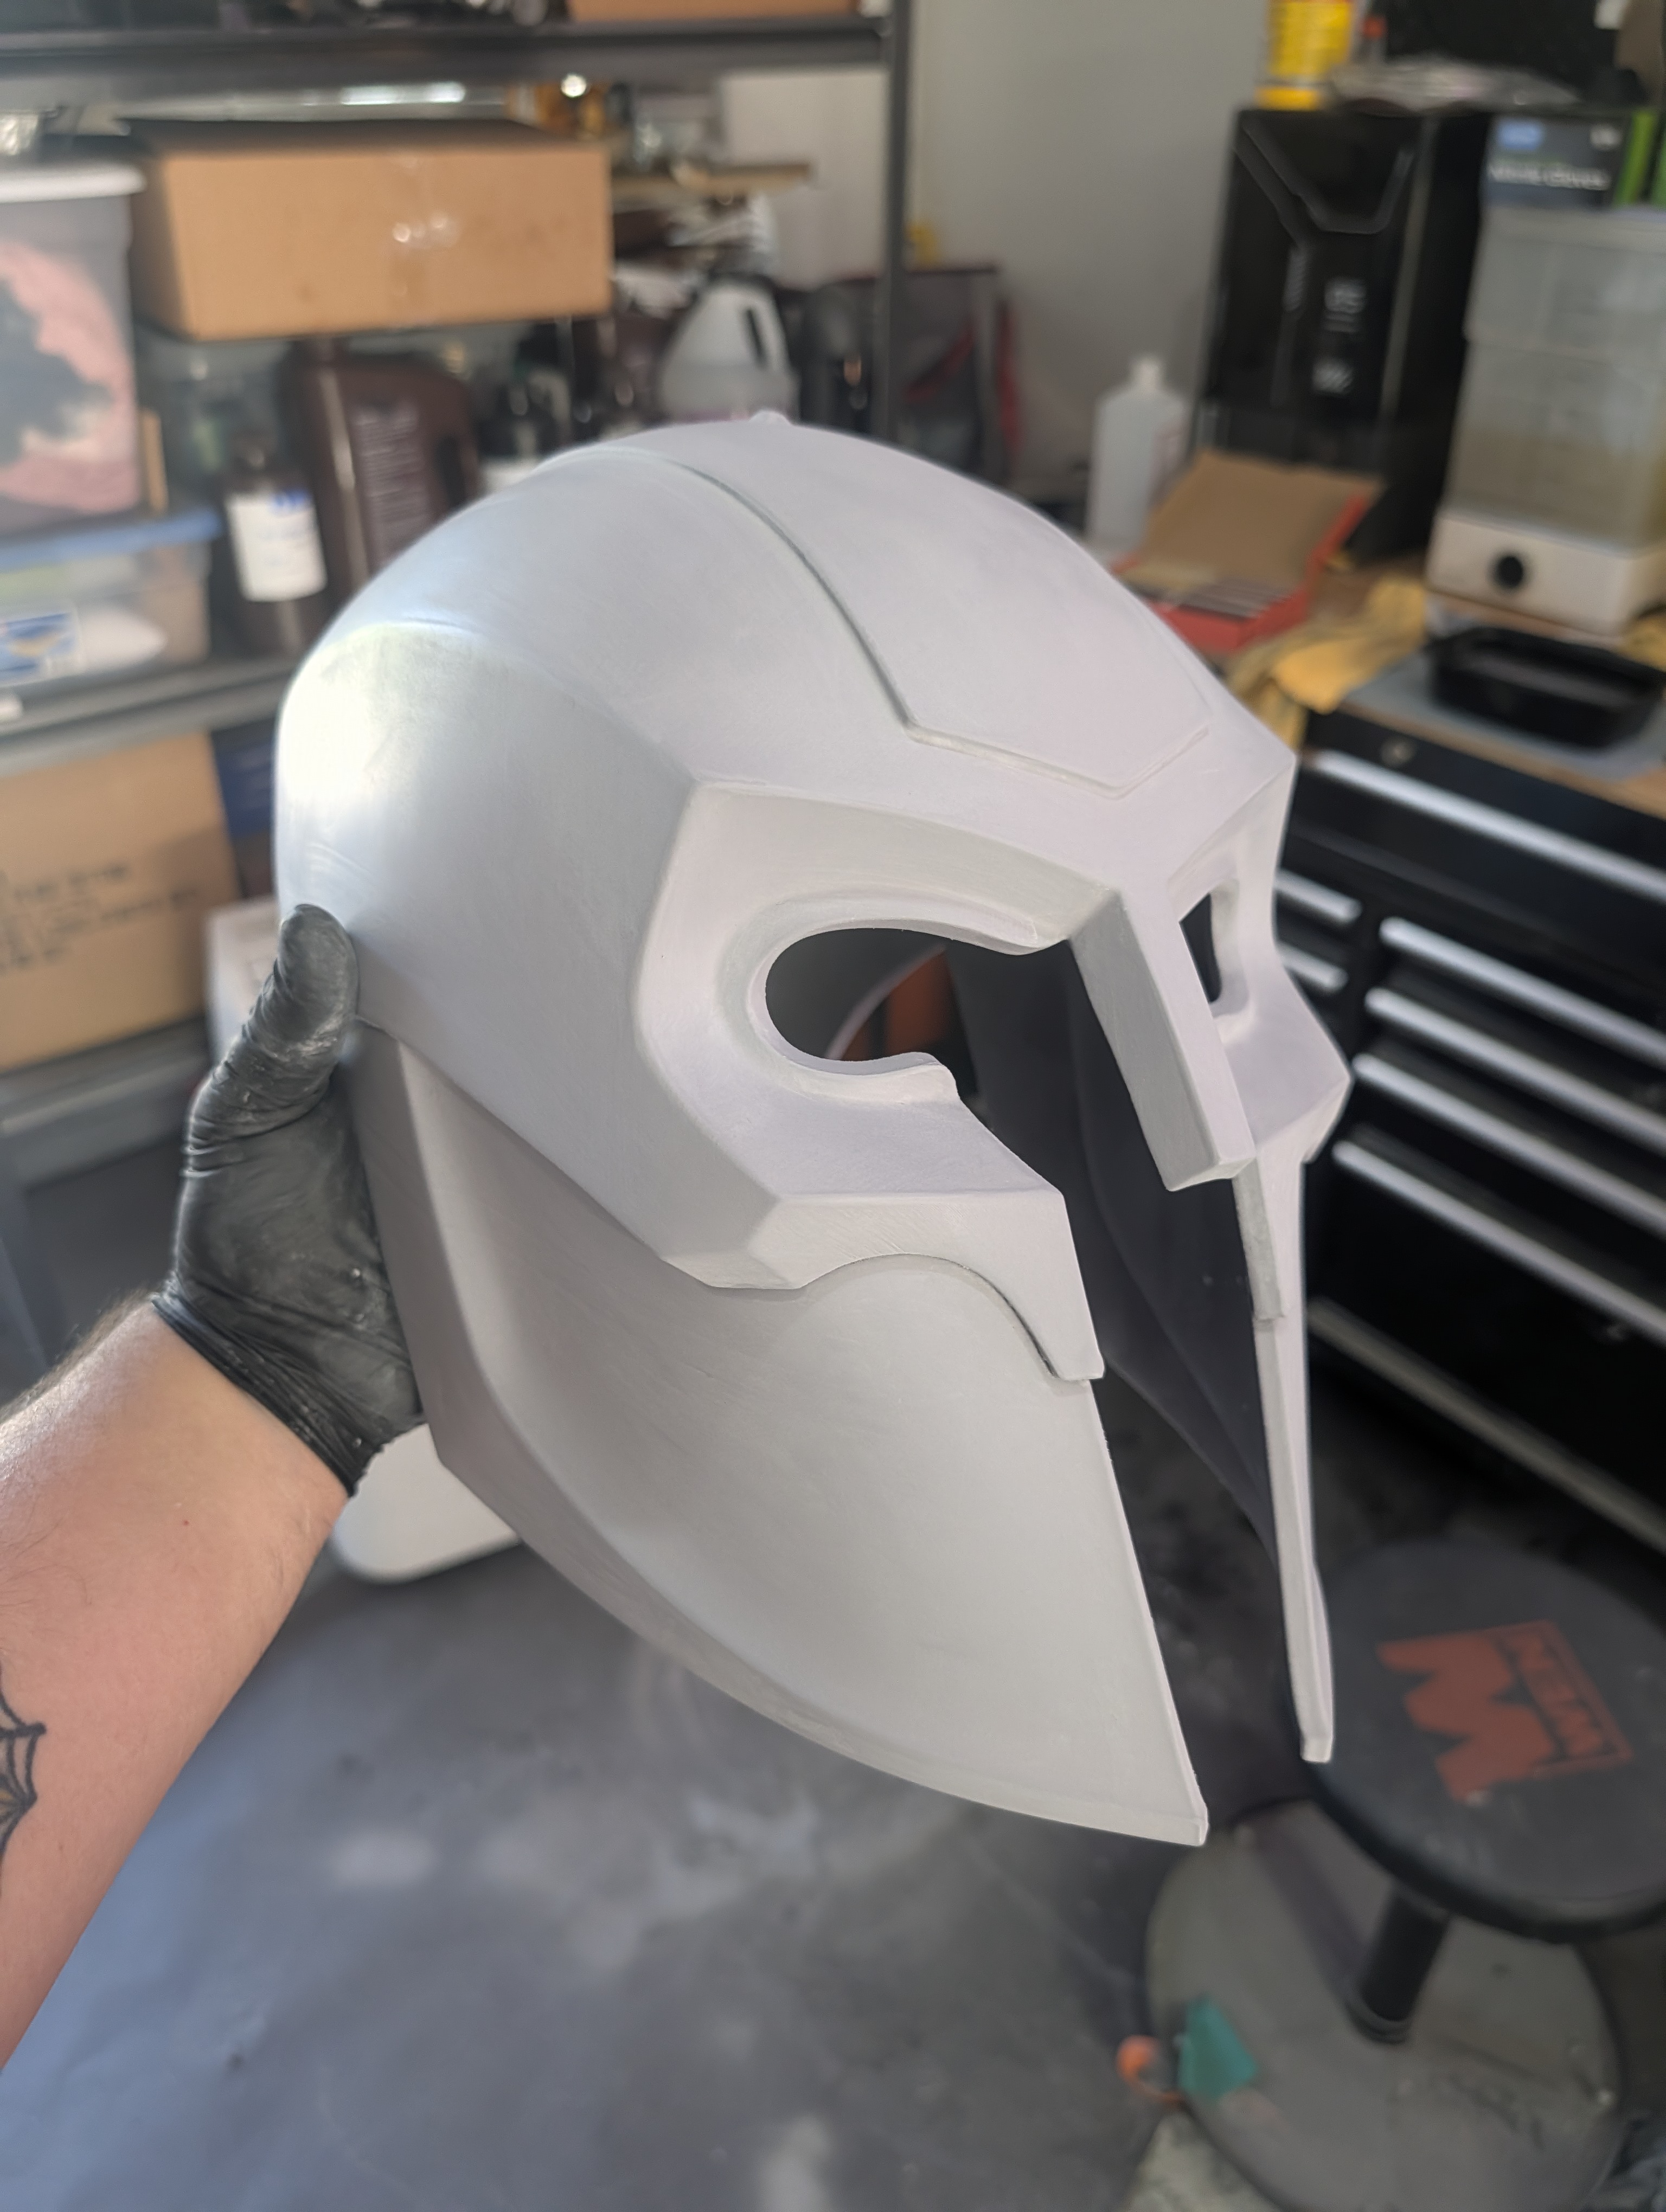
Also, completely unrelated to the actual technique, but I will die on this hill, my garage gym doubled as helmet-drying real estate for most of this build. Improvise, adapt, overcome:
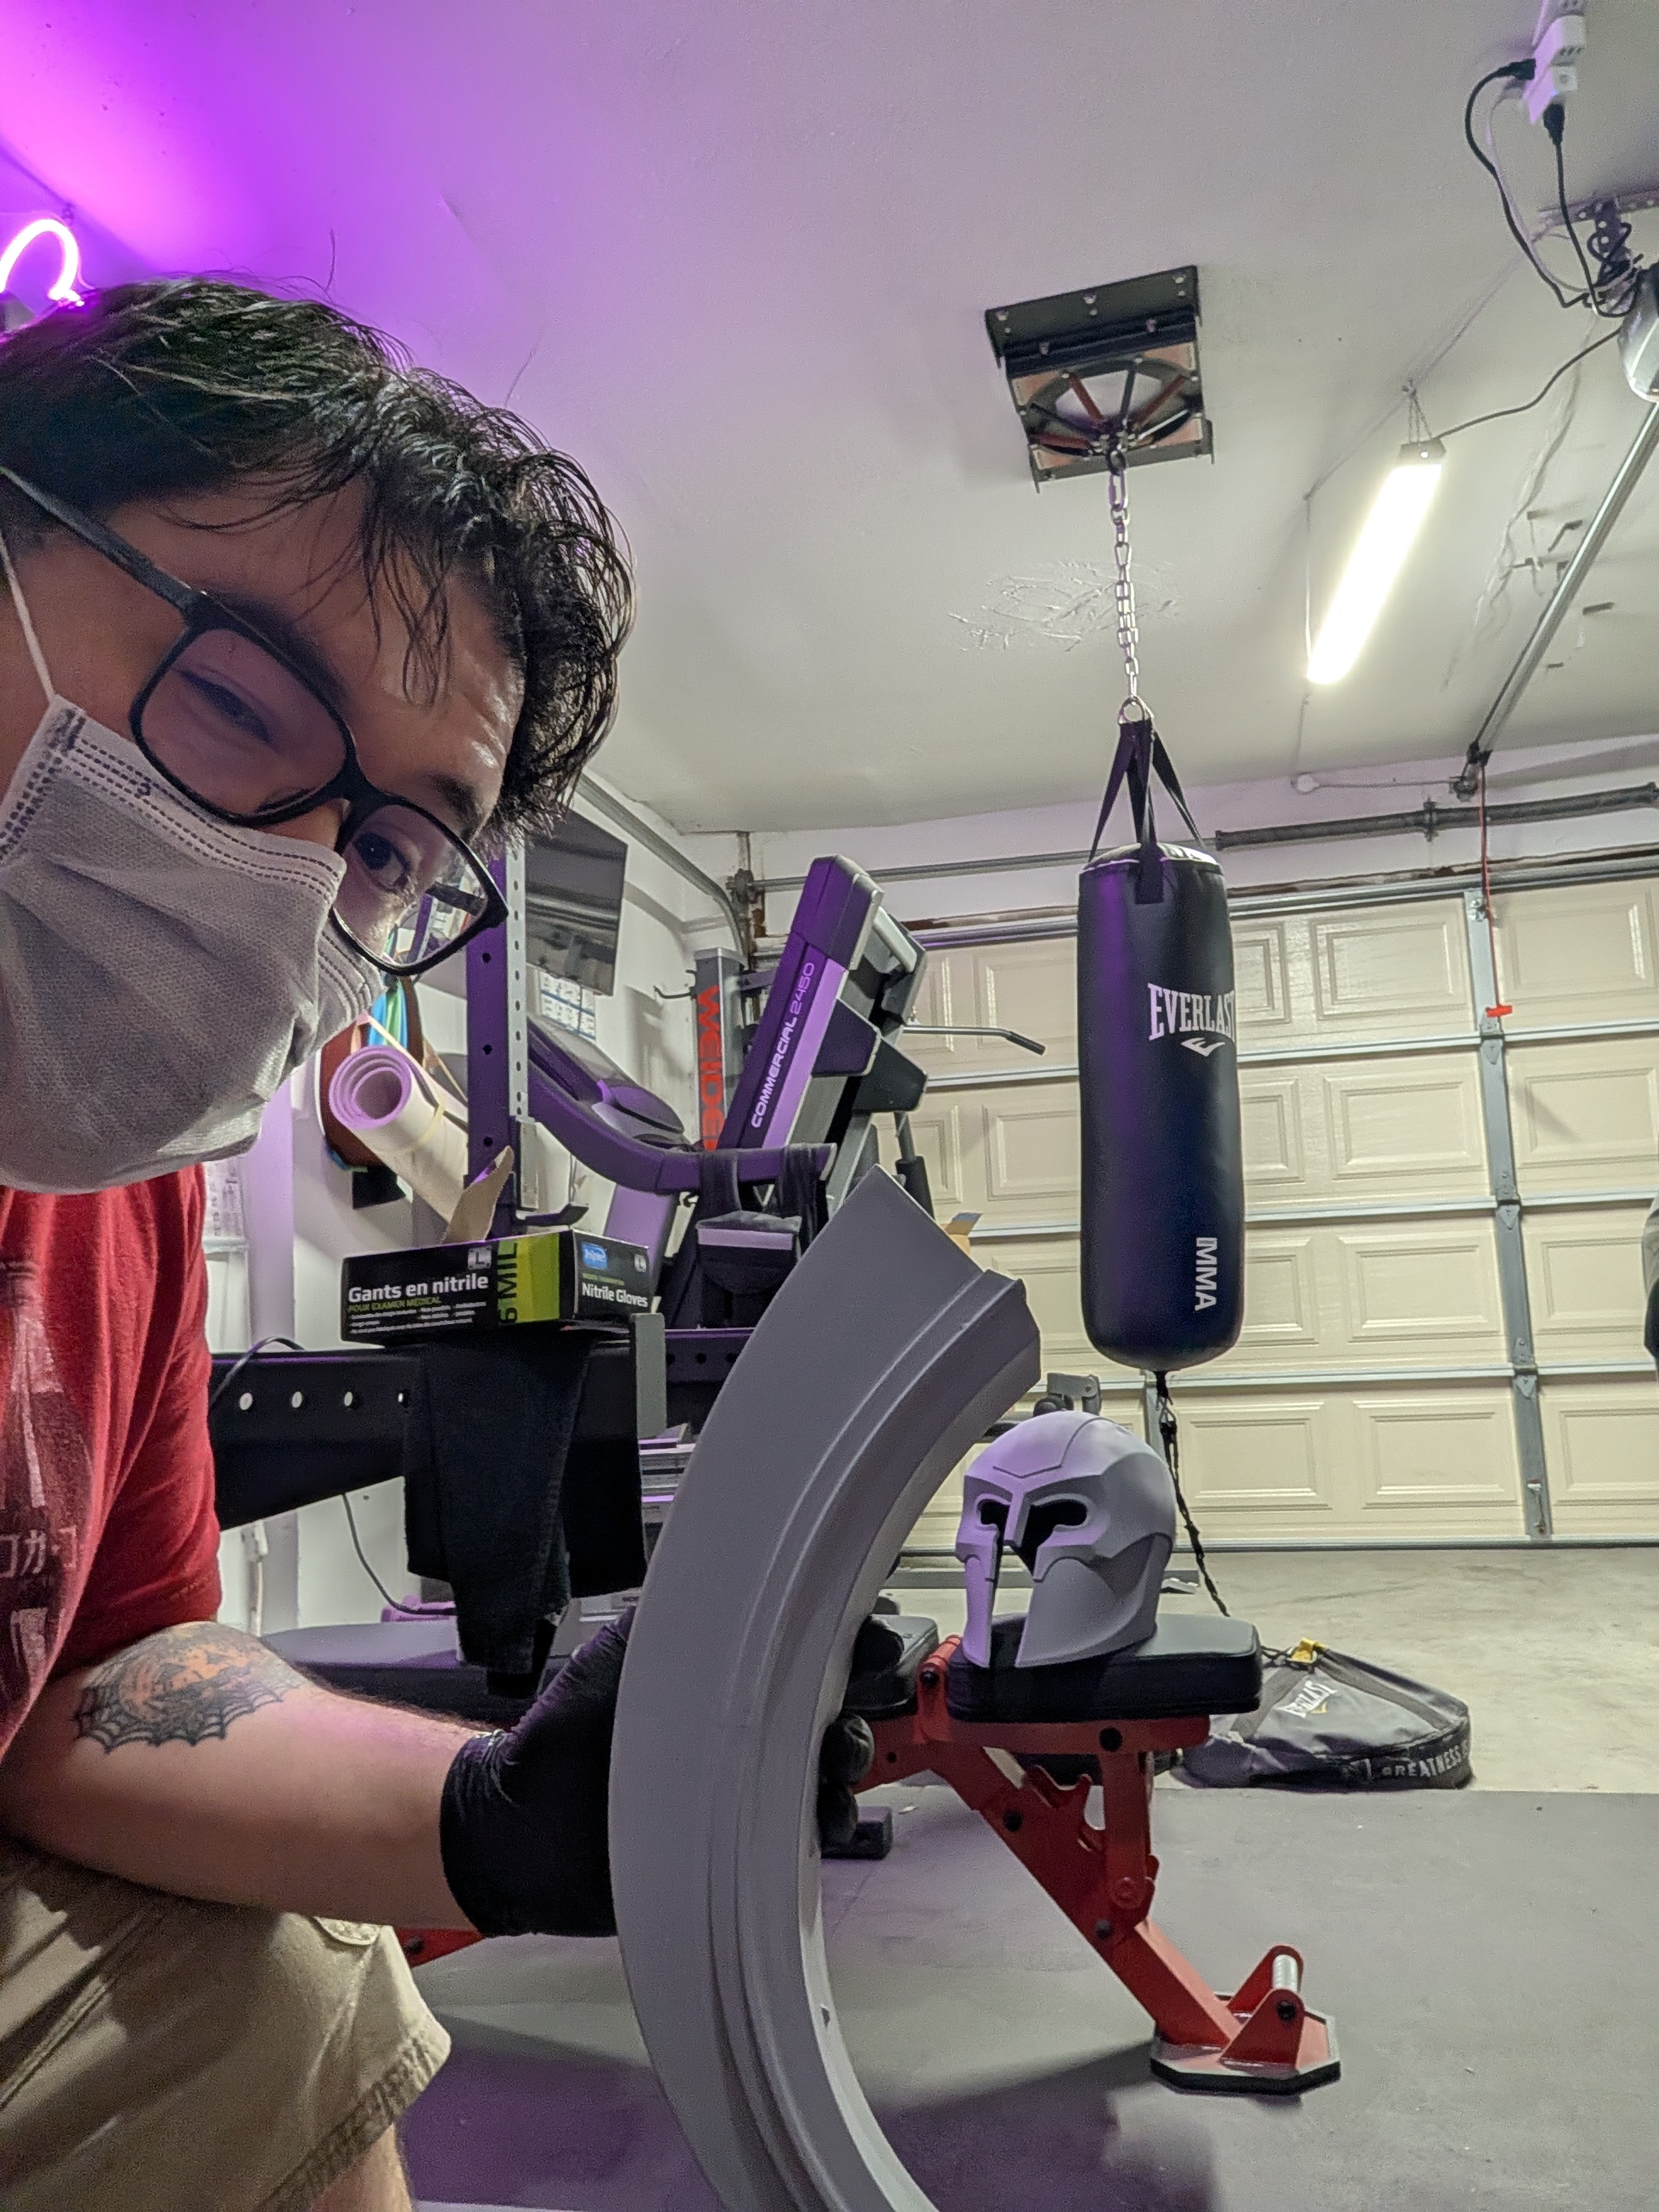
The adjustable bench became an unofficial helmet drying rack. It did not ask for this job. It did the job anyway.
Paint: Base Coat, Gold Details, Clear Coats
Once the surface was finally smooth enough to stop stressing me out, it was paint time. Which, if I'm being honest, is the part of every build I both look forward to and dread in equal measure, because one bad coat can undo weeks of sanding in about four seconds.
Base coat went down first, followed by a satin clear coat to seal and give it that slight depth but also to seal it up. The gold detailing is done with Speedpaint which is water based. It looks a good flat, and sealed surface to adhere to.
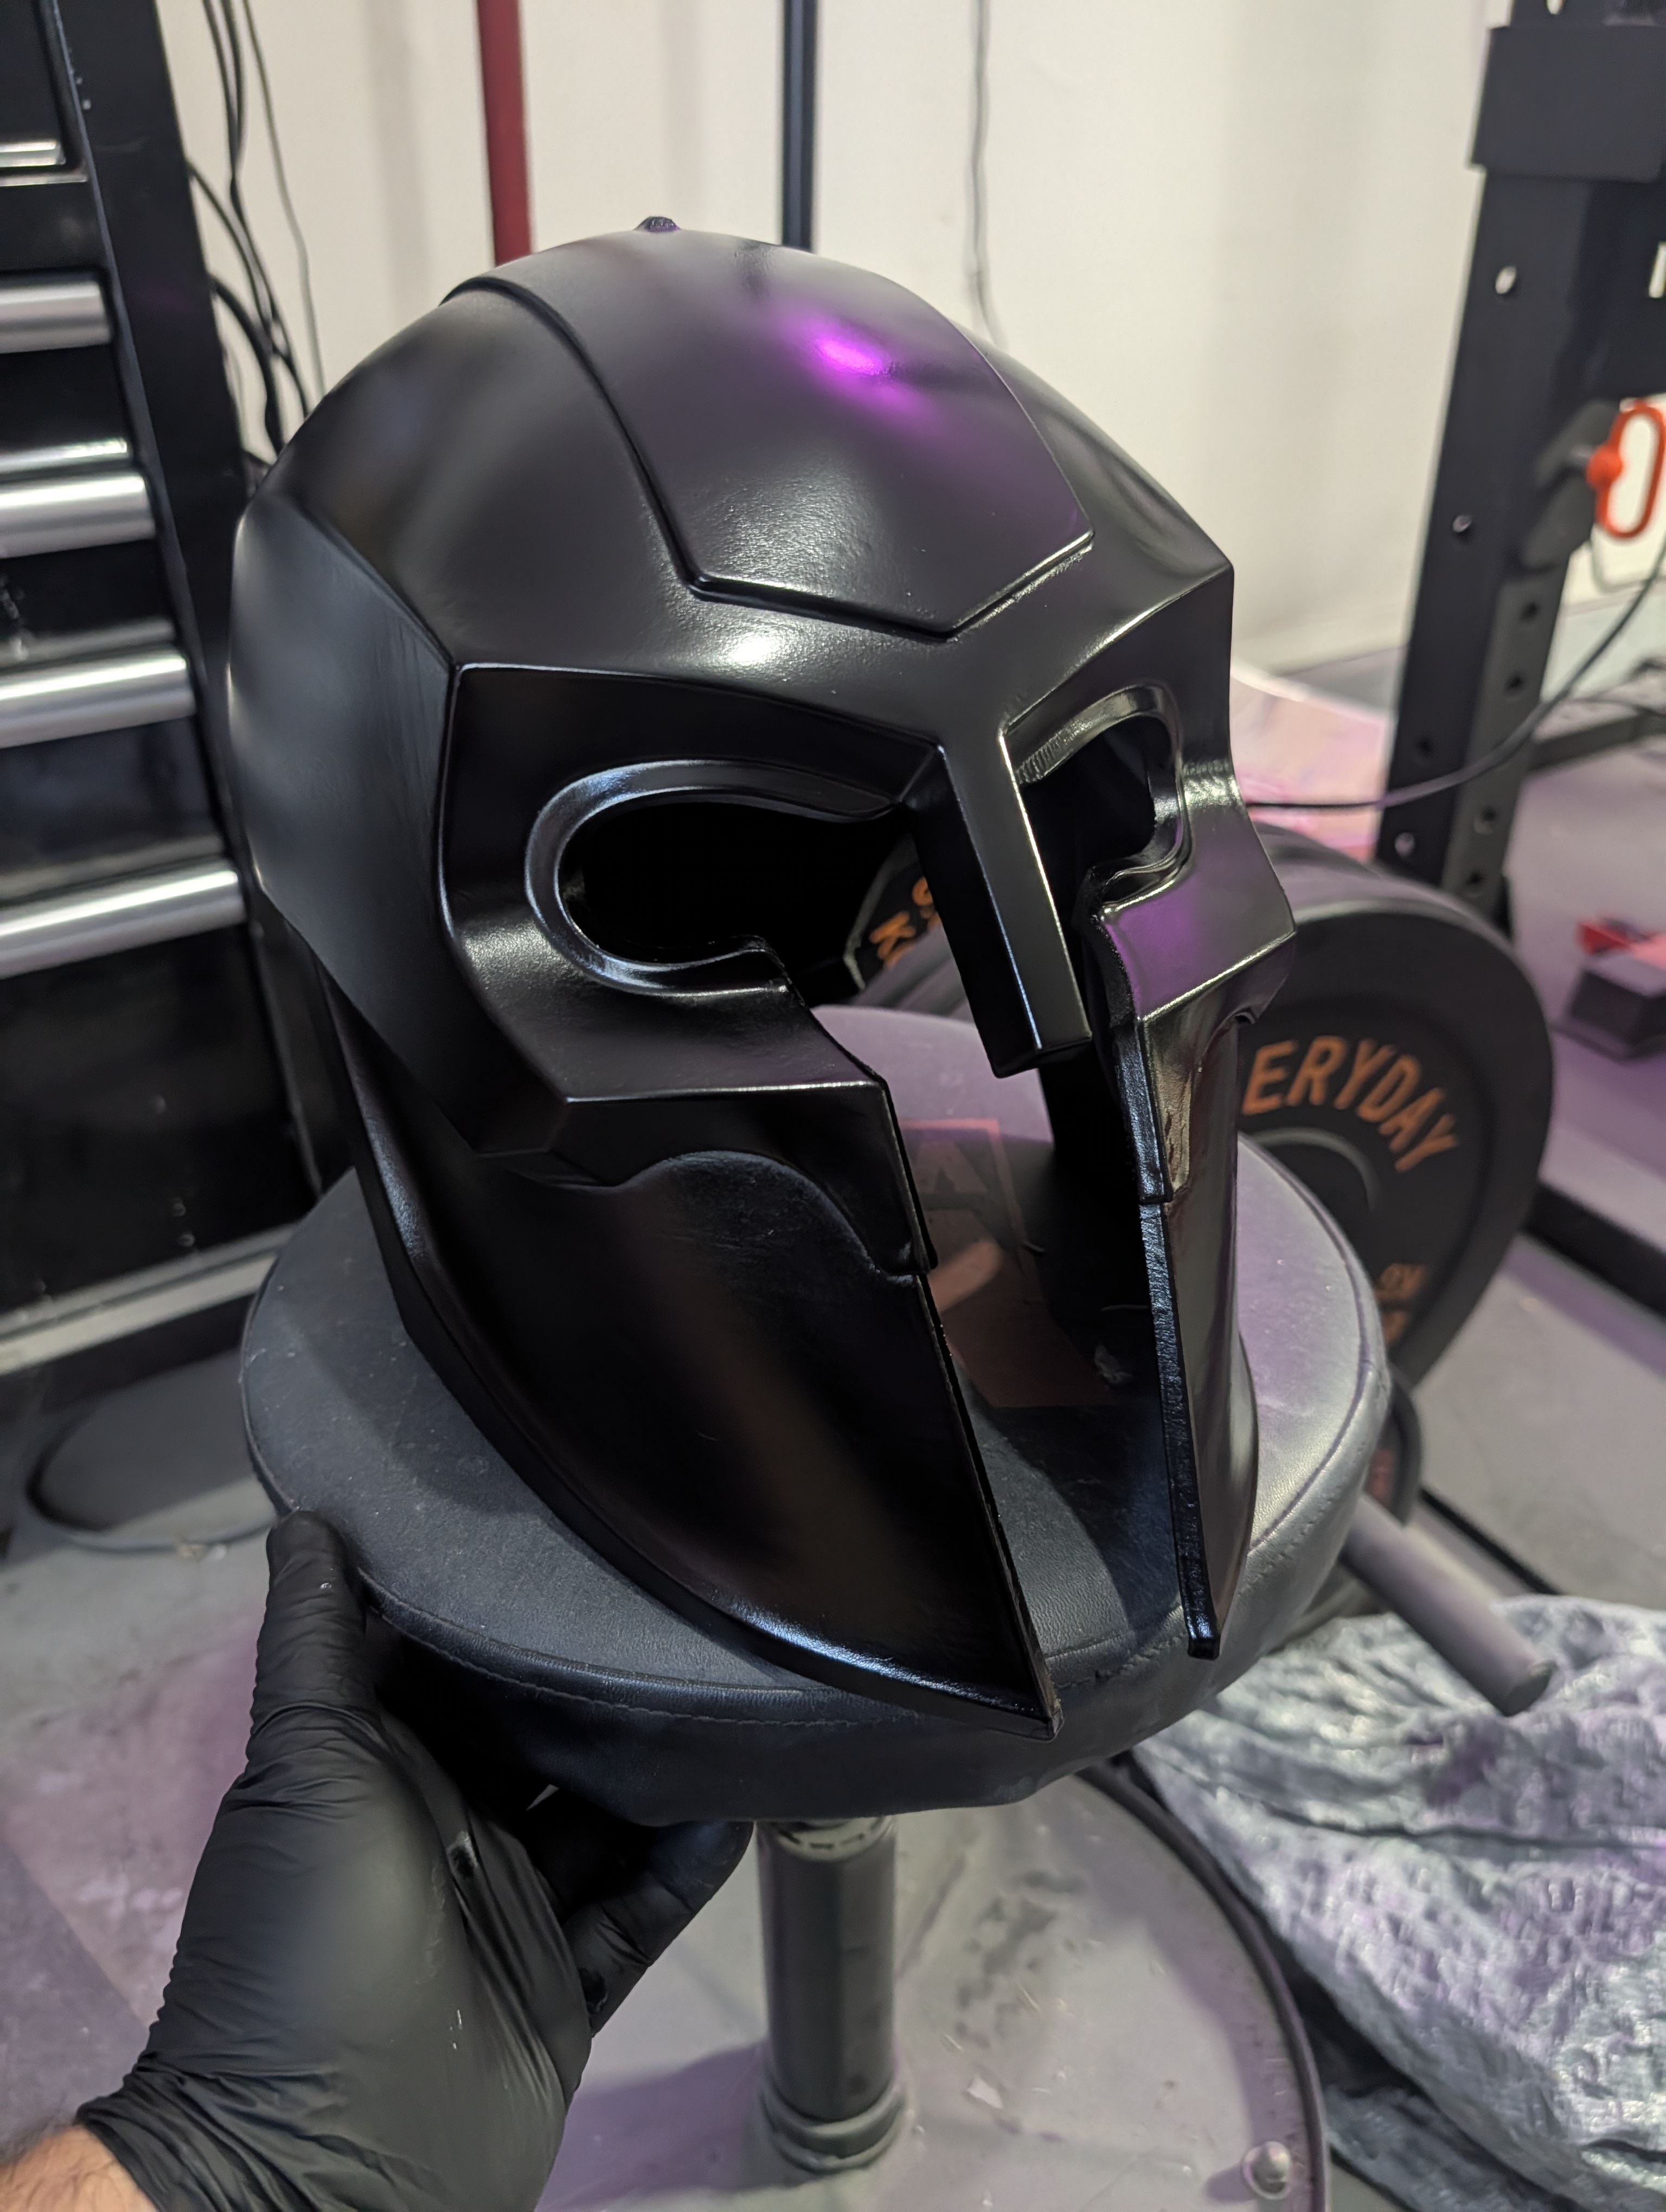
Nitrile gloves, wet clear coat, light aura farming
The gold hardware that makes up the pony tail, the spine and the vertebra-like bone pieces that run along the base of the crest got painted separately on a scrap of cardboard in the garage, which is a very glamorous sentence to write about a helmet based on a Bronze Age king.
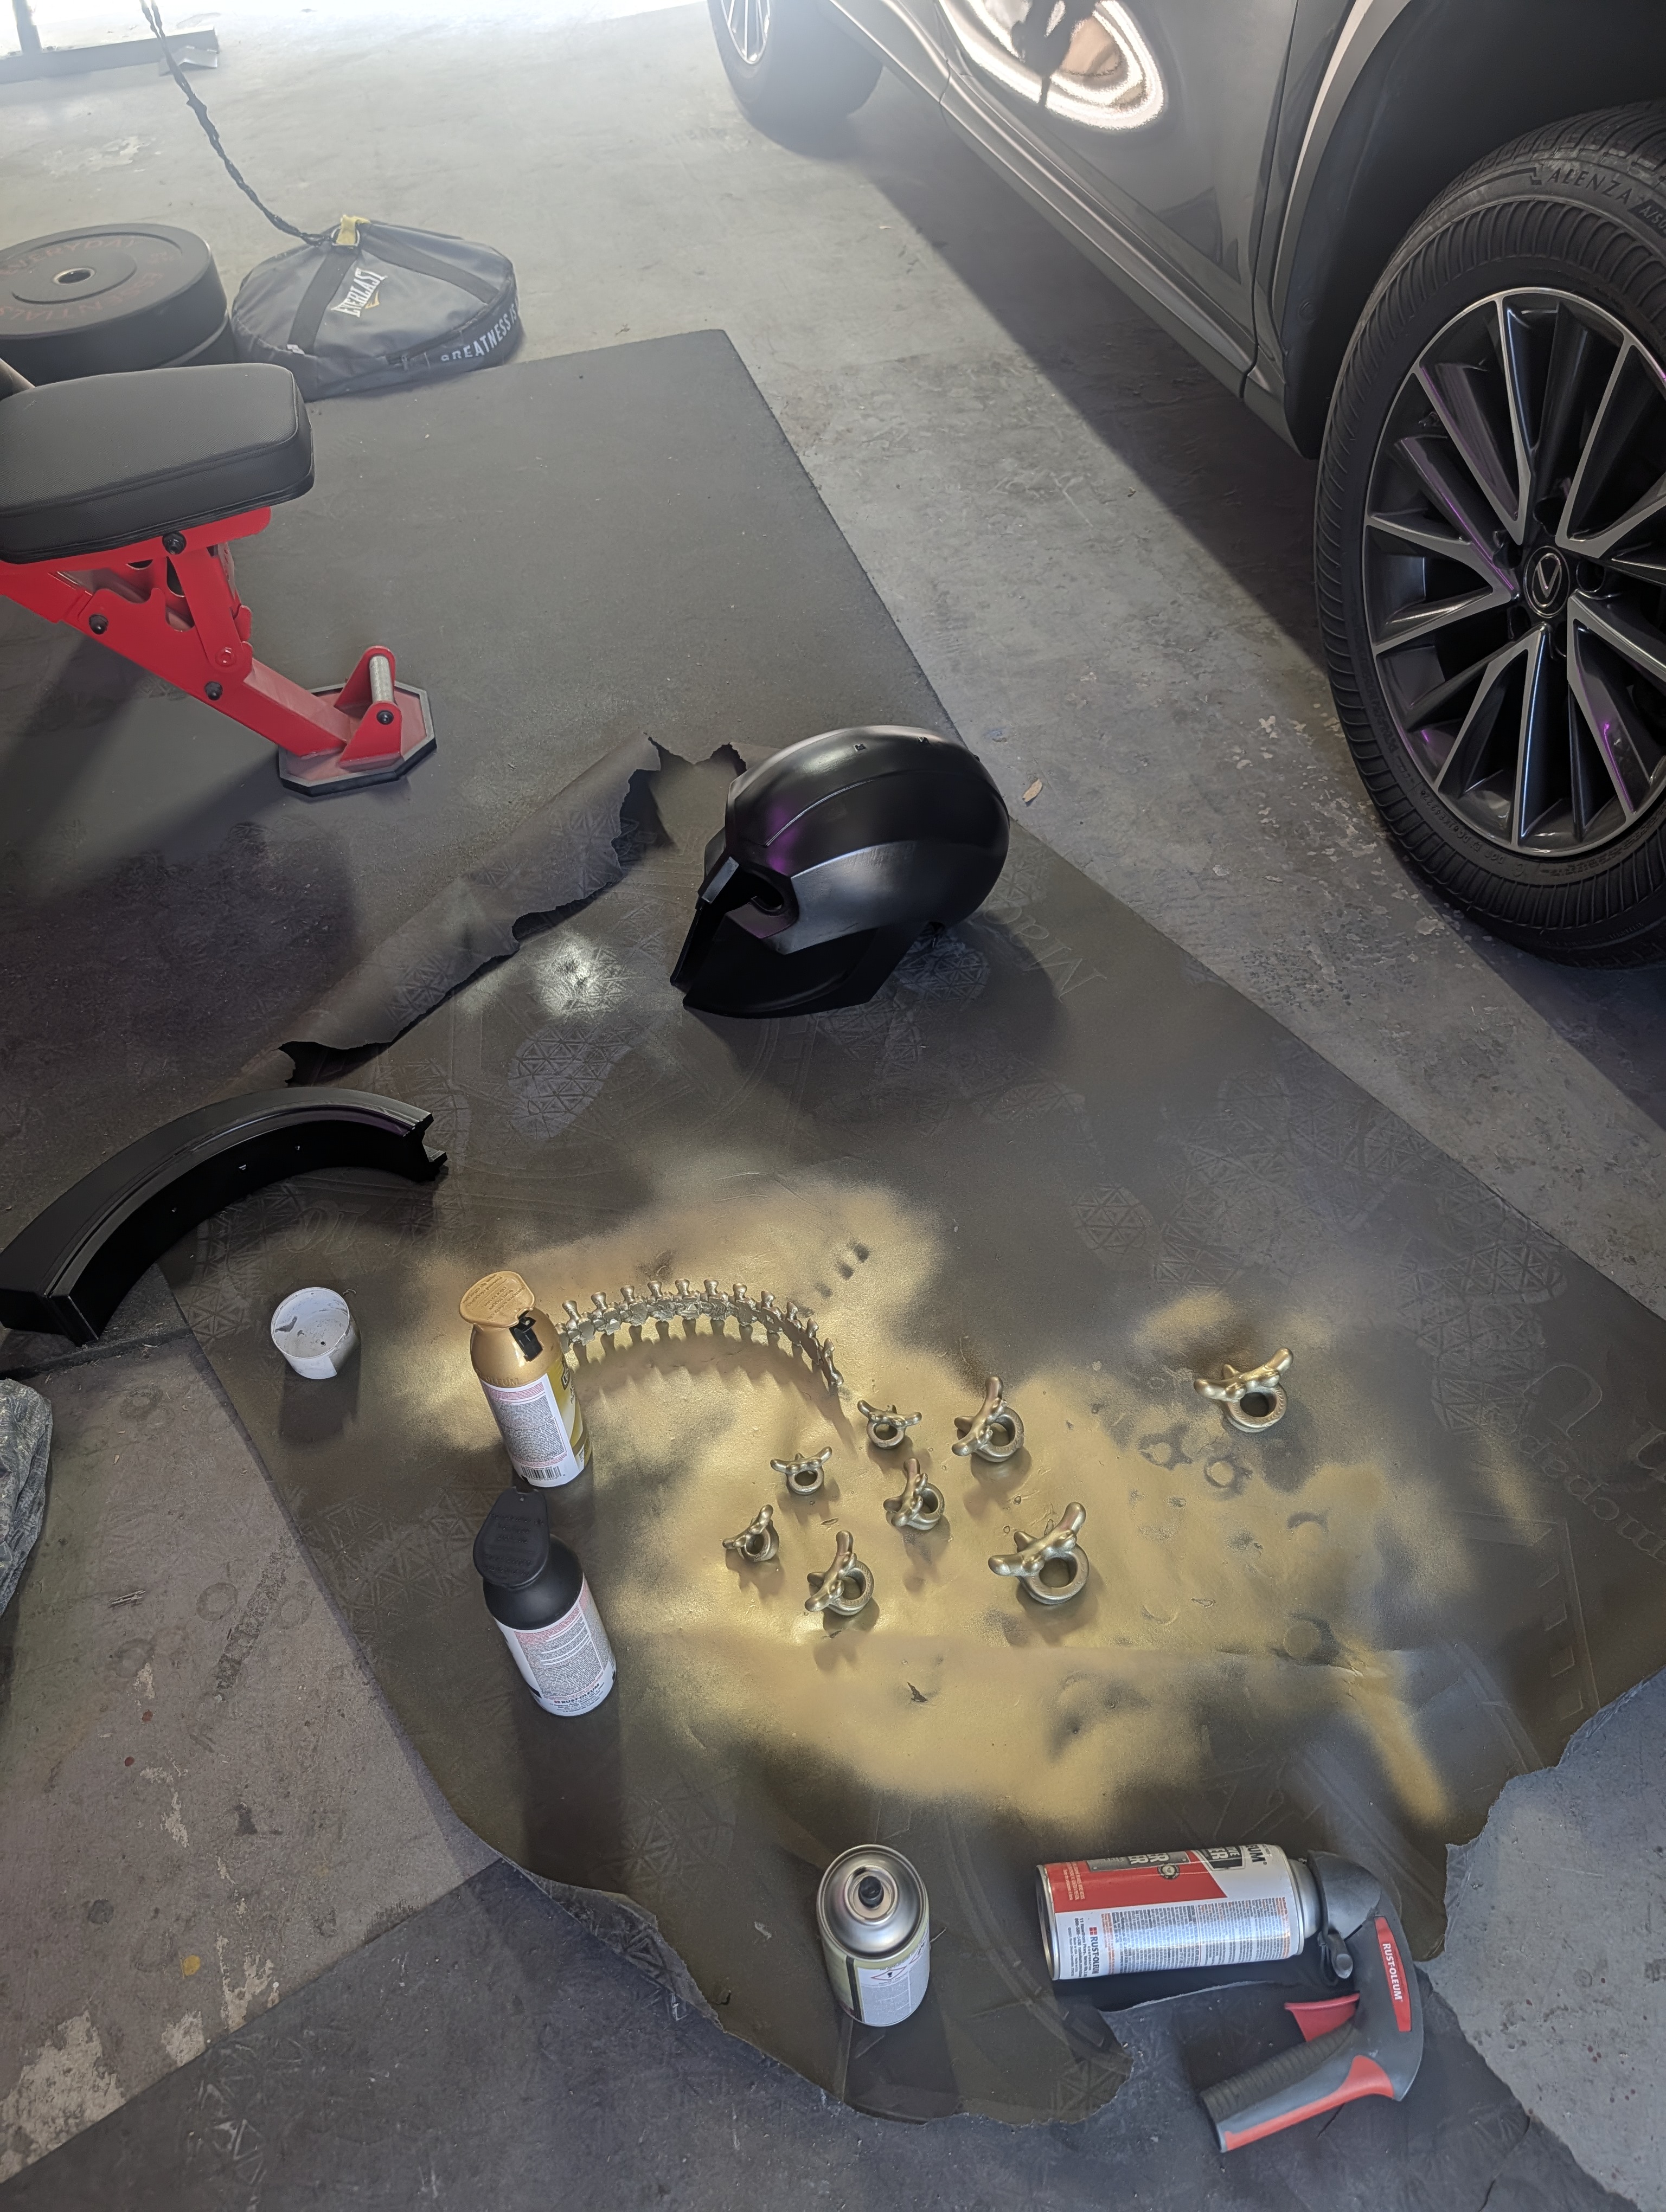
Every single one of those little vertebra pieces got spray-painted gold. There are a lot of them. I do not want to count them again.
Then came the actual gold detail work hand-painting every panel edge, every seam line. Which is somehow both the most tedious and most satisfying part of the entire process. I play a lot of DnD so i am very used to printing and painting miniatures. Also pictured: my actual workstation setup, because apparently I cannot paint tiny gold lines without Dropout's Game Changer playing in the background and a bowl of chips within arm's reach. No notes, this is peak productivity.
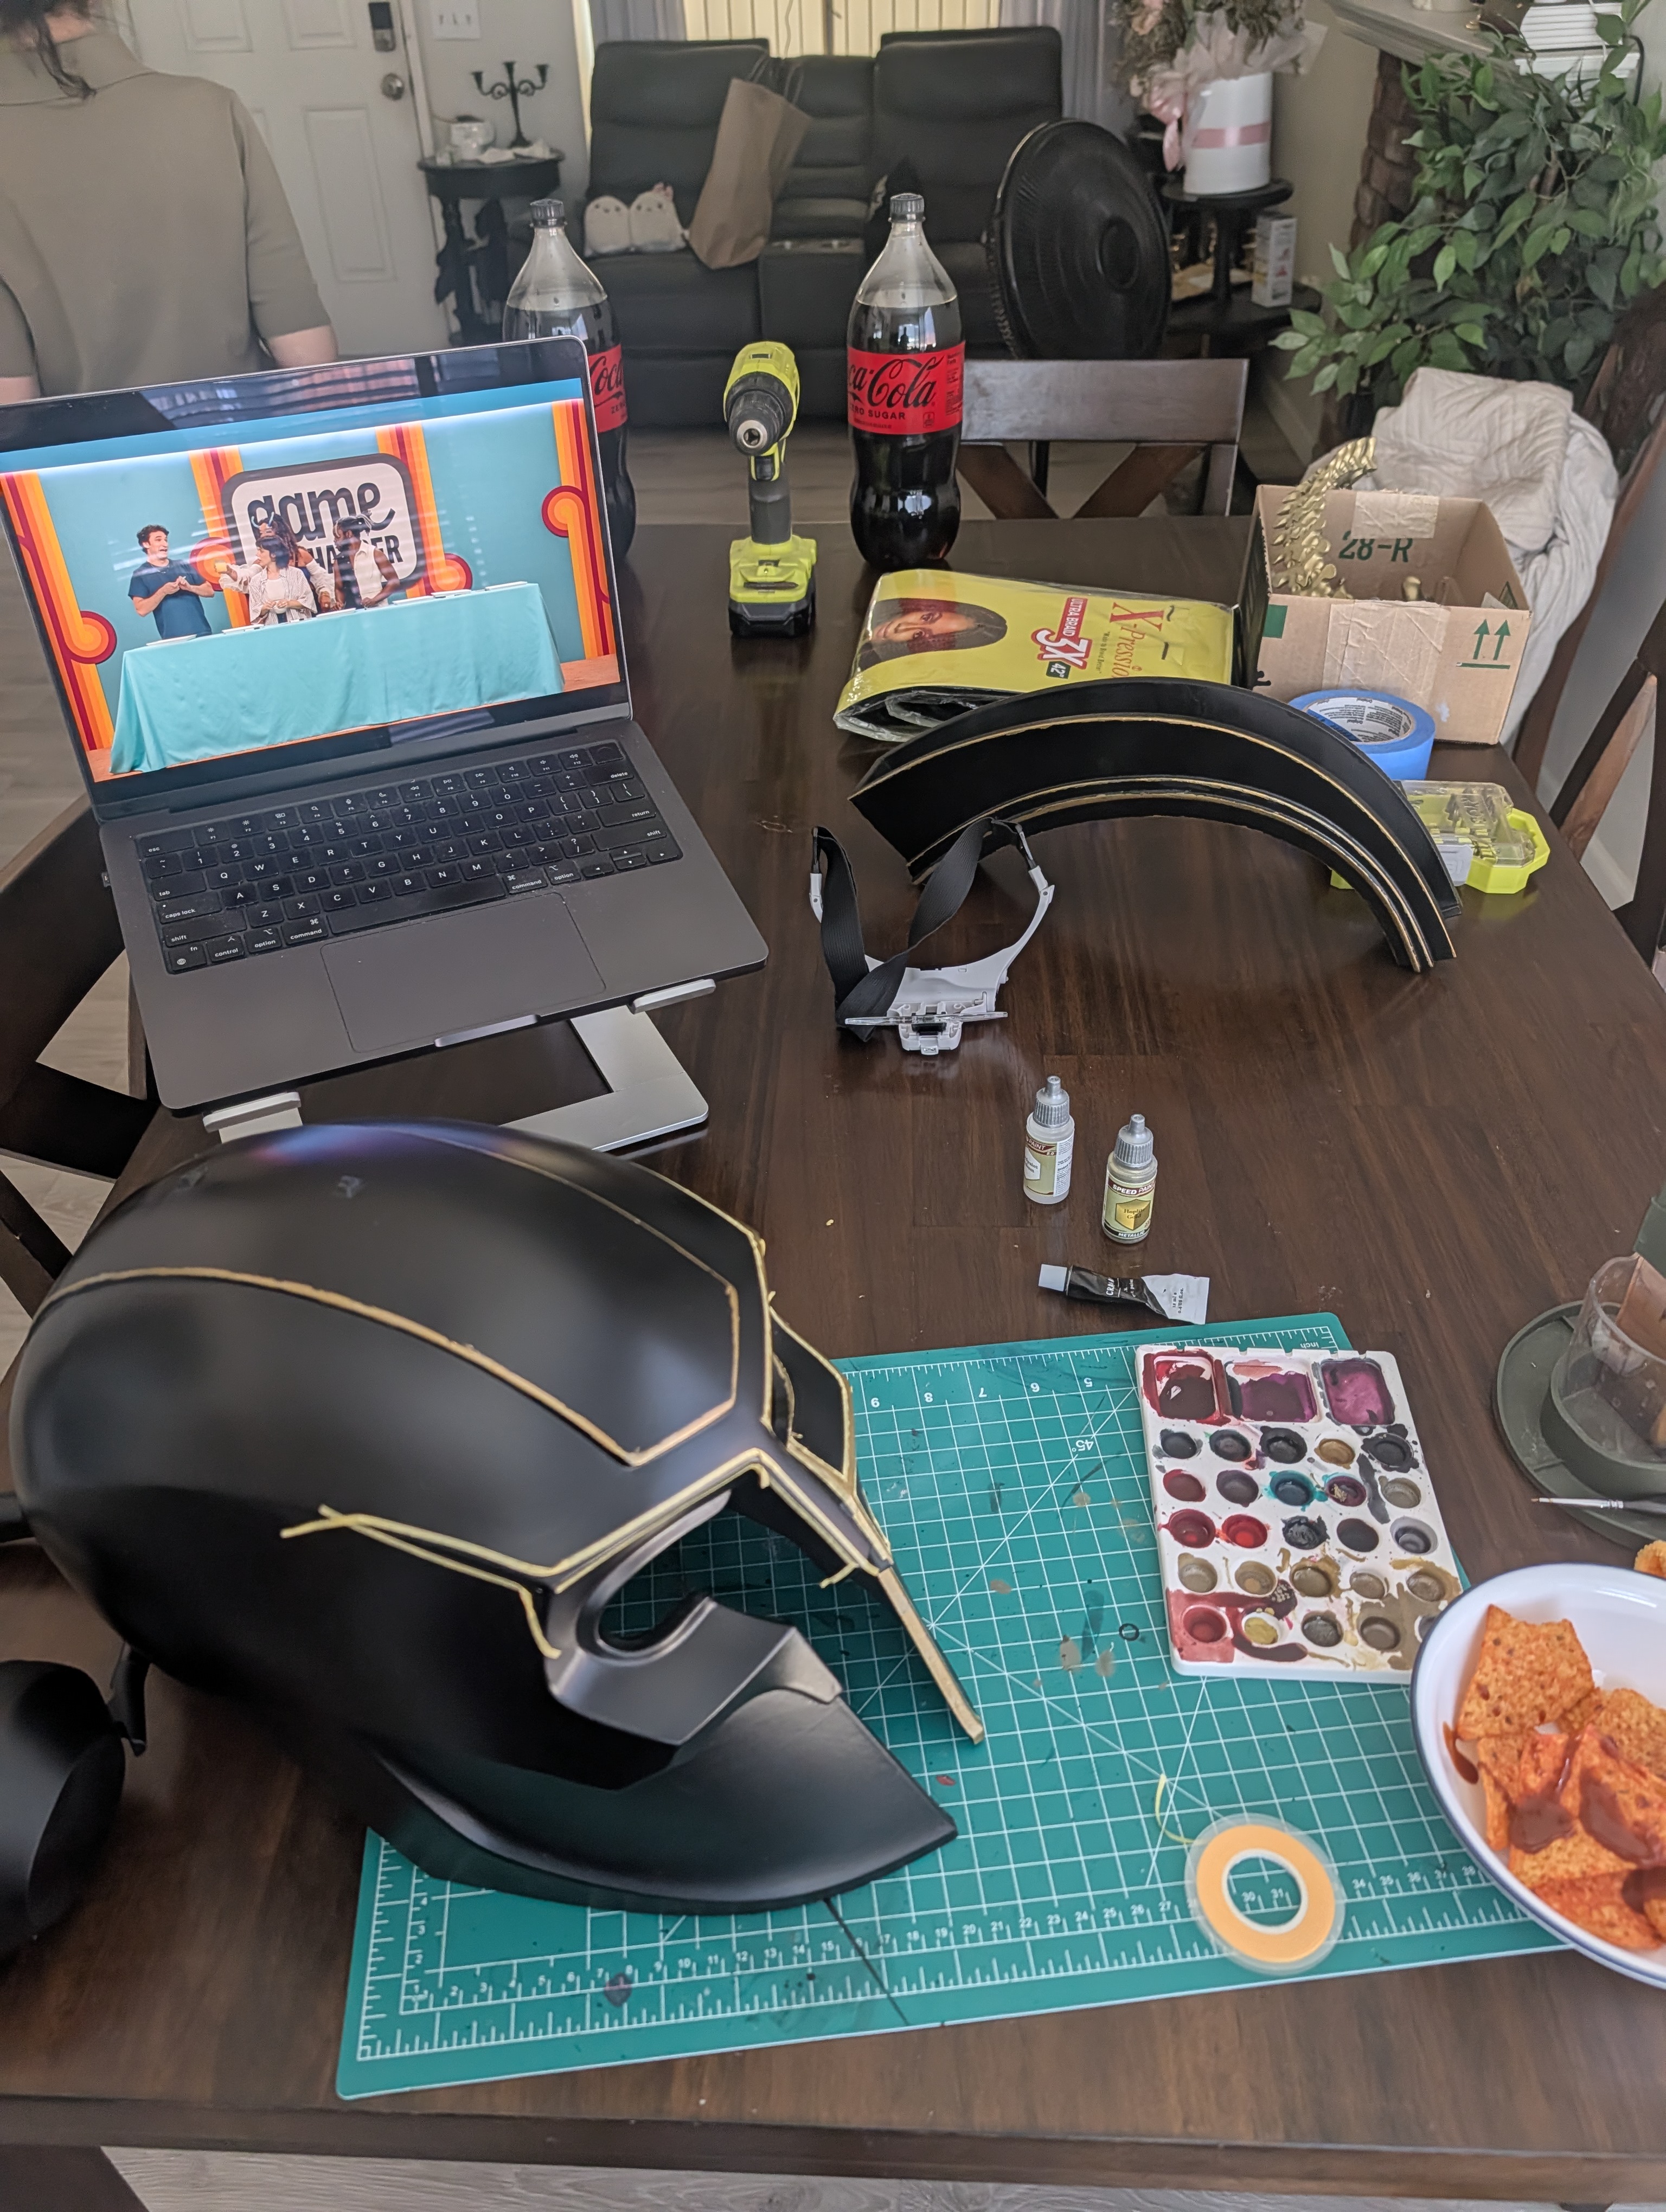
The unofficial fourth ingredient in every cosplay build: snacks and something dumb playing in the background.
First test-fit with the gold trim actually on:
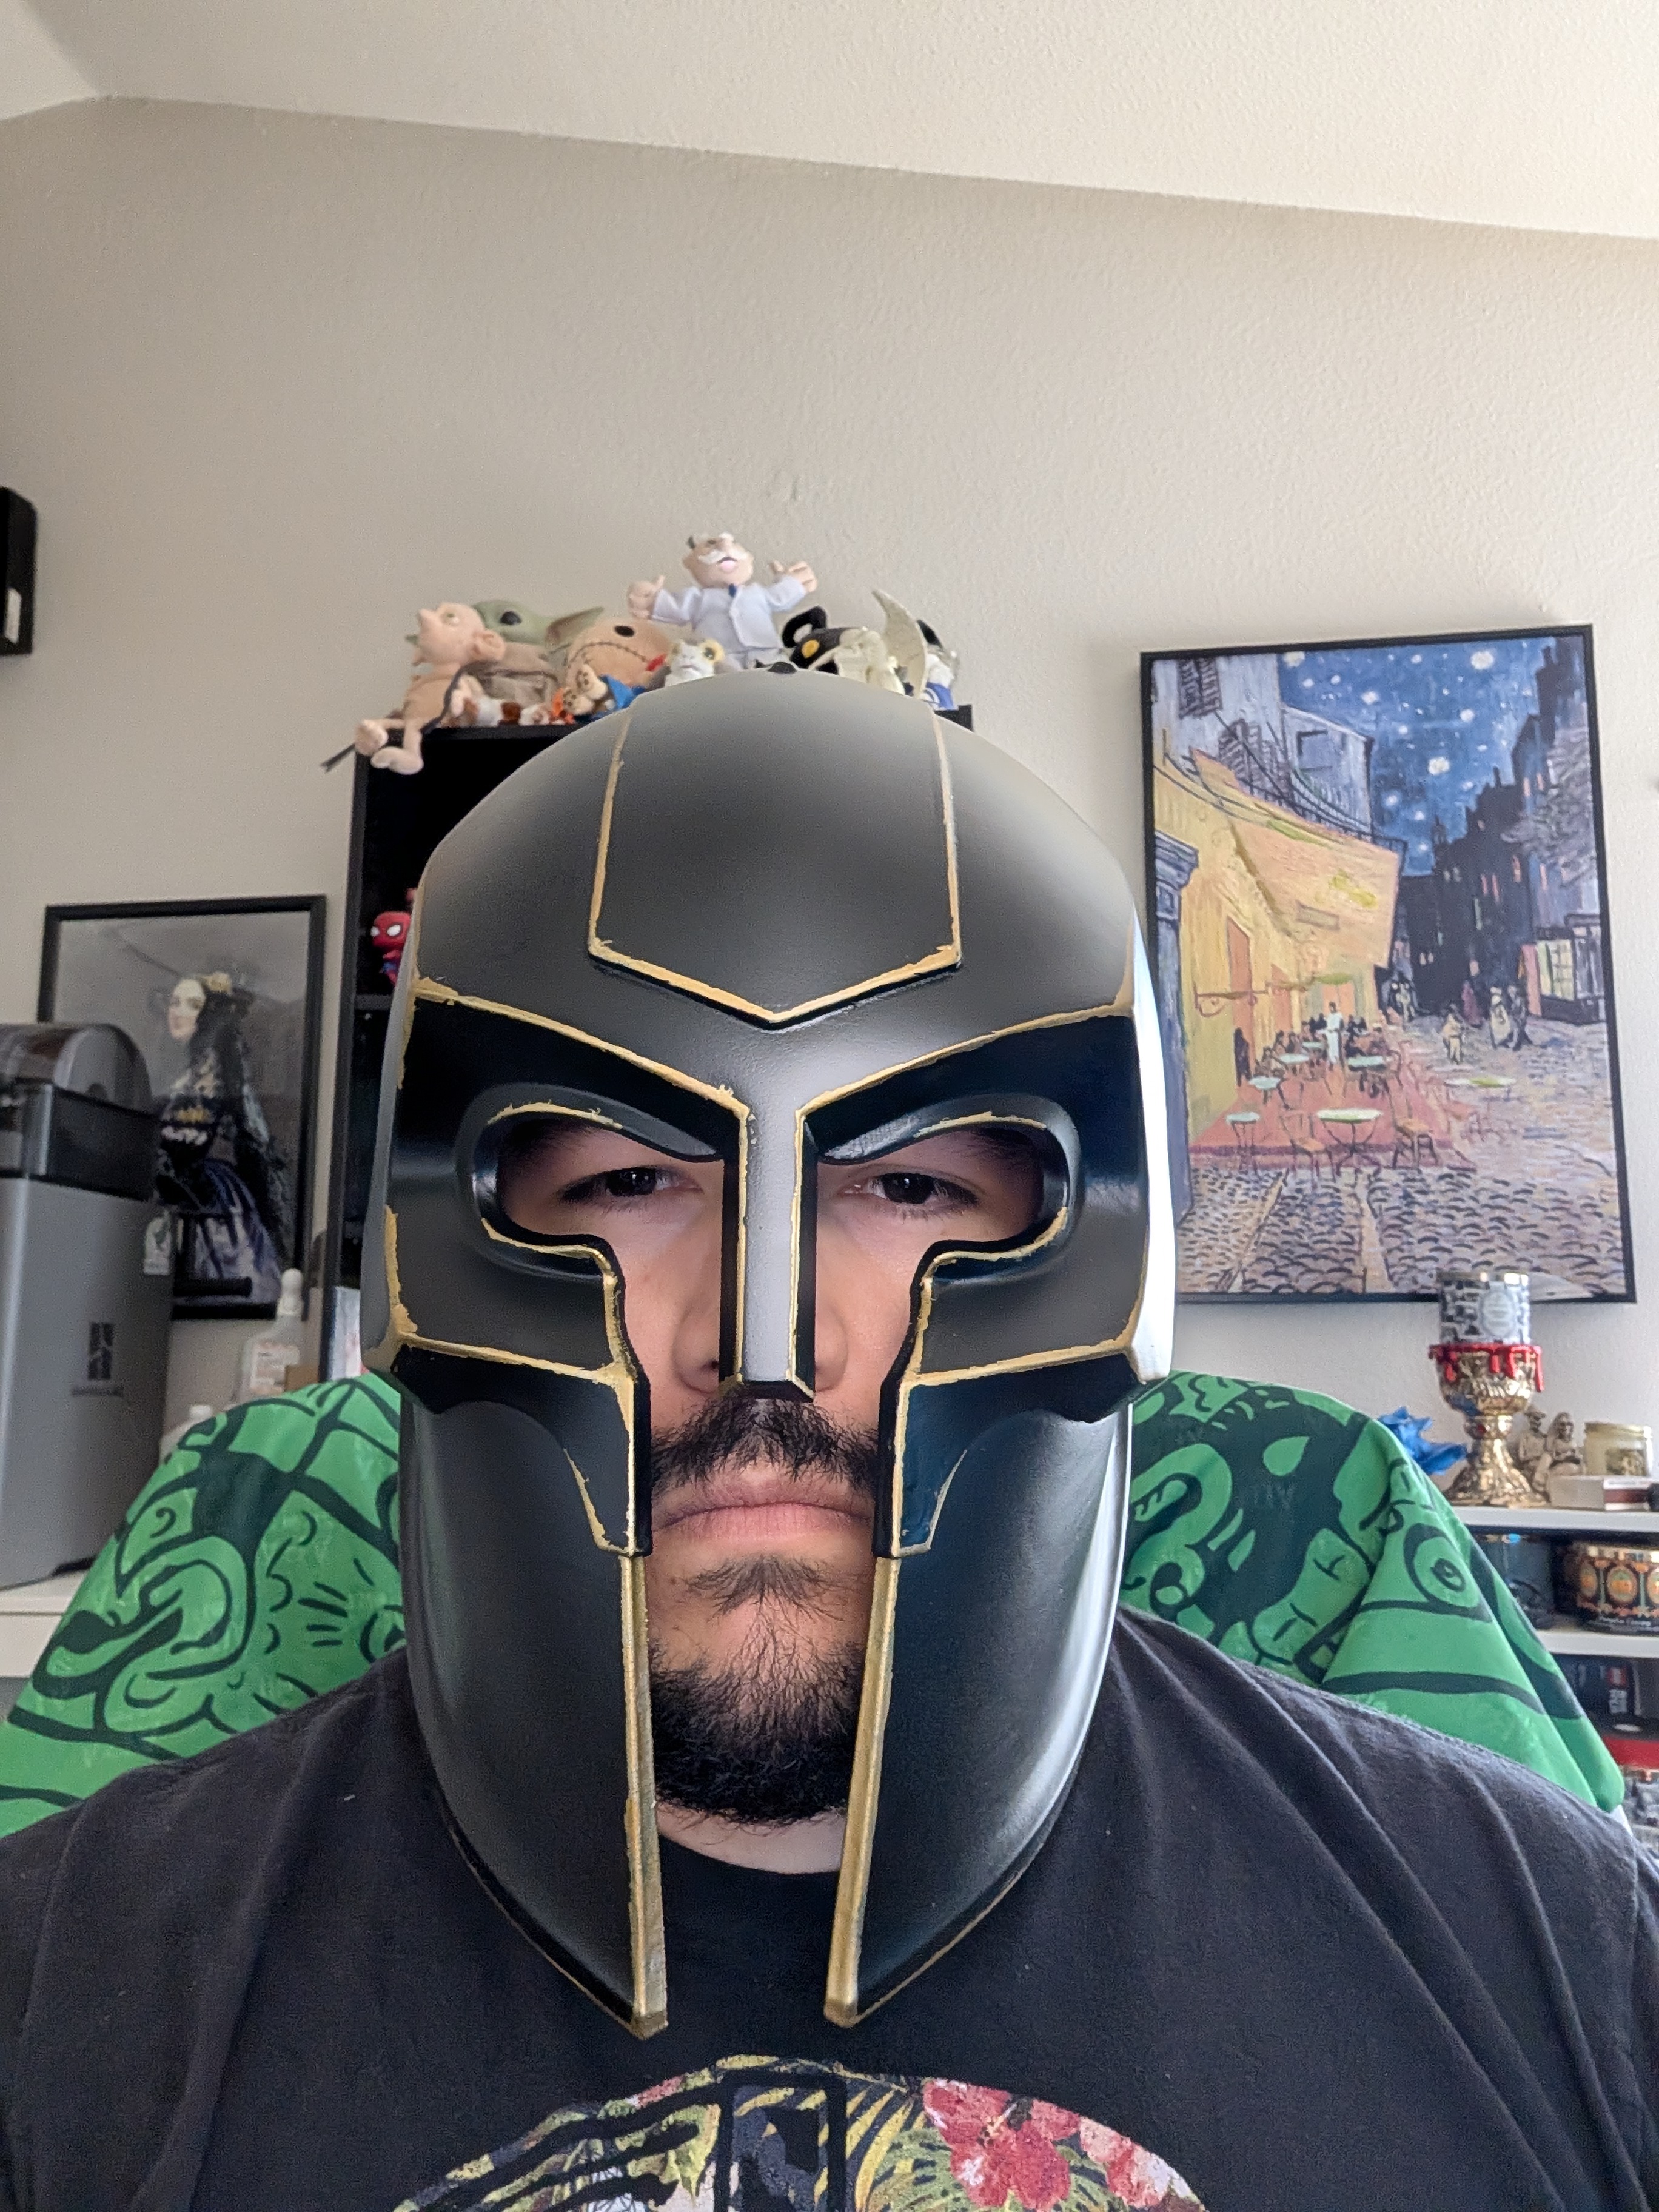
This is the first moment it looked like the character and not like a craft project. I stared at this photo for way too long.
Interior Padding (Because Comfort Matters, Even for Kings)
Before I got anywhere near the hair, I lined the interior with padding because as cool as this helmet is, none of it matters if I can't actually wear the thing for more than ten minutes without regretting every choice that led me here. Not the most photogenic step, but arguably the most important one if you ever plan to wear what you build. I used a universal kit of motorcyle helmet pads + custom cut EVA foam blocks to make sure the helmet didnt move around so much.
The Crest: Hair, Chaos, and a Small Amount of Suffering
Okay. The hair. Let's talk about the hair, because this is where the build absolutely tested my patience and made me consider scrapping the whole thing altogether. I wanted to use real/fake real hair. I was not interested in using broom bristles, hundreds of tiny pieces of plastic etc etc. I set out to test myself on making this helmet as screen accurate as possible.
The gold "spine" of vertebra-shaped pieces got glued along the base of the crest first, giving the mohawk-style plume something to visually grow out of. What I forget to mention was that prior to adding the hair, I actually epoxied a 10" piece of aluminium wire that has 1/4" diameter. This acted as as armature extending out from the back of the crest. This gave the pony tail some form, and allowed me to easily mount the vertebrae pieces as needed.
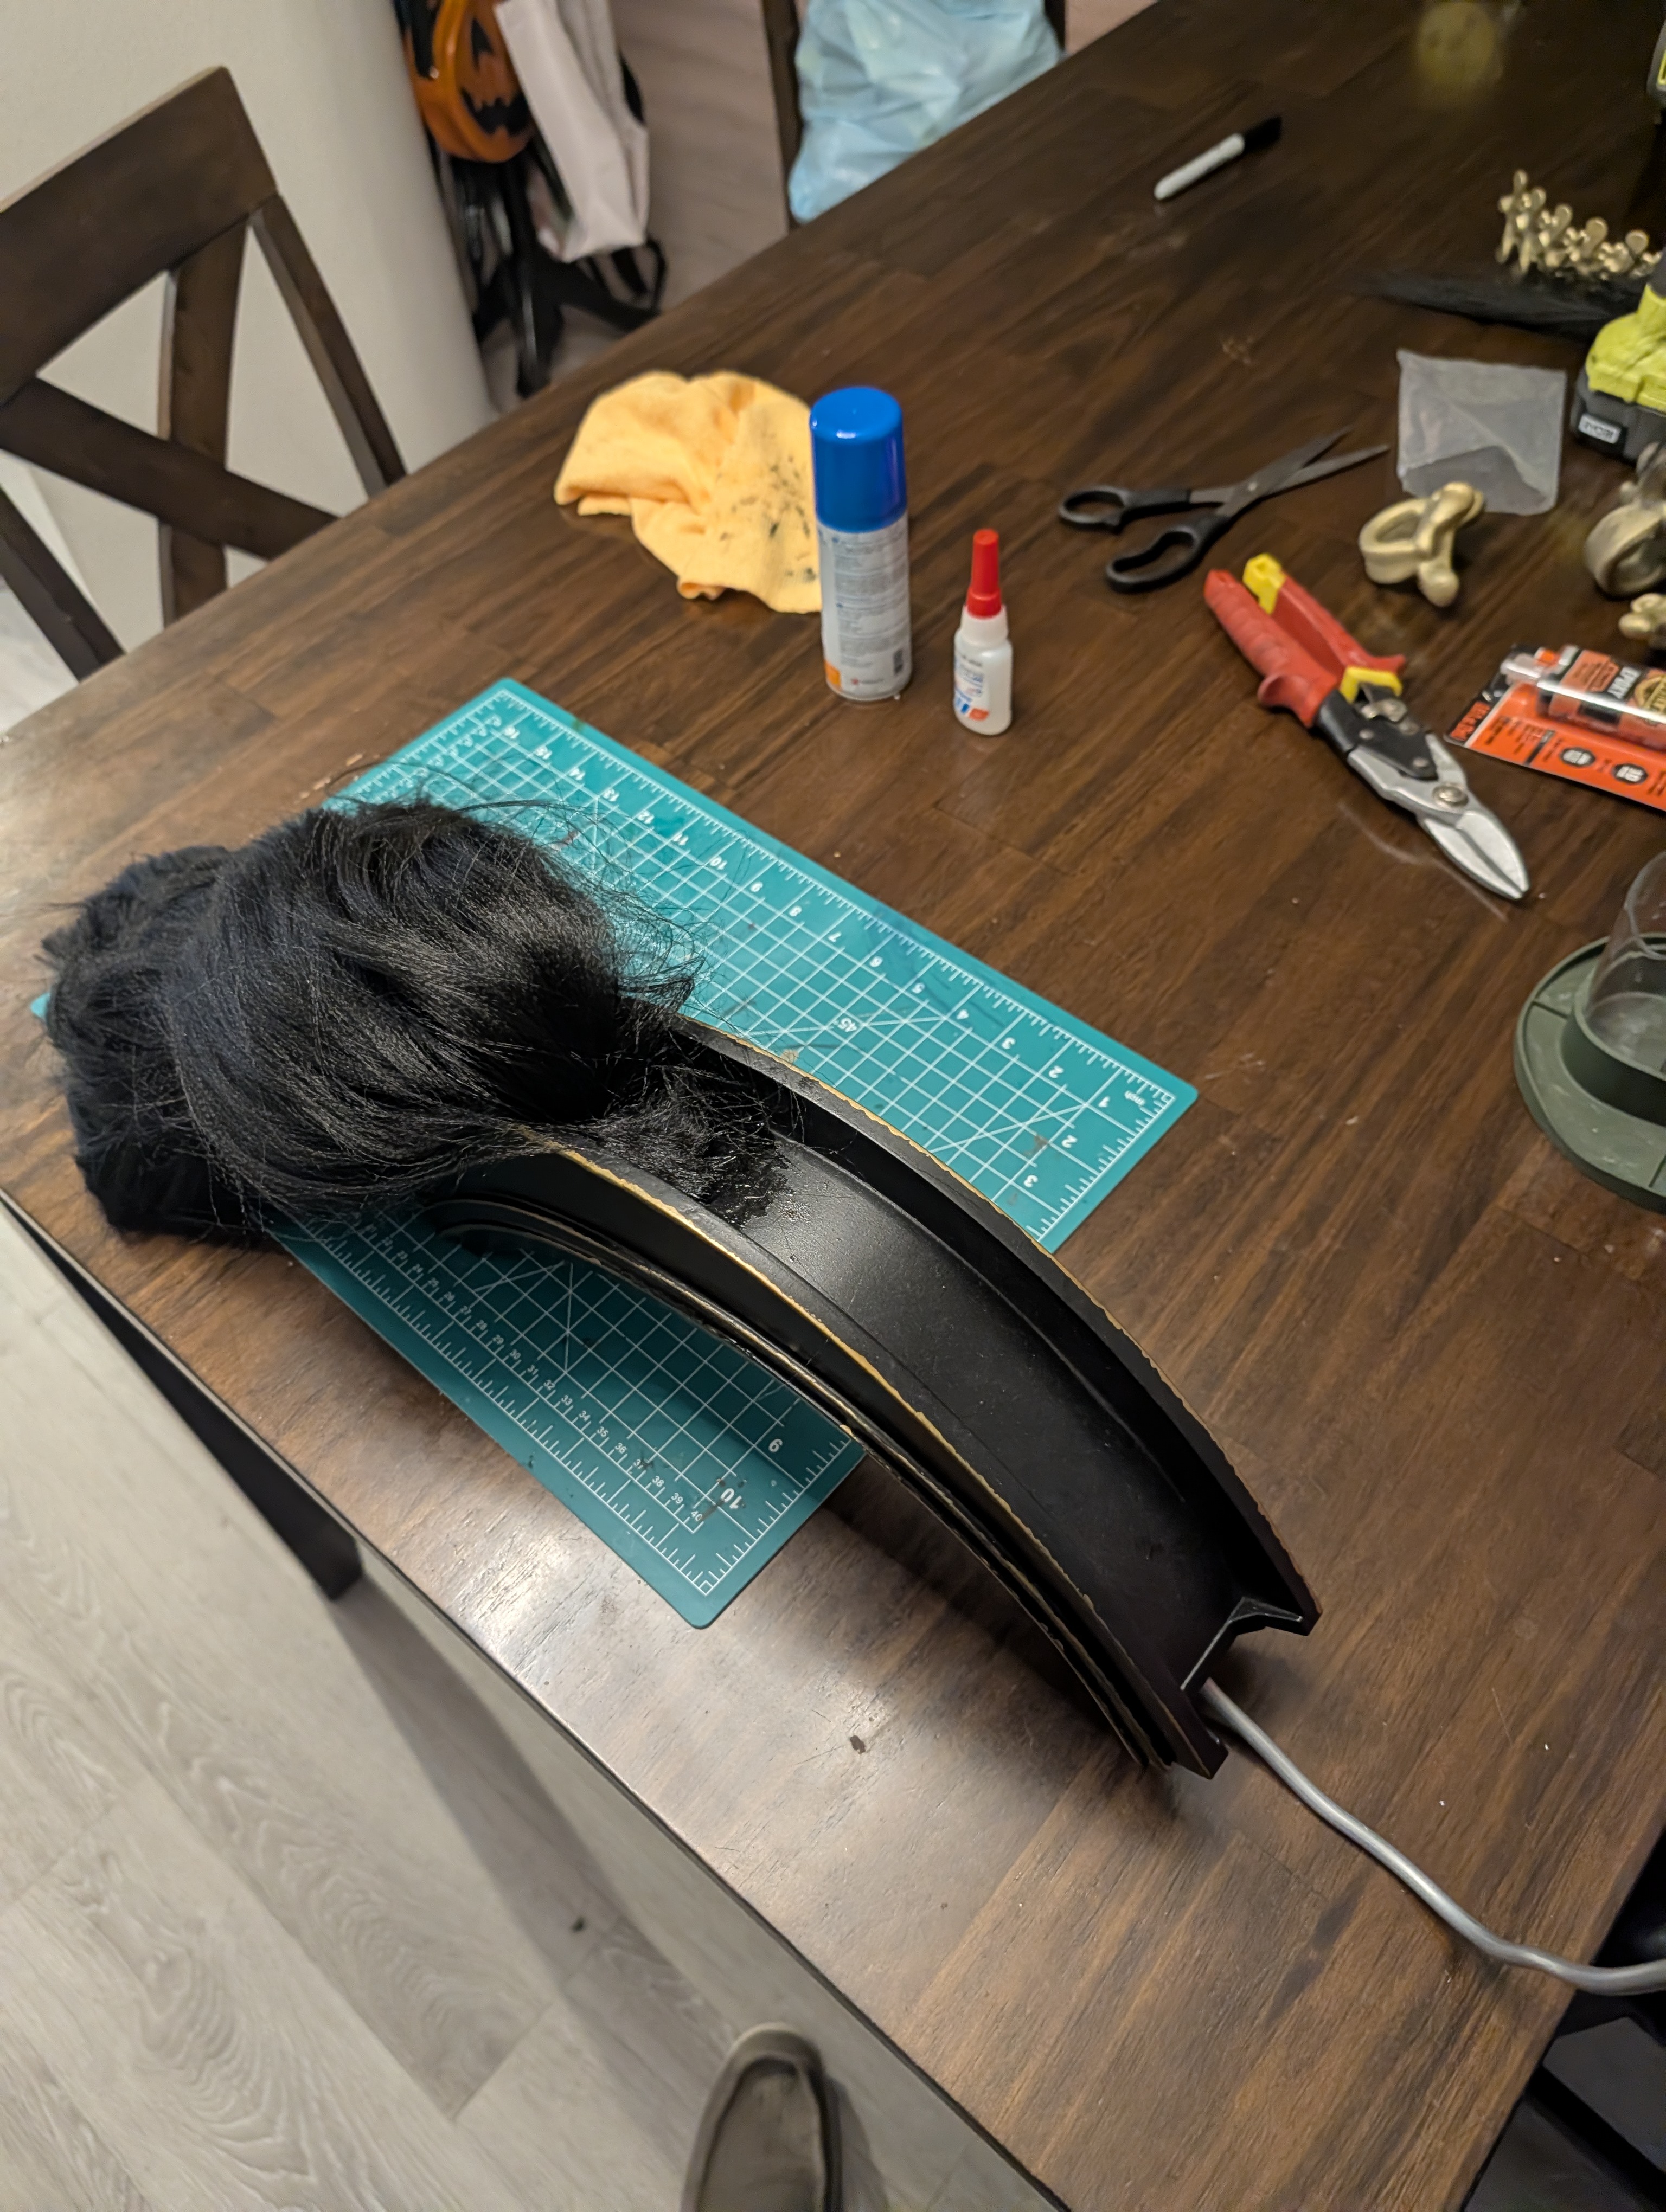
Began epoxying hair to the crest, note the armature on the right. This step alone ate an entire evening.
Then came the actual hair. I attached the Kanekalon in sections using built plugs and epoxy along the crest arch, and let me tell you. Raw, unstyled synthetic hair straight out of the package looks absolutely wild. It got everywhere. There's a solid hour in this build where I genuinely questioned every decision that got me here.
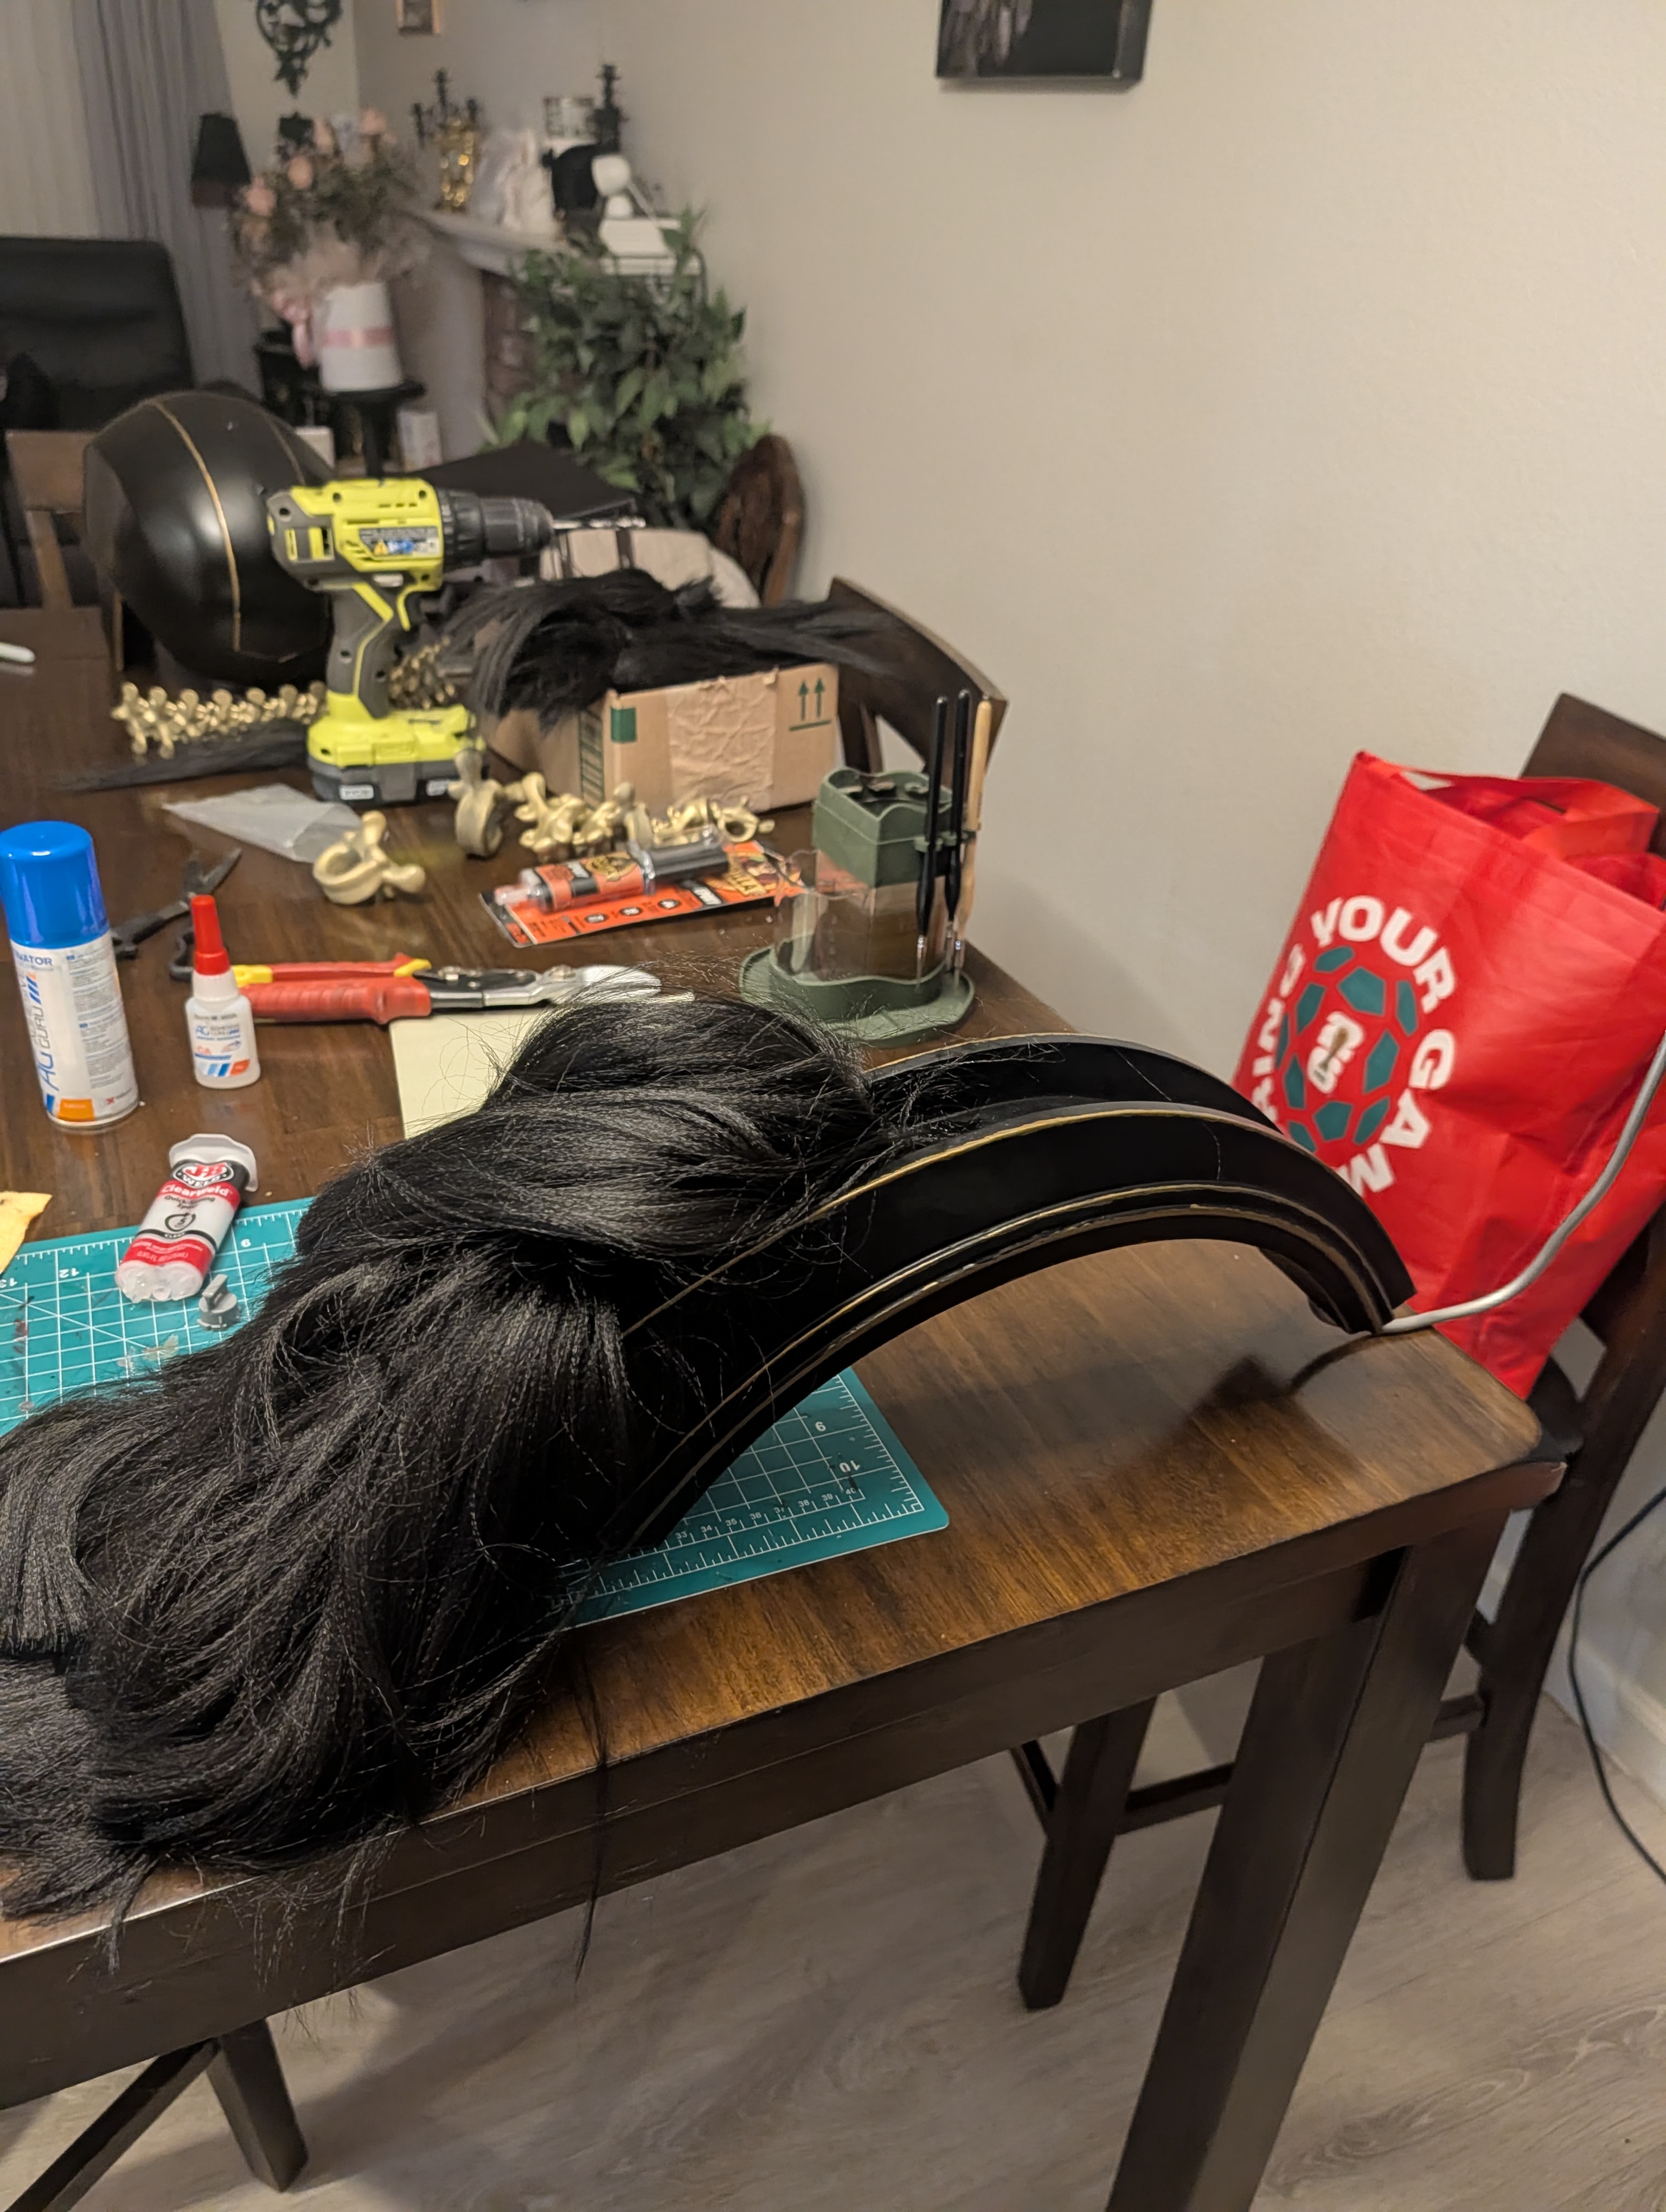
Behold: chaos. This is not a helmet crest, this is a threat.
Styling was its own whole hell err i mean process. Sectioning with painter's tape, blow-drying, and an obscene amount of Got2b Glued Blasting Freeze spray and gel to coax it into actually laying like a proper horsehair plume instead of looking like it survived a lightning strike.
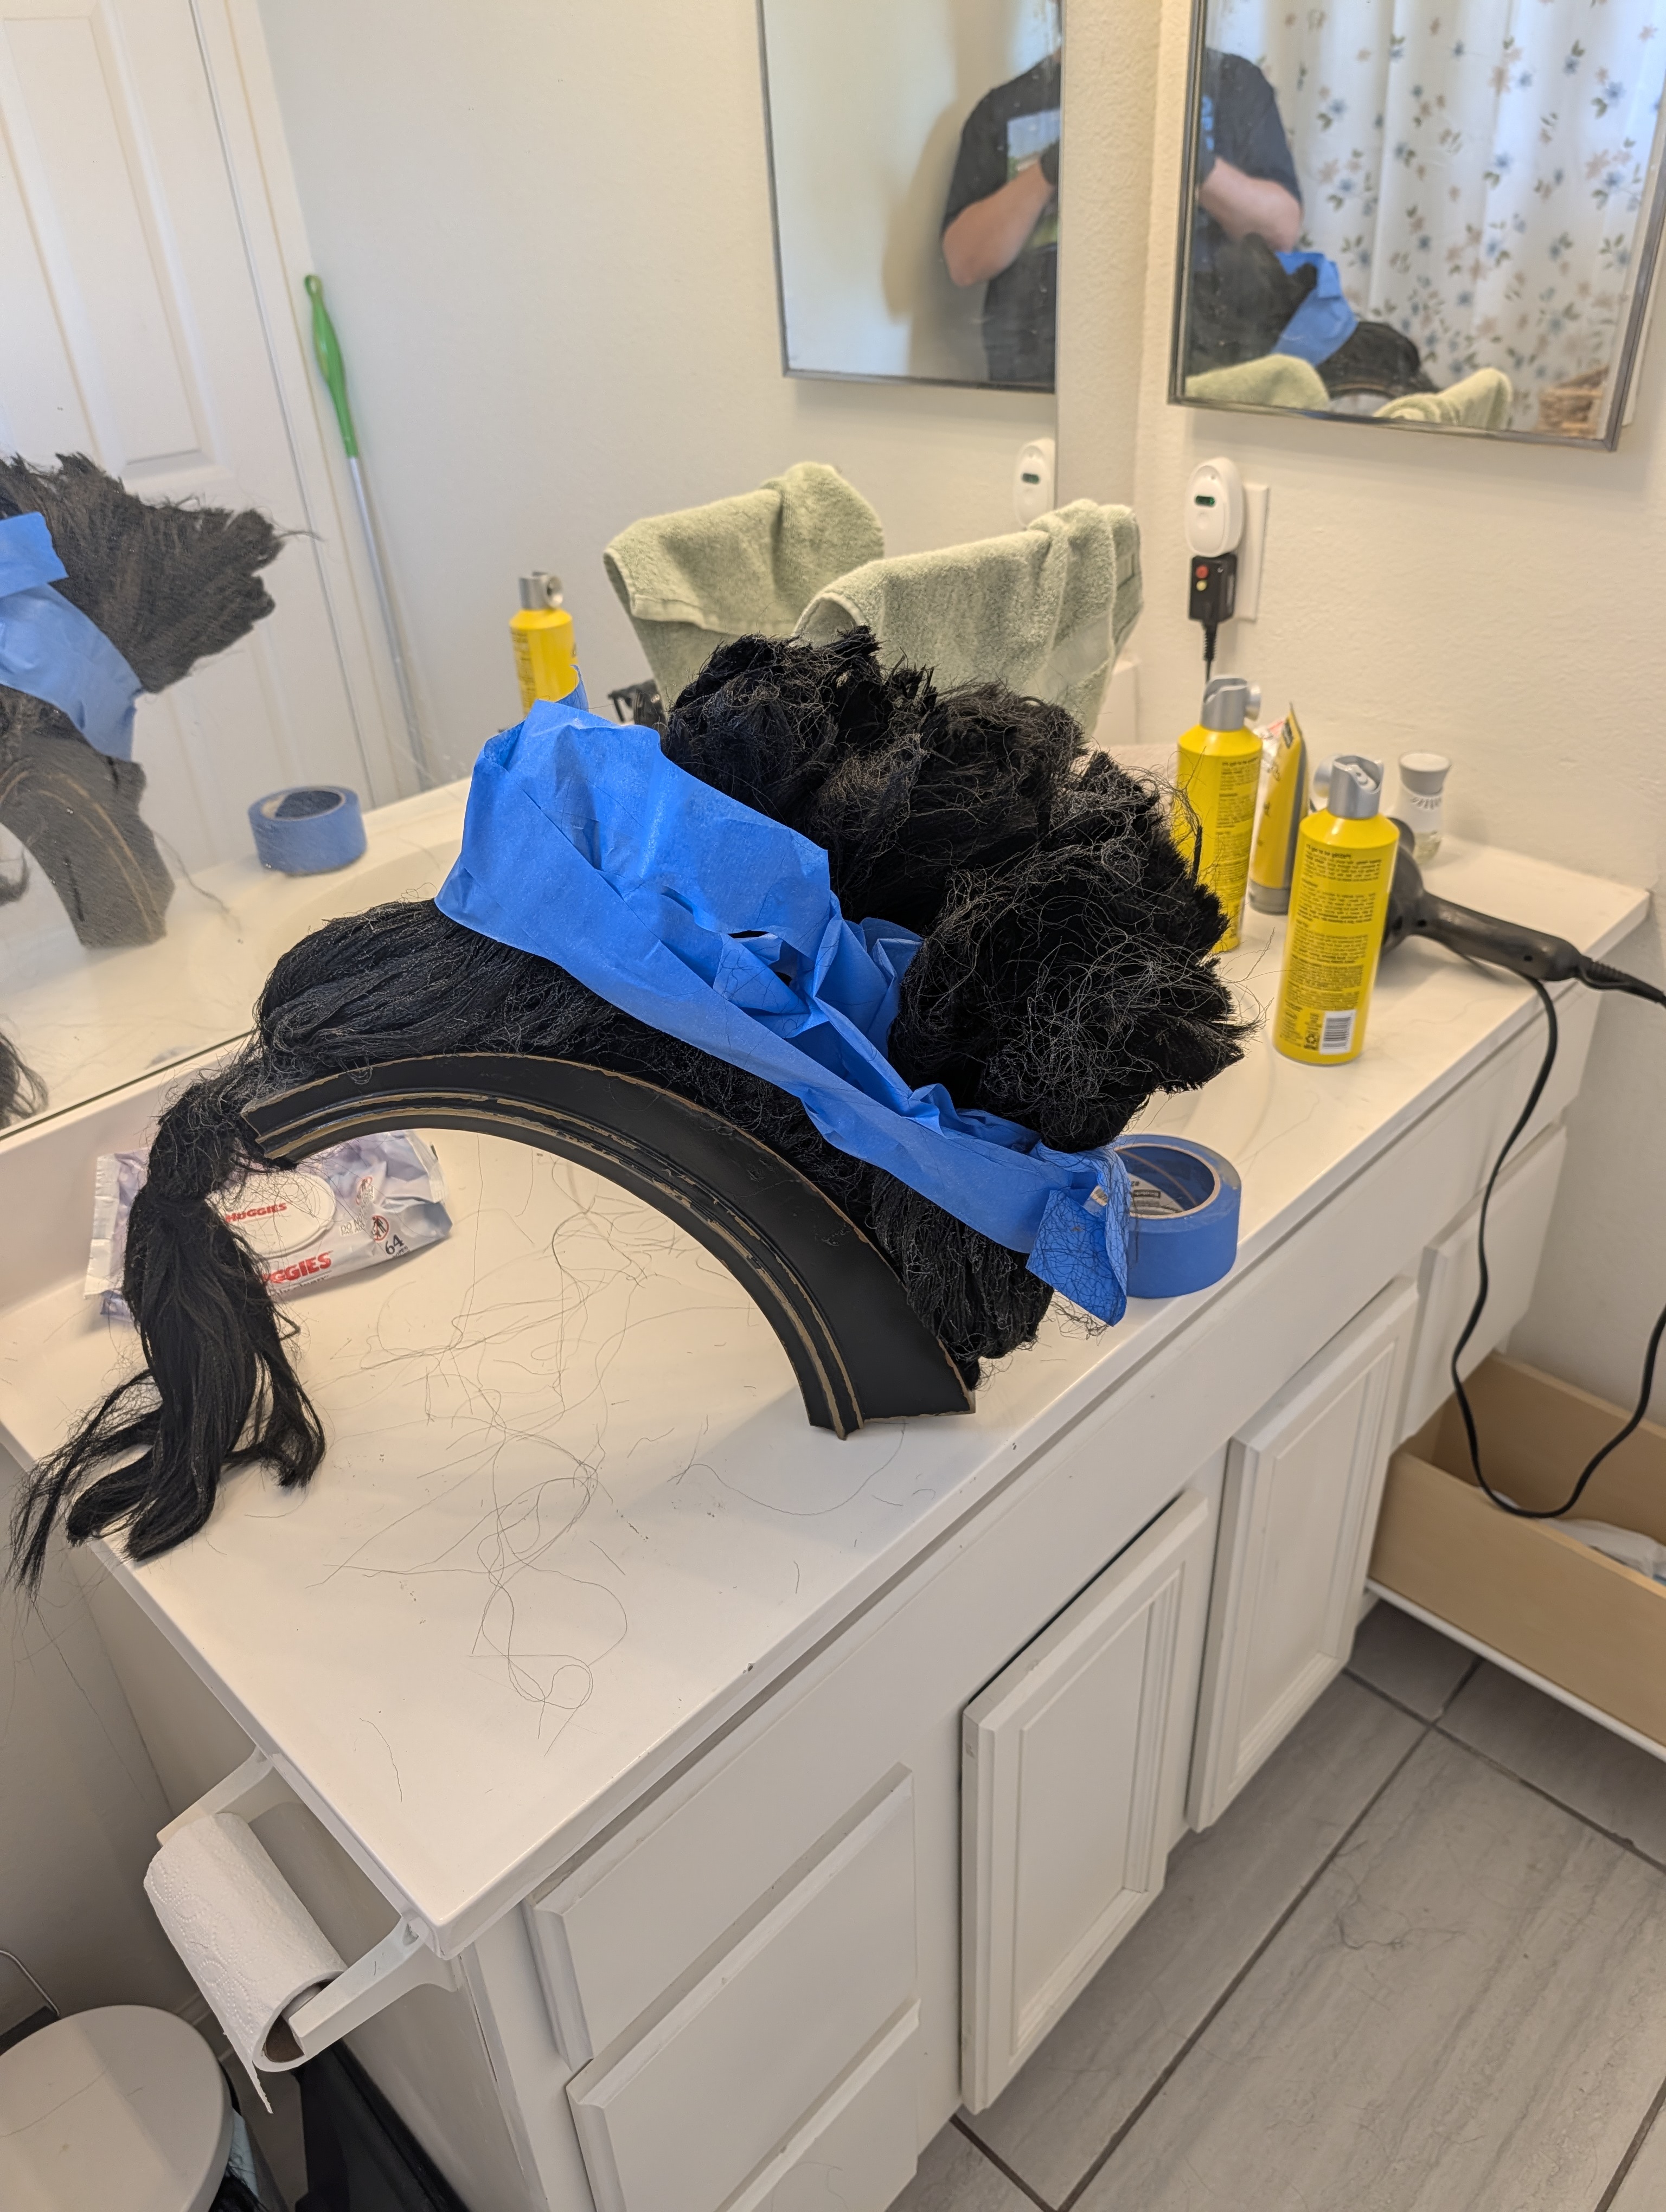
2.4 bottles of Got2b Glued later, and it finally started behaving.
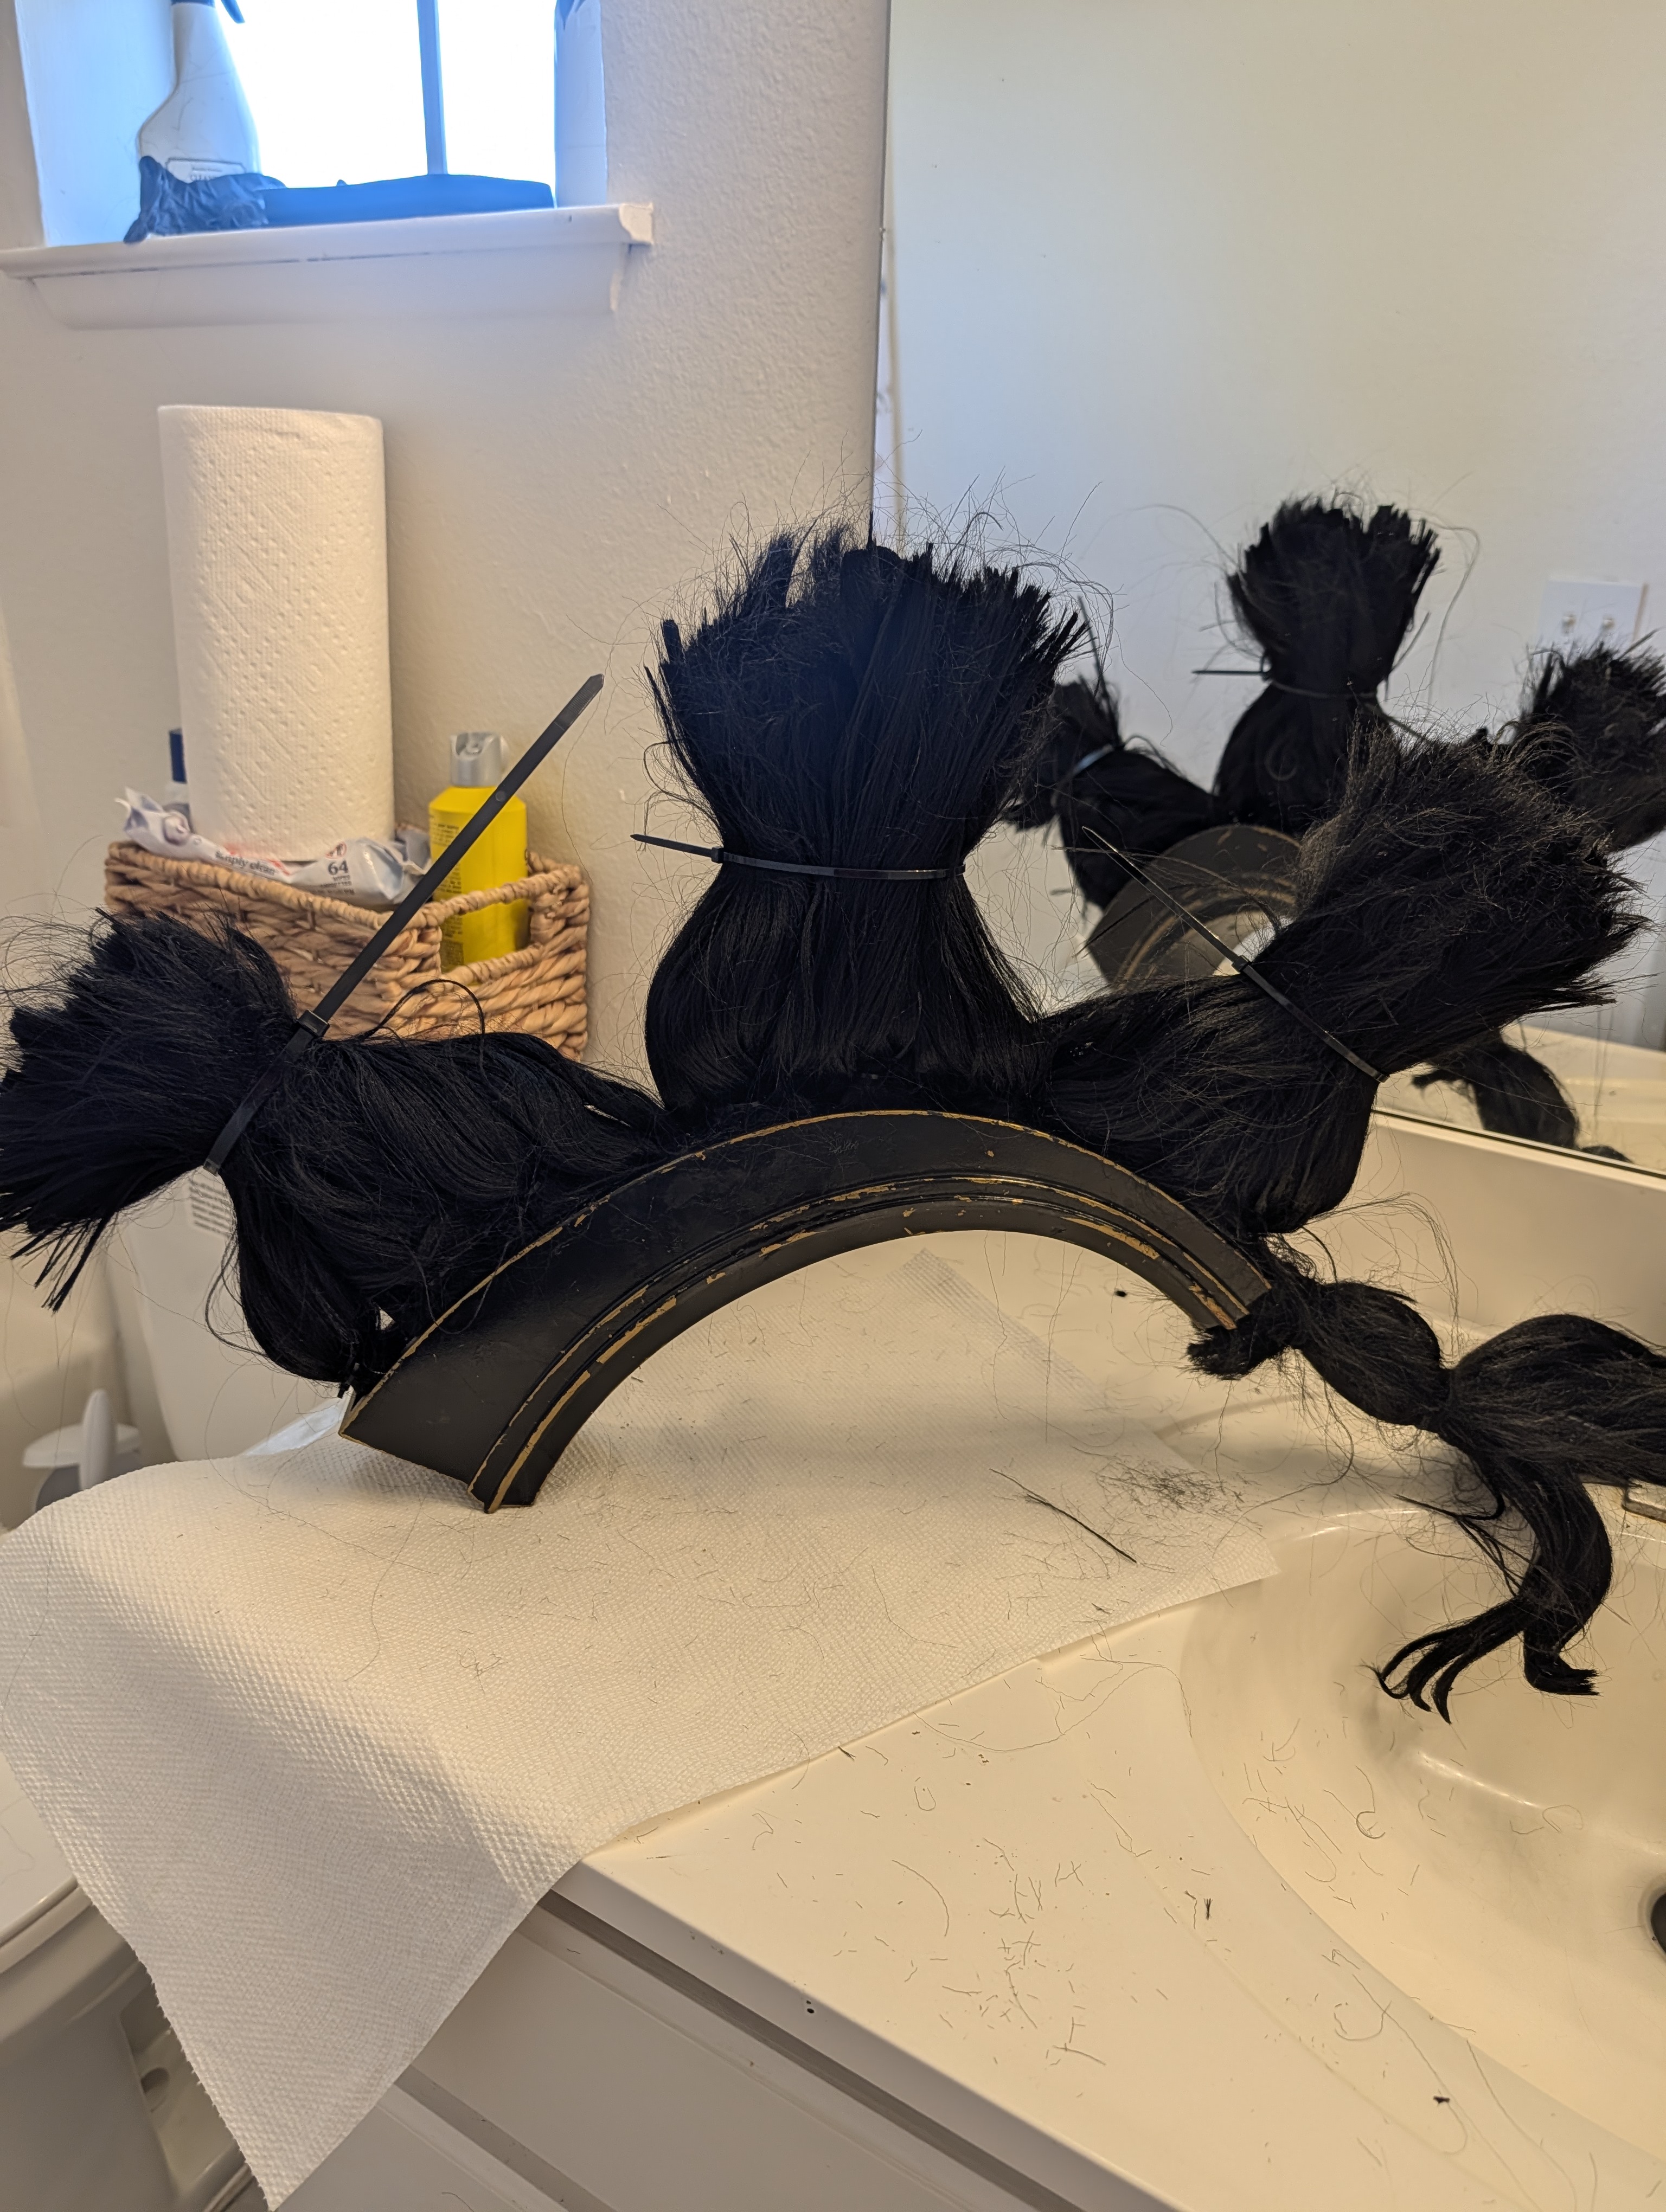
Bit by bit, evening by evening, it went from "feral" to "genuinely looks like it belongs on a Bronze Age battlefield":
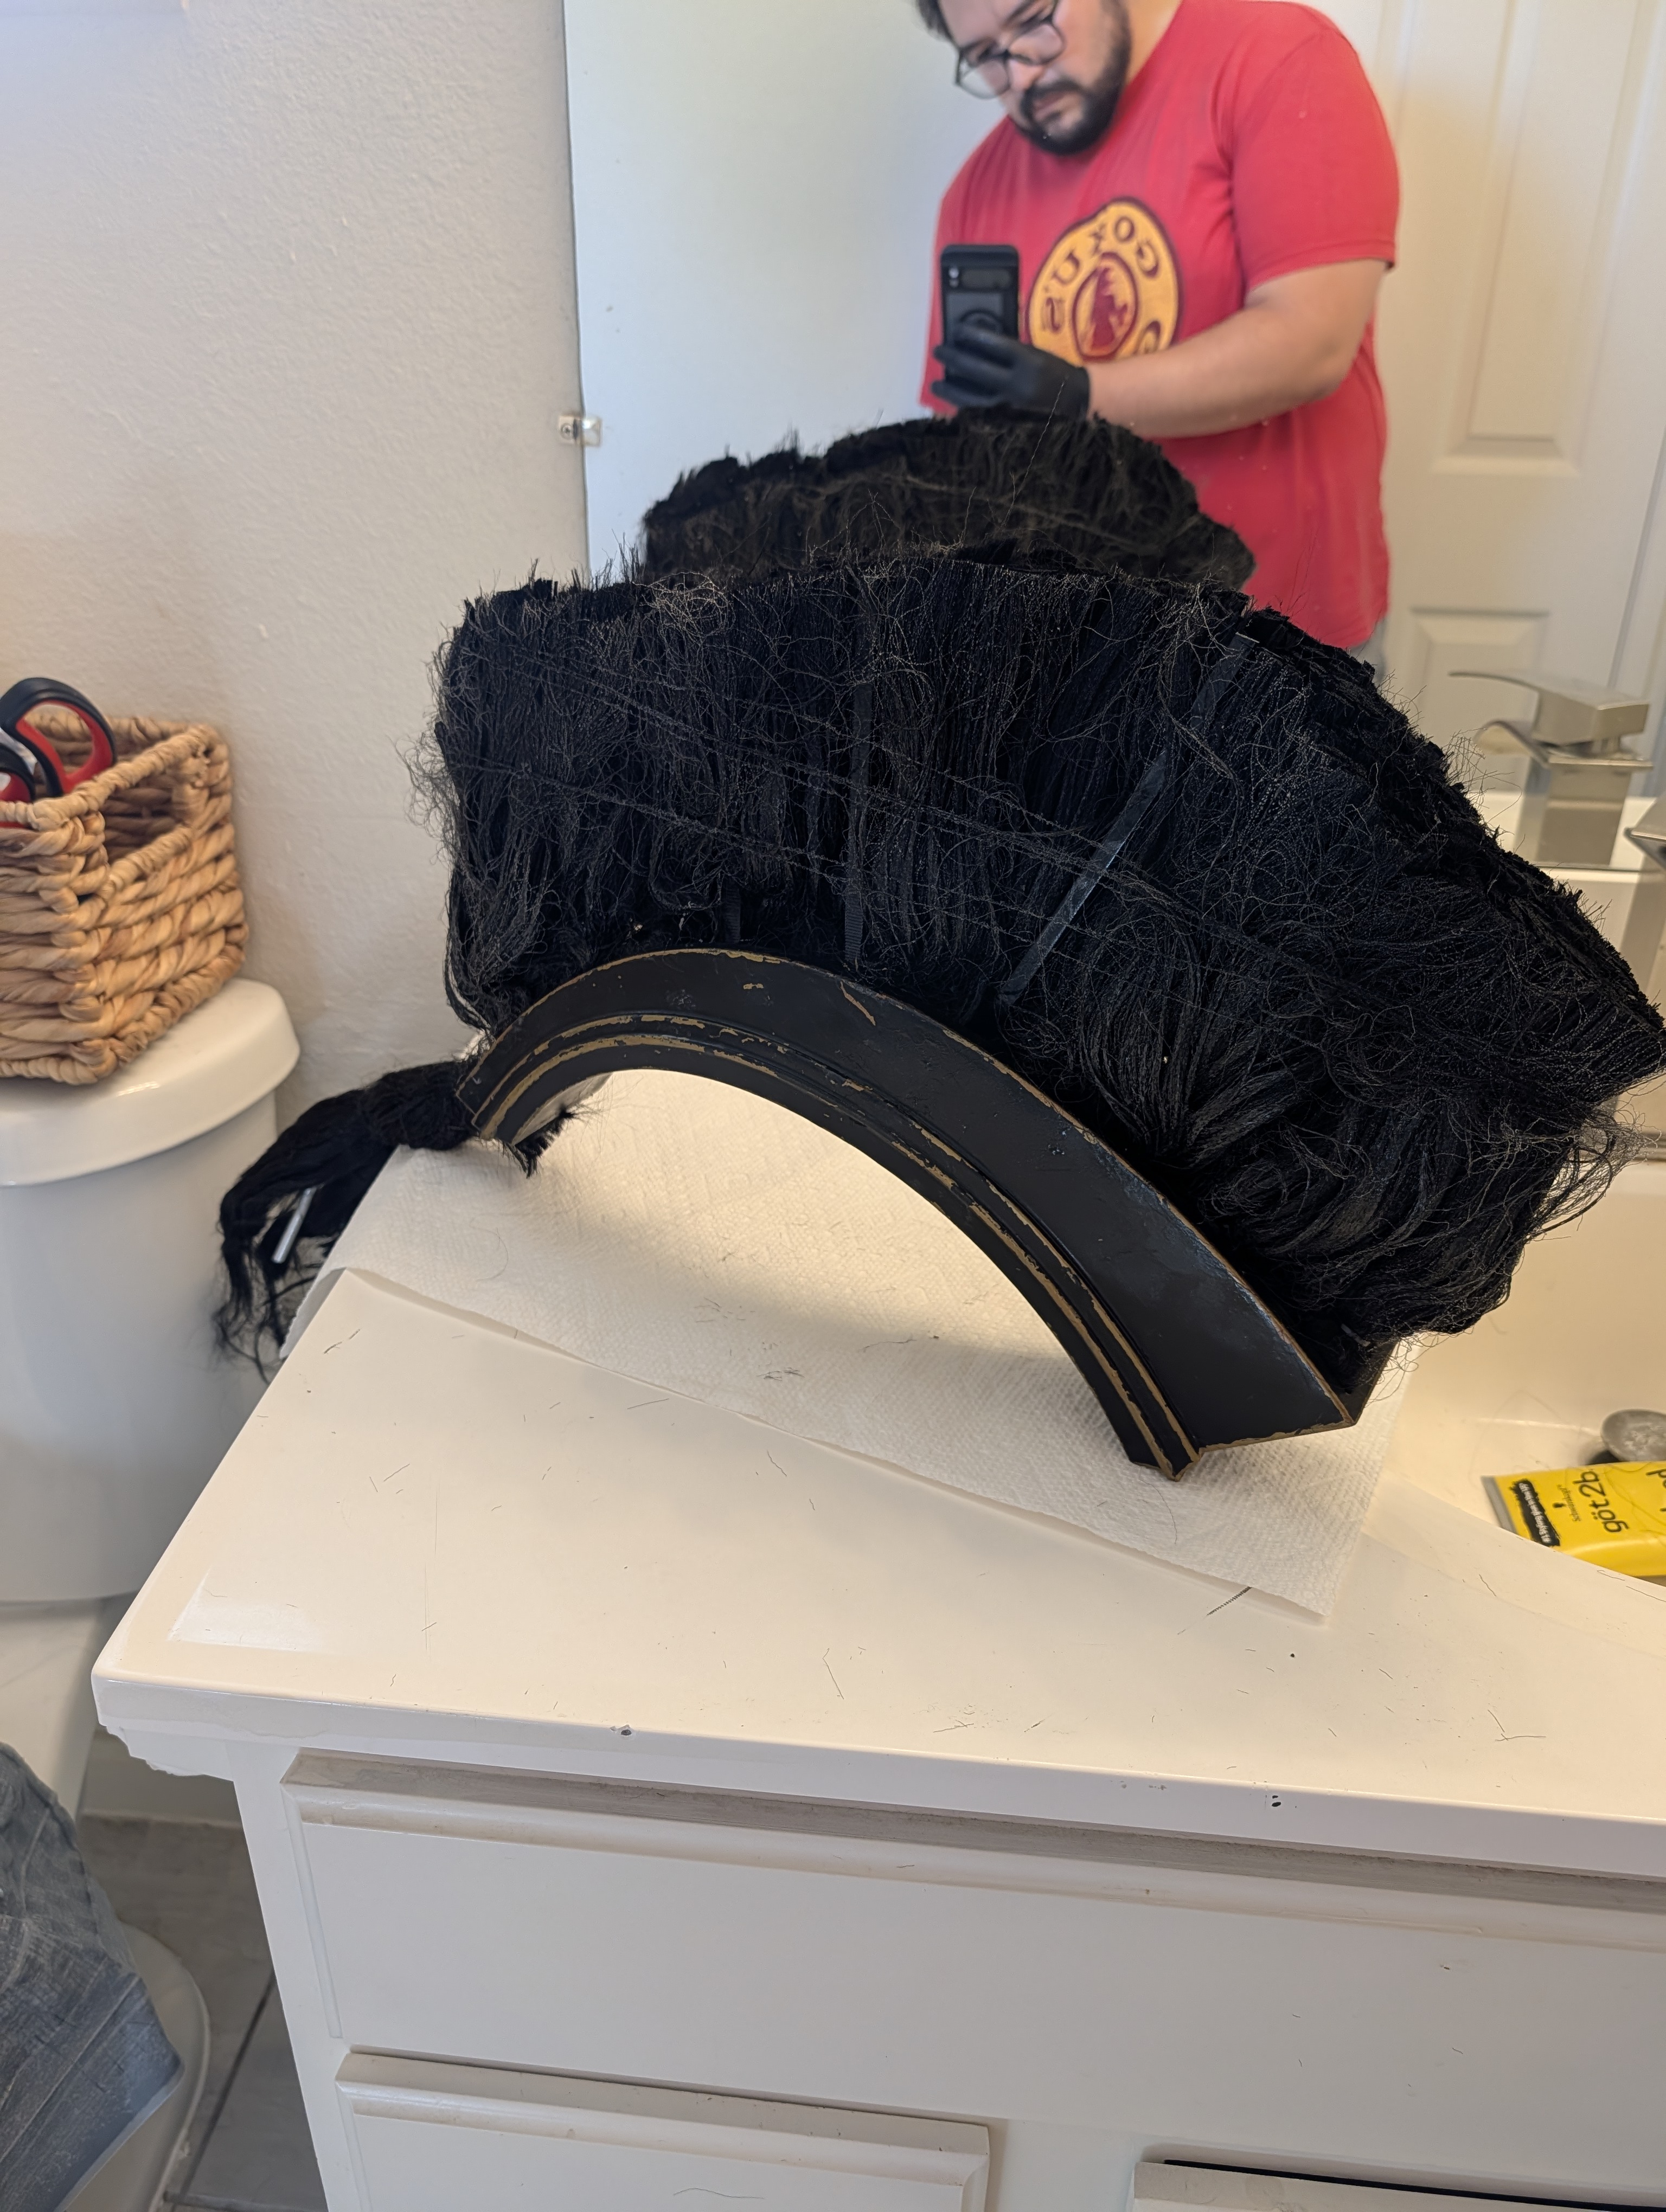
Getting there. You can start to see the actual silhouette from the film taking shape.
As you can see above the form is taking shape, and this is after I took thick pieces of zip ties and mounted them along the crest to provide structural support. I had to do at least 4 passes on the hair using strong fabric scissors to style it just the way i had wanted it. And then I finally finished it off with a spray of black colored hair spray from Spirit Halloween.
Standing Back and Looking At It
And then, seemingly out of no where, four weeks after that first cheek piece came off the plate, it was just done. I put it on, walked over to a mirror, and just stood there for a solid minute.
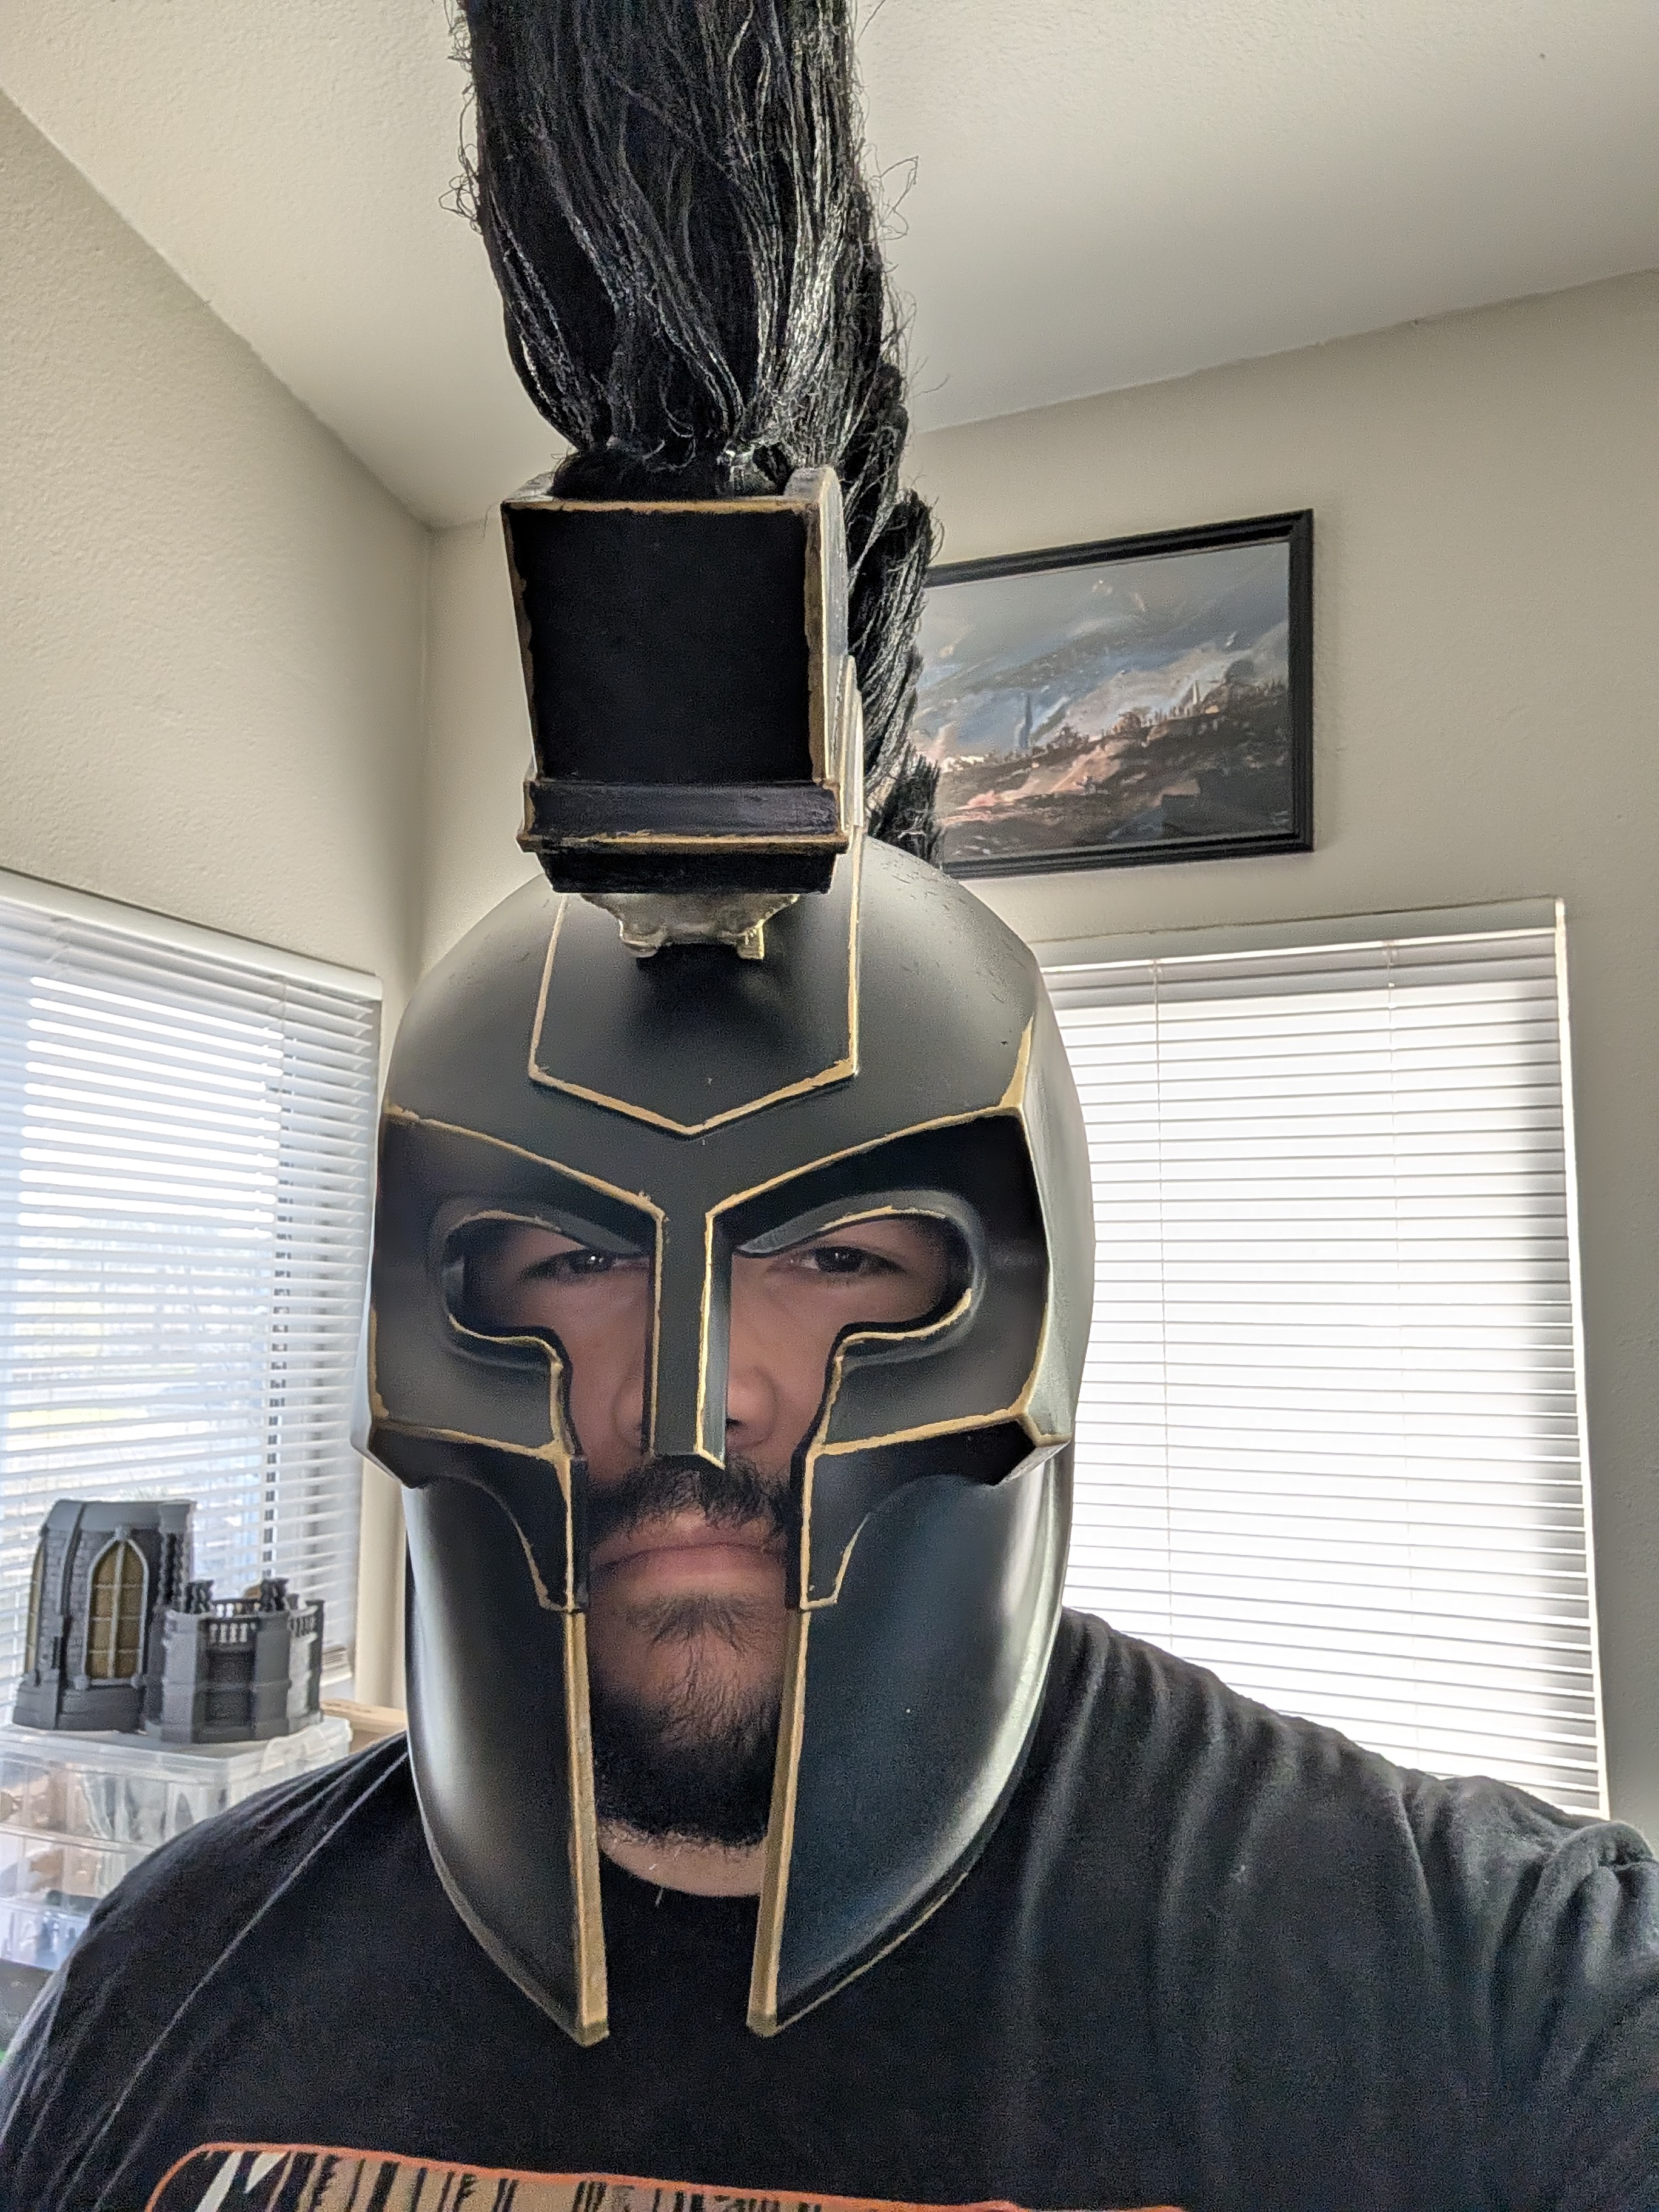
This is it. This is the one.
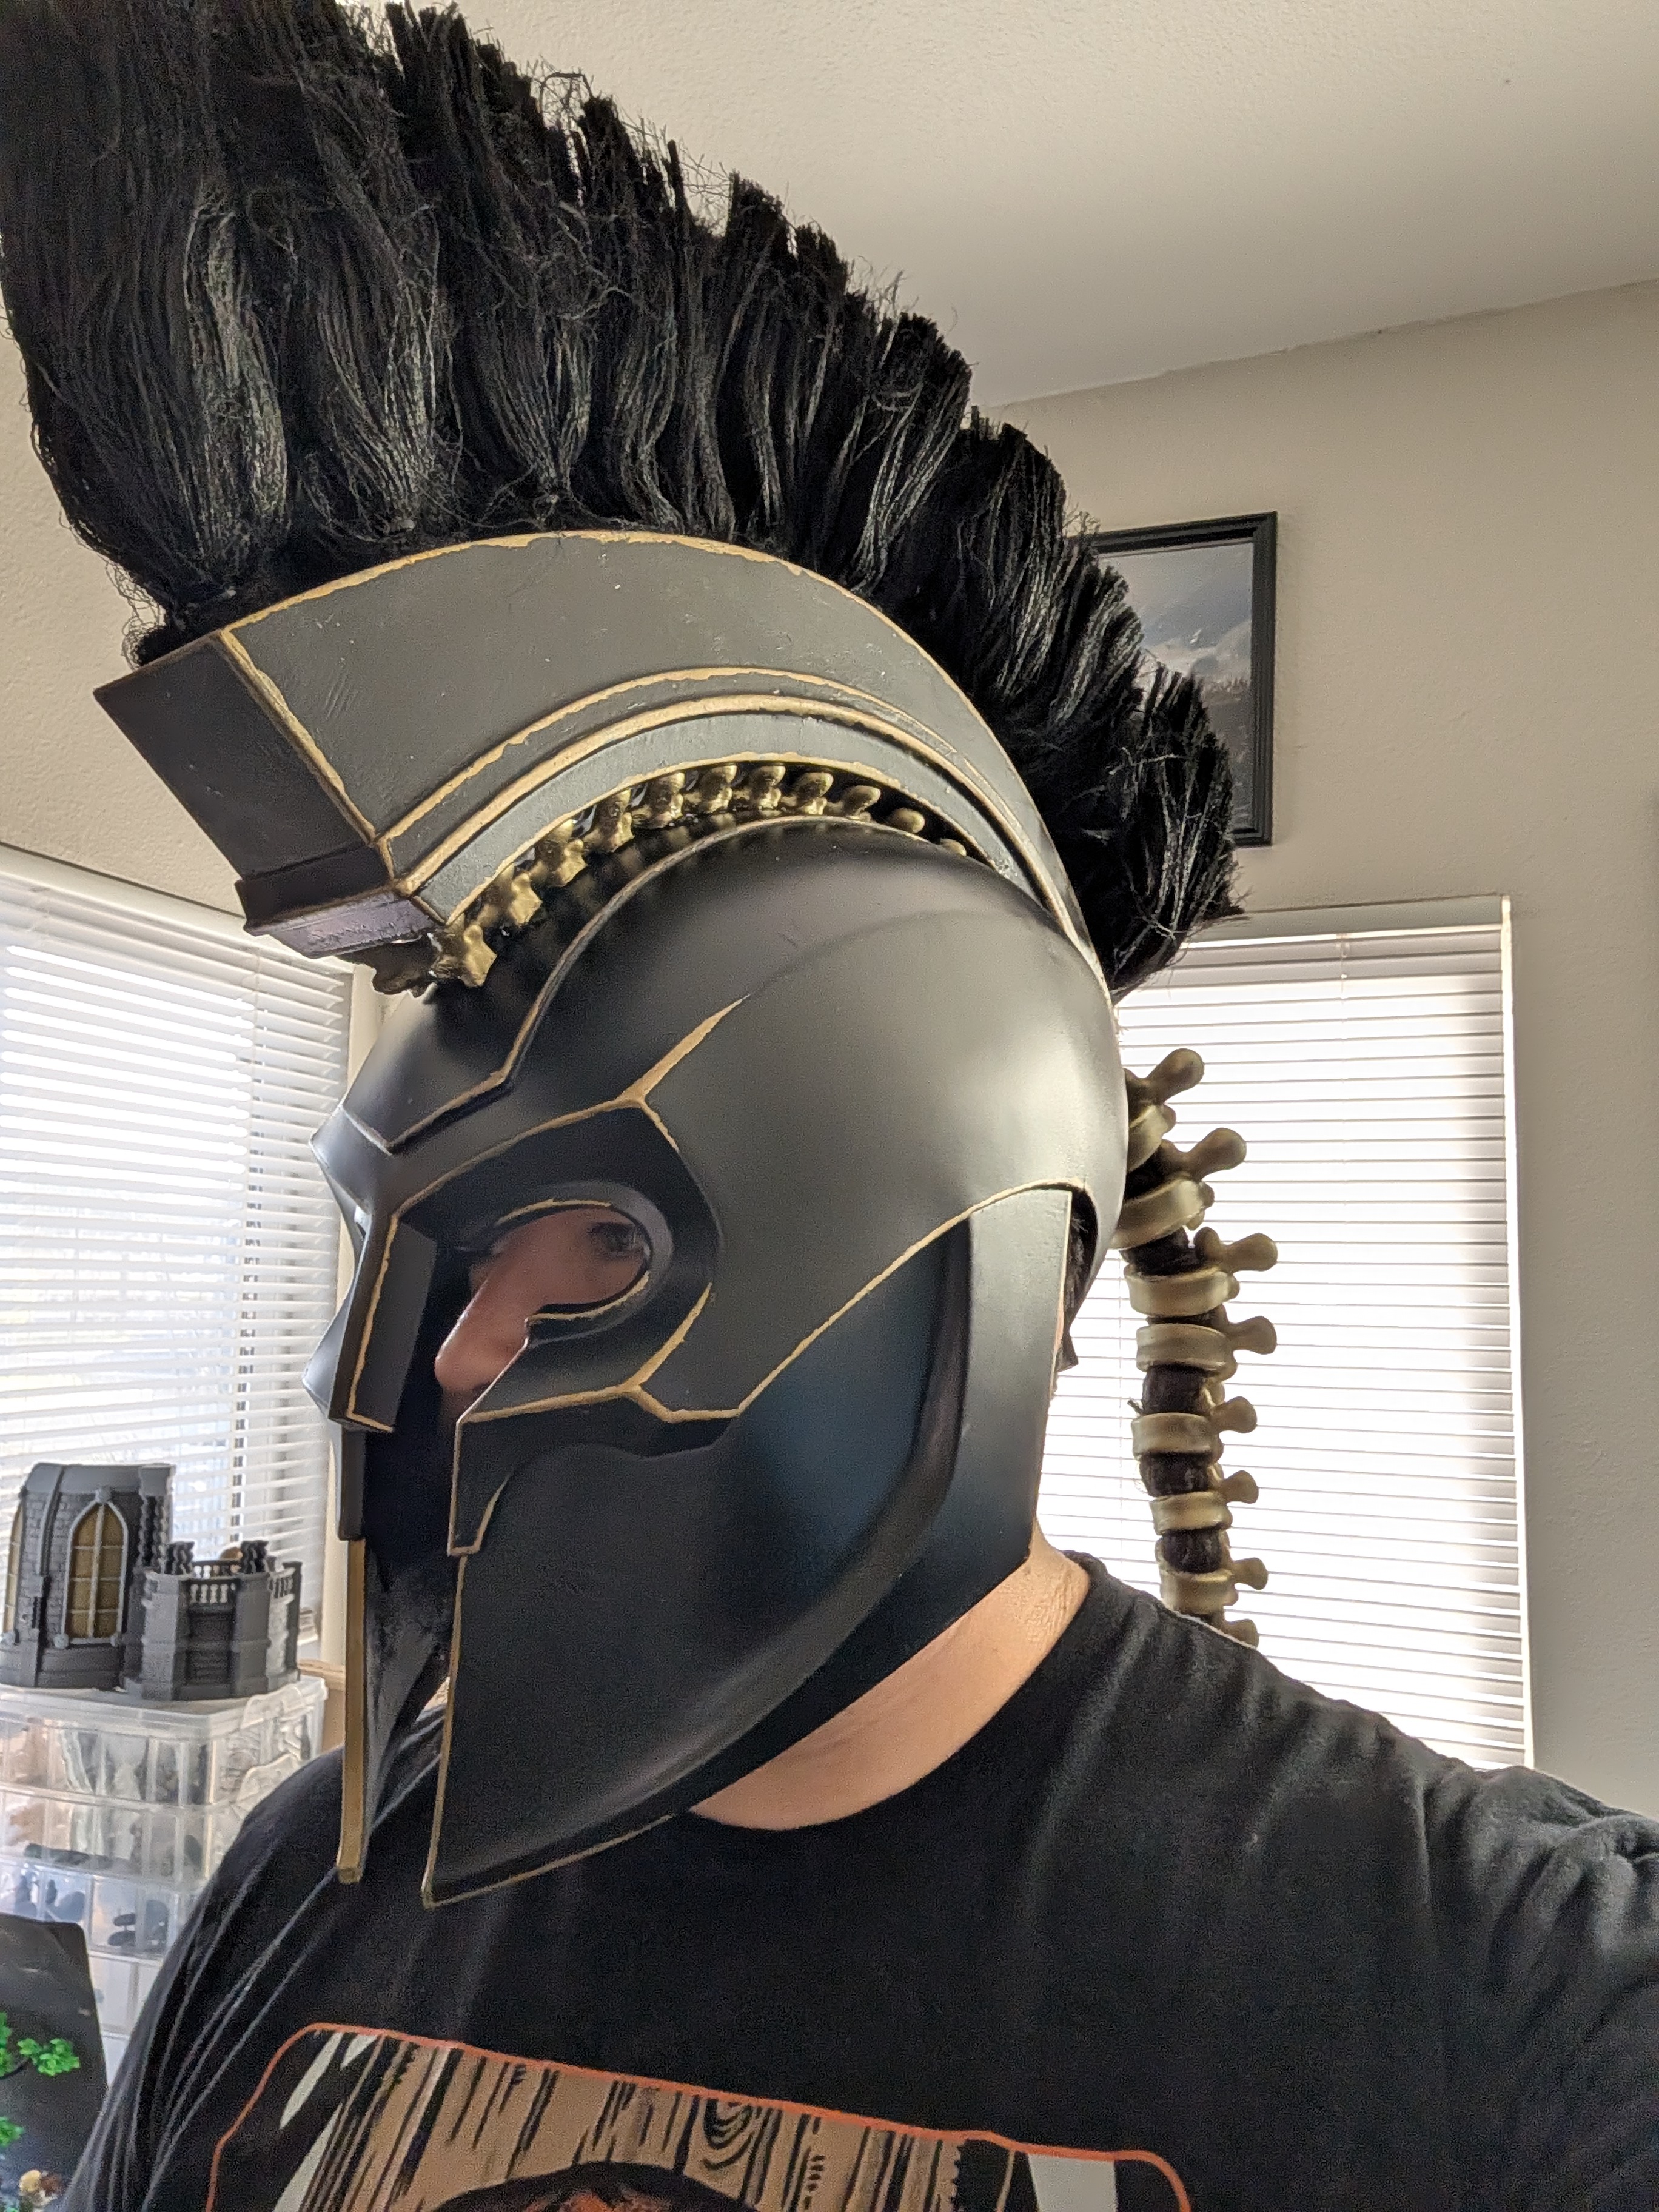
Every hour of sanding, every bottle of hairspray, every evening I spent hunched over a cutting hair, gluing gold bone pieces one at a time it was all for this shot right here.
Here's a full turnaround of the finished piece, because honestly a photo doesn't fully do the crest movement justice:
You can catch this whole build process and some more pics/vids on my tiktok here: https://www.tiktok.com/t/ZP8Wgkj3T/
I keep coming back to the fact that this whole thing started because I sat in a movie theater and got genuinely emotional about a costume design. That's it. That's the whole origin story. No brand deal, no convention deadline. Just a design I fell in love with, a printer in my office, and my own personality daring me to try.
Was it film-accurate? I got about as close as my skills and my sanity would allow, and I'm proud of every hour it took to get there. Would I do it again? Ask me in about a month, once my hands stop smelling like hairspray and epoxy.
Until the next build or the next hack,
Le Spooky Hacker
Join the Grimoire
Get notified when I publish new posts. No spam, unsubscribe anytime.